Retro-style Mini Chocolate Cakes with Marshmallow Filling
introduction
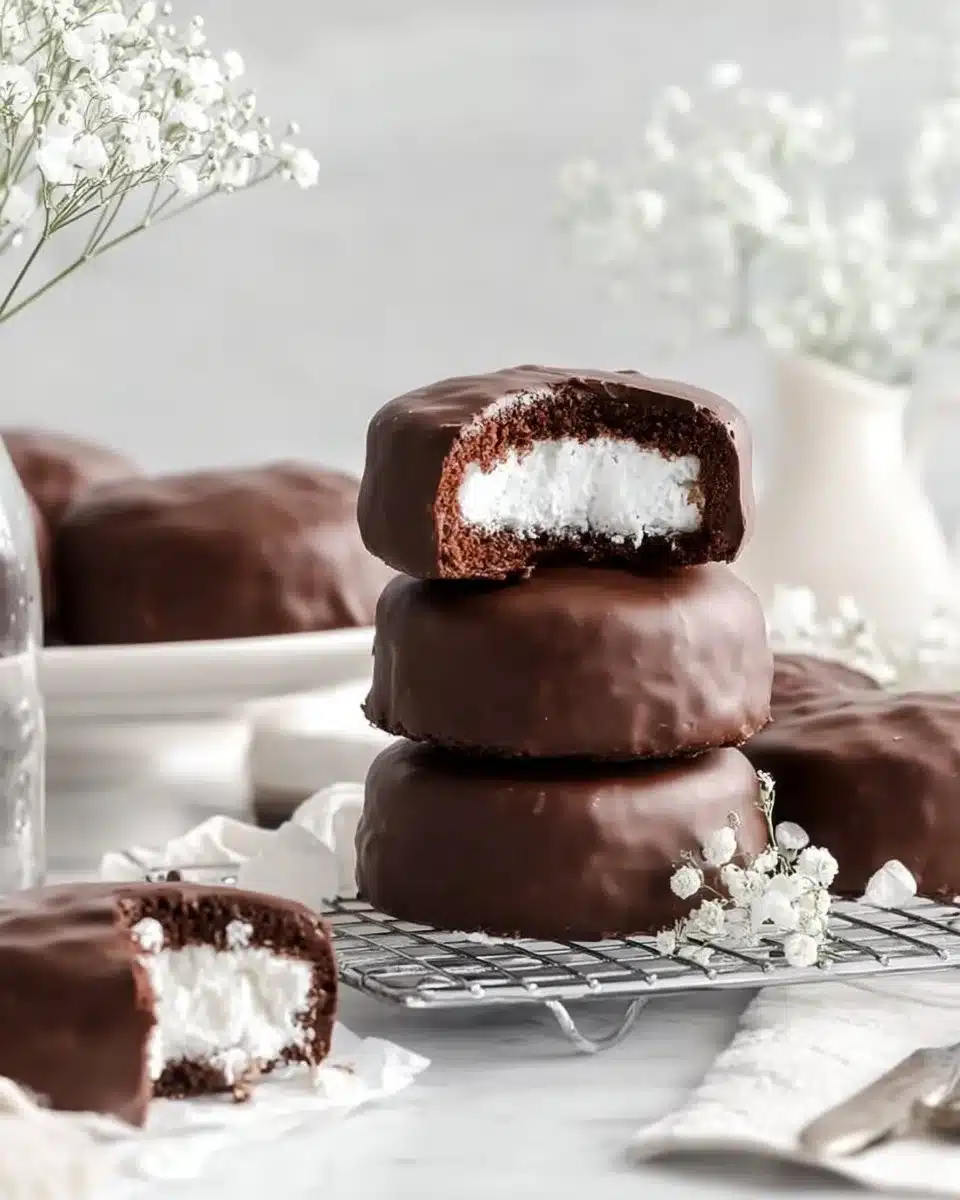
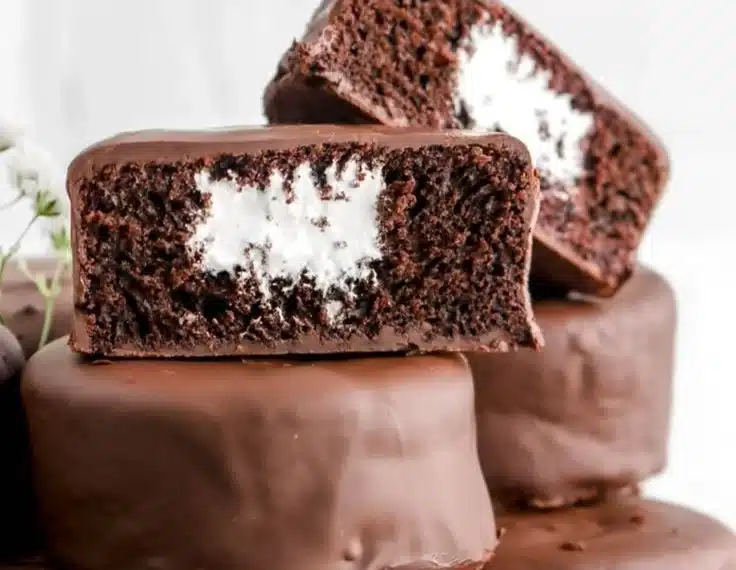
Retro-style mini chocolate cakes with marshmallow filling are a delightful treat that takes us back in time. They remind many of the classic snacks we enjoyed as kids, known for their rich chocolate flavor and creamy marshmallow center. These tiny cakes are perfect for gatherings, parties, or even just a sweet indulgence during a quiet evening at home.
why make this recipe
Creating these mini chocolate cakes is not just about enjoying delicious dessert; it’s also a fun and rewarding baking experience. They let you express your creativity while bringing back nostalgic flavors that many love. The combination of chocolate, marshmallow fluff, and a glossy chocolate coating makes these cakes irresistible. Not to mention, they are easy to make and the perfect size for sharing. Making these cakes from scratch also allows you to control the ingredients, ensuring freshness and quality. So, let’s get started and explore how to make these delightful treats!
how to make Retro-style Mini Chocolate Cakes with Marshmallow Filling
To make your retro-style mini chocolate cakes with marshmallow filling, gather your ingredients and follow these simple steps. The process is straightforward and will guide you from mixing to baking, filling, and coating your cakes.
Ingredients:
- 1 cup all-purpose flour
- 1 cup granulated sugar
- 1/3 cup unsweetened cocoa powder
- 1 tsp baking powder
- 1/2 tsp baking soda
- 1/4 tsp salt
- 1/2 cup buttermilk
- 1/2 cup vegetable oil
- 2 large eggs
- 1 tsp vanilla extract
- 1 cup marshmallow fluff
- 8 oz dark chocolate, chopped
- 1/2 cup heavy cream
Directions:
Preheat the Oven: Start by preheating your oven to 350°F (175°C). As the oven heats, prepare your mini cake pans by greasing and flouring them. This step ensures that your cakes will come out easily after baking.
Mix Dry Ingredients: In a mixing bowl, combine the all-purpose flour, granulated sugar, unsweetened cocoa powder, baking powder, baking soda, and salt. Stir these ingredients together with a whisk or spoon until they are well blended.
Mix Wet Ingredients: In a separate bowl, whisk together the buttermilk, vegetable oil, eggs, and vanilla extract. Ensure that the mixture is smooth and well combined.
Combine Ingredients: Pour the wet mixture into the bowl with the dry ingredients. Mix everything together until you achieve a smooth and consistent batter. Be careful not to overmix; a few lumps are okay.
Pour and Bake: Pour the batter evenly into the prepared mini cake pans. Bake in your preheated oven for about 15-18 minutes. You can check if the cakes are done by inserting a toothpick in the center; if it comes out clean, the cakes are ready.
Cool Completely: After baking, remove the pans from the oven and let the cakes cool in the pans for about 5 minutes. Then, transfer them to a wire rack to cool completely. This step is essential to prevent the marshmallow filling from melting when added.
Fill with Marshmallow Fluff: Once the cakes are completely cooled, take a small knife or cupcake corer and cut a small hole in the center of each cake. Be careful not to cut too deep, as you want to avoid breaking the cake apart. Fill each hole with the marshmallow fluff. You can use a piping bag or simply a spoon for this step.
Prepare the Chocolate Coating: In a small saucepan, heat the heavy cream on medium heat until it is almost boiling. Remove it from the heat and pour it over the chopped dark chocolate in a bowl. Let it sit for a minute, then stir until the chocolate is fully melted and smooth.
Dip and Coat: Carefully dip each filled cake into the melted chocolate, making sure they are fully coated. Place them back on the wire rack so the excess chocolate can drip off. If you want, you can sprinkle some crushed nuts or chocolate sprinkles on top while the chocolate is still soft.
Let Set: Allow the chocolate coating to set completely at room temperature. If you want to speed up the process, you can place them in the refrigerator for about 15-20 minutes.
Enjoy Your Homemade Ding Dongs: Once the chocolate is firm, your retro-style mini chocolate cakes with marshmallow filling are ready to enjoy! Serve them to friends and family, or keep them all to yourself for a special treat.
how to serve Retro-style Mini Chocolate Cakes with Marshmallow Filling
These mini chocolate cakes are versatile and can be served in many ways. You can present them on a decorative plate for parties or gatherings. To add flair, garnish with fresh berries, whipped cream, or even drizzle some additional chocolate over the top. They are also great paired with a glass of milk or a scoop of vanilla ice cream. For an extra touch, you can dust them with powdered sugar before serving or add a scoop of ice cream on the side.
how to store Retro-style Mini Chocolate Cakes with Marshmallow Filling
To keep your mini chocolate cakes fresh, store them in an airtight container. If you have leftovers, place them in the refrigerator, where they can last for about 4-5 days. Before serving leftovers, you can let them sit at room temperature for a few minutes. If you want to store them for a longer time, consider freezing them before coating with chocolate. Wrap each cake in plastic wrap, then place them in a freezer-safe container. They will keep well for up to 2 months. When ready to enjoy, simply thaw them in the refrigerator and coat them with chocolate.
tips to make Retro-style Mini Chocolate Cakes with Marshmallow Filling
Use Room Temperature Ingredients: For the best texture and flavor, ensure your eggs, buttermilk, and any other refrigerated ingredients are at room temperature before mixing.
Don’t Overmix: When combining the wet and dry ingredients, mix just until everything is combined to avoid tough cakes.
Use Good Quality Chocolate: The flavor of your cakes will greatly depend on the quality of the chocolate you use for coating. Opt for a good quality dark chocolate for the best results.
Customize Fillings: If you’re not a fan of marshmallow fluff, consider using other fillings like homemade whipped cream, peanut butter, or a fruit preserve.
Experiment with Toppings: You can get creative with toppings. Drizzle caramel sauce, sprinkle crushed nuts, or add colorful sprinkles for an eye-catching finish.
variation
You can easily adapt this recipe to suit your taste. Here are a few variations:
Vanilla Cakes: Replace the cocoa powder with an equal amount of flour and add a tablespoon of vanilla extract for a vanilla version of the cakes.
Different Fillings: Instead of marshmallow fluff, try filling your cakes with a rich ganache, cream cheese frosting, or even custard for a tasty twist.
Healthier Version: Substitute the all-purpose flour with whole wheat flour and use coconut sugar instead of granulated sugar for a slightly healthier option.
FAQs
Can I use regular milk instead of buttermilk?
Yes, if you don’t have buttermilk, you can make a substitute by adding 1/2 tablespoon of lemon juice or vinegar to 1/2 cup of regular milk. Let it sit for a few minutes before using.What can I substitute for the vegetable oil?
You can use melted butter or coconut oil as a substitute for vegetable oil in this recipe.How do I make sure my cakes rise properly?
Be sure to use fresh baking powder and baking soda, and avoid overmixing the batter. Ensure that your oven is properly preheated before placing the cakes inside.Can I make the batter in advance?
It’s best to bake the cakes soon after making the batter for the best texture. However, you can prepare the dry ingredients ahead of time and mix them with the wet ingredients just before baking.How can I make the chocolate coating smoother?
If your chocolate coating is too thick, you can thin it out with a little more warm heavy cream or coconut oil until it reaches your desired consistency.
Making retro-style mini chocolate cakes with marshmallow filling is a fun adventure that brings joy and sweetness to any occasion. Enjoy baking, sharing, and savoring these delightful treats!
PrintRetro-style Mini Chocolate Cakes with Marshmallow Filling

Delightful mini chocolate cakes filled with creamy marshmallow, perfect for gatherings or a sweet indulgence.
- Prep Time: 20 minutes
- Cook Time: 18 minutes
- Total Time: 38 minutes
- Yield: 12 servings 1x
- Category: Dessert
- Method: Baking
- Cuisine: American
- Diet: Vegetarian
Ingredients
- 1 cup all-purpose flour
- 1 cup granulated sugar
- 1/3 cup unsweetened cocoa powder
- 1 tsp baking powder
- 1/2 tsp baking soda
- 1/4 tsp salt
- 1/2 cup buttermilk
- 1/2 cup vegetable oil
- 2 large eggs
- 1 tsp vanilla extract
- 1 cup marshmallow fluff
- 8 oz dark chocolate, chopped
- 1/2 cup heavy cream
Instructions
- Preheat the Oven: Start by preheating your oven to 350°F (175°C) and prepare your mini cake pans.
- Mix Dry Ingredients: In a mixing bowl, combine flour, sugar, cocoa powder, baking powder, baking soda, and salt.
- Mix Wet Ingredients: In a separate bowl, whisk together buttermilk, vegetable oil, eggs, and vanilla extract.
- Combine Ingredients: Pour the wet mixture into the dry ingredients and mix until smooth.
- Pour and Bake: Pour the batter evenly into prepared pans and bake for 15-18 minutes.
- Cool Completely: Let cakes cool in pans for 5 minutes, then transfer to a wire rack.
- Fill with Marshmallow Fluff: Cut a hole in the center of each cake and fill with marshmallow fluff.
- Prepare the Chocolate Coating: Heat heavy cream, pour over chopped chocolate, and stir until smooth.
- Dip and Coat: Dip each filled cake into melted chocolate and set on a wire rack.
- Let Set: Allow the chocolate coating to set completely.
- Enjoy Your Homemade Ding Dongs: Serve and enjoy your delightful treats!
Notes
Store in an airtight container. They can last for about 4-5 days in the refrigerator.
Nutrition
- Serving Size: 1 cake
- Calories: 250
- Sugar: 20g
- Sodium: 200mg
- Fat: 10g
- Saturated Fat: 3g
- Unsaturated Fat: 5g
- Trans Fat: 0g
- Carbohydrates: 35g
- Fiber: 1g
- Protein: 3g
- Cholesterol: 40mg
Keywords: mini chocolate cakes, marshmallow filling, nostalgic desserts, baking, American desserts