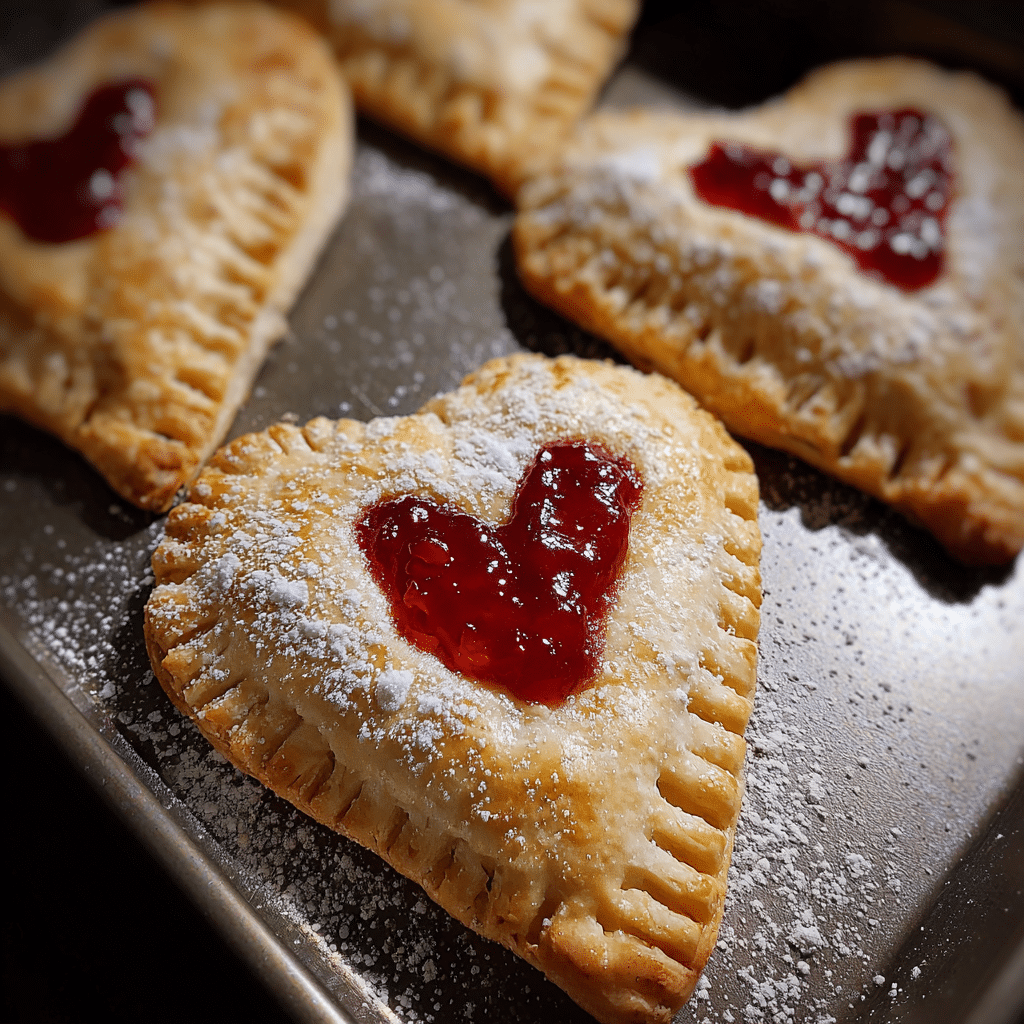
Homemade Heart Pop Tarts with Pie Crust might just be the answer to your Valentine’s Day dessert dilemma. Are you tired of overpriced bakery treats that taste artificial, or complicated recipes that leave you stressed instead of celebrating? These adorable heart-shaped pastries offer a delightful solution that’s as charming to make as they are to eat.
This recipe promises flaky, buttery pop tarts filled with sweet jam and topped with a simple glaze that will have everyone asking for seconds. Unlike store-bought versions, these homemade treats deliver real fruit flavor wrapped in tender, golden pie crust that actually tastes homemade because it is.
Hi, I’m Sam from dishfoody.com, and over the years of creating recipes that bring joy to home kitchens, I’ve discovered that Valentine’s Day doesn’t need elaborate techniques or fancy equipment. These Heart Pop Tarts with Pie Crust have become one of my go-to recipes when I want something special that doesn’t require culinary school training. They’re perfect for celebrating with your sweetheart, making with kids, or gifting to friends who deserve something made with love.
In this guide, you’ll discover why this recipe works so beautifully, how to select and work with pie crust, the simple ingredients you need, step-by-step instructions that ensure success, and creative variations to make these pop tarts uniquely yours. Plus, I’ll share my tested tips for achieving that perfect flaky texture and gorgeous presentation every time.
Why This Homemade Heart Pop Tarts with Pie Crust Recipe Works
This recipe succeeds where many pastry projects fail because it balances simplicity with impressive results. The combination of accessible ingredients and straightforward techniques means you can create bakery-quality treats in your own kitchen without specialized skills.
Uses affordable, easy-to-find ingredients: Store-bought or homemade pie crust forms the base, eliminating the need for puff pastry or laminated dough techniques. Your favorite jam provides the filling, and basic pantry staples create the glaze.
Quick assembly in just 30 minutes: Once your pie crust is ready, cutting hearts, filling, and sealing takes minimal time. The entire process from start to finished pop tarts takes about an hour, including baking.
Perfect for Valentine’s Day or any celebration: While these Heart Pop Tarts shine on February 14th, they’re equally wonderful for anniversaries, bridal showers, or simply because Tuesday needs more heart-shaped pastries. The recipe scales easily whether you’re making a romantic breakfast for two or treats for an entire classroom.
Customizable to any taste preference: Unlike store-bought options with limited flavors, you control the filling, sweetness level, and decoration style, making these adaptable to dietary needs and flavor preferences.
Choosing the Right Pie Crust for Heart Pop Tarts
The foundation of excellent Homemade Heart Pop Tarts with Pie Crust starts with selecting quality pastry that bakes up tender and flaky rather than tough or soggy.
Best Pie Crust Options for This Recipe
Traditional butter-based pie crust delivers the best flavor and texture for these pop tarts. The butter creates flaky layers and rich taste that complements sweet fillings beautifully. You can use homemade pie crust if you have a favorite recipe, or opt for quality store-bought refrigerated pie dough found in the dairy section.
Refrigerated pie dough sheets work exceptionally well because they’re already rolled to the proper thickness and contain the right fat-to-flour ratio for tender results. Look for brands listing butter as the primary fat rather than shortening or vegetable oils for superior flavor.
If you prefer making crust from scratch, a basic recipe using flour, cold butter, salt, and ice water will give you complete control over ingredients and freshness. The key is keeping everything cold so the butter creates steam pockets during baking, resulting in those coveted flaky layers.
Buying Tips for Pie Crust
When purchasing ready-made pie crust, check the refrigerated section rather than frozen aisles—refrigerated versions typically contain fewer preservatives and better-quality fats. Read ingredient labels and choose options with recognizable ingredients: flour, butter, salt, and water should dominate the list.
Look for pie crust that feels cold and firm in the package. Avoid any that seem warm or have been sitting out, as this compromises the butter’s structure and leads to tough pastry.
If buying from a bakery, ask whether their pie dough contains all butter. Many commercial operations use shortening for cost reasons, but butter-based crusts deliver incomparably better flavor for these Heart Pop Tarts.
Substitutions for Different Dietary Needs
For those avoiding traditional pie crust, several alternatives work reasonably well. Gluten-free pie crust can substitute directly using the same techniques, though texture may be slightly more crumbly. Choose gluten-free blends specifically designed for pastry rather than all-purpose mixes.
Vegan pie crust made with plant-based butter alternatives creates a dairy-free version that still bakes up nicely. The flavor will differ slightly from traditional butter crust, but you’ll still achieve the characteristic flaky texture these Heart Pop Tarts need.
Puff pastry offers another option if you want even more dramatic layers, though the texture will be lighter and more delicate than traditional pie crust. Use store-bought puff pastry following the same cutting and filling method, but reduce baking time slightly since puff pastry cooks faster.
Ingredients & Prep for Heart Pop Tarts with Pie Crust
Pie Crust Prep Essentials
Starting with properly prepared crust makes the difference between pop tarts that hold together beautifully and those that leak or tear. If using refrigerated pie dough, remove it from the refrigerator about 10 minutes before working with it just enough to make it pliable without becoming warm.
For homemade crust, roll the dough to approximately 1/8-inch thickness on a lightly floured surface. This thickness provides enough structure to contain the filling while remaining tender when baked. Too thick and your Heart Pop Tarts become bready; too thin and they may tear during assembly.
Dust your work surface and rolling pin lightly with flour to prevent sticking, but avoid using excessive flour as this can make the crust tough. If the dough becomes too soft while working, place it back in the refrigerator for 10 minutes to firm up the butter.
Filling and Topping Ingredients
For the Pop Tarts:
- 2 packages refrigerated pie crust (or homemade equivalent for about 4 crusts)
- 3/4 cup fruit jam or preserves (strawberry, raspberry, or cherry work beautifully)
- 1 egg beaten with 1 tablespoon water (egg wash)
- 2 tablespoons all-purpose flour (for thickening filling)
For the Glaze:
- 1 1/2 cups powdered sugar
- 3 tablespoons milk or cream
- 1/2 teaspoon vanilla extract
- Food coloring (optional, for pink or red glaze)
- Sprinkles or sanding sugar for decoration
The jam selection significantly impacts your final flavor. Choose high-quality preserves with visible fruit pieces rather than artificially flavored jelly. Seedless varieties work best since seeds can puncture the delicate crust. If your jam seems particularly thin or runny, mix it with the flour before filling to create a thicker consistency that won’t leak during baking.
Pantry Staples for Success
Keep these basic items on hand to ensure smooth preparation. All-purpose flour serves multiple purposes: dusting your work surface, thickening the filling, and sealing edges if needed.
Granulated sugar can be sprinkled on top before baking for extra crunch and sparkle, while powdered sugar forms the base of your glaze. Vanilla extract enhances the glaze flavor, though almond extract offers a delicious alternative if you prefer.
Milk adjusts glaze consistency use more for a thinner, translucent coating or less for an opaque, thick layer. The egg wash creates that gorgeous golden-brown finish and helps seal the edges, so don’t skip this simple step.
Step-by-Step Cooking Instructions for Heart Pop Tarts with Pie Crust
Pre-Cooking Prep for Heart Pop Tarts
Begin by preheating your oven to 375°F and lining two baking sheets with parchment paper or silicone mats. This prevents sticking and ensures even browning on the bottom of your Heart Pop Tarts with Pie Crust.
Remove your pie crust from the refrigerator and let it sit for about 10 minutes until slightly softened but still cool. On a lightly floured surface, gently roll out each crust to smooth any creases and ensure even thickness throughout.
Using a heart-shaped cookie cutter (approximately 3-4 inches works well), cut out heart shapes from the dough. You should get about 8-10 hearts per crust, depending on cutter size. Gather scraps, gently press together without overworking, roll out again, and cut additional hearts. You’ll need an even number since these pair together for each pop tart.
Prepare your filling by mixing the jam with flour in a small bowl until well combined. This thickening step prevents excessive spreading during baking. Set up your assembly station with the cut hearts, filling mixture, beaten egg wash, and a small brush.
Cooking Method for Heart Pop Tarts with Pie Crust
Arrange half of your heart cutouts on the prepared baking sheets, spacing them about 2 inches apart. These form the bottoms of your pop tarts. Place approximately 1 tablespoon of jam mixture in the center of each bottom heart, leaving a 1/2-inch border around all edges.
Brush the exposed edges with egg wash this acts as glue to seal your pop tarts. Carefully place a second heart on top of each filled bottom, pressing gently to adhere. Using a fork, crimp around all edges to create a decorative seal and ensure the filling stays contained during baking.
With a sharp knife or toothpick, poke 3-4 small steam vents in the top of each Heart Pop Tart. These tiny holes allow moisture to escape, preventing the pastries from puffing up excessively or bursting. Brush the tops with remaining egg wash for a beautiful golden finish.
Slide the baking sheets into your preheated 375°F oven and bake for 20-25 minutes. The Heart Pop Tarts with Pie Crust are done when they turn golden brown and the edges become slightly darker. The filling may bubble slightly through the vents, which is perfectly normal.
Doneness Check for Heart Pop Tarts
Perfect Homemade Heart Pop Tarts with Pie Crust display a rich golden-brown color across the entire surface, with slightly darker golden edges. The bottoms should also be golden rather than pale, indicating thorough baking that creates a crisp rather than soggy texture.
If you gently lift a pop tart with a spatula, it should feel firm and hold its shape rather than sagging or feeling soft. The filling should have bubbled slightly, which you might see through the steam vents, but shouldn’t be leaking significantly from the edges.
Unlike cooking temperatures for proteins, there’s no internal temperature to measure here. Visual cues tell you everything you need to know. If the tops are browning too quickly but the bottoms remain pale, reduce oven temperature to 350°F and continue baking until the bottoms catch up.
Cooling Time for Heart Pop Tarts with Pie Crust
Once baked to golden perfection, remove the baking sheets from the oven and let the Heart Pop Tarts rest on the pan for 5 minutes. This brief resting period allows the filling to set slightly, reducing the chance of burns from molten jam when you eventually take that first bite.
After 5 minutes on the pan, transfer the pop tarts to a wire cooling rack using a thin spatula. Cool completely before glazing approximately 30 minutes. Glazing warm pop tarts causes the icing to melt and run off rather than creating that attractive opaque coating you want.
While waiting for your pastries to cool, this is the perfect time to prepare your glaze so it’s ready when needed.
Pro Tips for Perfect Heart Pop Tarts with Pie Crust
Avoiding Common Pastry Problems
The most frequent issue with Homemade Heart Pop Tarts with Pie Crust is filling leakage during baking. Prevent this by not overfilling less is genuinely more when it comes to the jam center. One tablespoon seems modest, but remember that filling expands when heated. Sealing edges thoroughly with fork crimping creates a barrier that contains even enthusiastic fillings.
If your dough becomes too warm while working, it will be difficult to handle and may shrink excessively during baking. Keep dough refrigerated until the moment you need it, and if your kitchen is particularly warm, chill cut hearts for 10 minutes before filling and baking.
Soggy bottoms result from underbaking or filling that’s too liquidy. Ensure your oven reaches the full 375°F before baking, and thicken thin jams with flour as directed. Baking directly on parchment or a silicone mat also promotes better bottom crisping than baking on bare metal.
Tool Recommendations for Success
A heart-shaped cookie cutter in the 3-4 inch range creates perfectly sized pop tarts that bake evenly and look adorable. Metal cutters with sharp edges cut cleaner shapes than plastic versions that sometimes tear delicate dough.
A pastry brush applies egg wash evenly without damaging the dough surface. Silicone brushes clean more easily than natural bristle versions and last longer, making them a worthwhile investment if you do much baking.
While not essential, a bench scraper helps transfer cut dough hearts from your work surface to baking sheets without distorting their shape. This simple tool also makes gathering and cleaning up dough scraps much easier.
Rolling your pie crust between two sheets of parchment paper eliminates the need for flour dusting and prevents sticking without toughening the dough. This technique is especially helpful in warm kitchens where dough tends to become sticky quickly.
Storage & Reheating Your Heart Pop Tarts
Once completely cooled and glazed, store Homemade Heart Pop Tarts with Pie Crust in an airtight container at room temperature for up to 3 days. Place parchment paper between layers if stacking to prevent glaze from sticking.
For longer storage, freeze unglazed baked pop tarts in a single layer on a baking sheet until solid, then transfer to a freezer bag for up to 2 months. When ready to enjoy, thaw at room temperature, then apply fresh glaze. This method preserves texture better than freezing already-glazed pastries.
To refresh day-old pop tarts, warm them in a 300°F oven for 5-7 minutes before serving. This gentle reheating restores some of the original crispness without drying them out. Avoid microwaving, which makes the crust tough and chewy rather than flaky.
You can also freeze unbaked, assembled pop tarts before baking. Freeze them on a baking sheet until solid, then transfer to freezer bags. Bake directly from frozen, adding 5-7 minutes to the original baking time. This option is perfect for preparing ahead and baking fresh for a special breakfast.
Looking for more creative inspiration? Discover hundreds of delicious ideas on my Pinterest boards at Dishfoody Magic, where I share seasonal recipes, decorating tips, and flavor combinations that will make your next baking project even more special!
Flavor Variations for Heart Pop Tarts with Pie Crust
Classic Fruit Fillings
Traditional strawberry jam remains the most popular filling for Homemade Heart Pop Tarts with Pie Crust, offering familiar sweetness that appeals to all ages. Raspberry preserves provide a slightly tart contrast to the sweet glaze, while cherry creates a more sophisticated flavor profile perfect for adult palates.
For something different, try mixed berry jam that combines strawberries, blueberries, and blackberries for complex fruit flavor in every bite. Apricot preserves offer a less common but equally delicious option with subtle floral notes that pair beautifully with vanilla glaze.
Chocolate and Specialty Flavors
Chocolate lovers can fill their Heart Pop Tarts with Pie Crust using chocolate hazelnut spread, creating a richer, more decadent treat. Apply it sparingly since chocolate spreads are thicker than jam and can make sealing edges more challenging.
Lemon curd transforms these into bright, tangy pastries that feel more brunch-appropriate than dessert. The citrus filling pairs wonderfully with a simple powdered sugar glaze or even a light lemon glaze for double citrus impact.
For a breakfast-inspired version, try cinnamon apple butter or pumpkin butter as your filling. These options feel cozier and less candy-like, making them appropriate for morning meals while still satisfying your sweet tooth.
Dietary-Friendly Versions
Creating sugar-free Homemade Heart Pop Tarts with Pie Crust is simple when you use sugar-free jam and replace the powdered sugar glaze with a cream cheese frosting sweetened with your preferred sugar substitute. The cream cheese provides richness without excessive sweetness.
Vegan versions succeed when you use vegan pie crust, fruit-only jam (checking that it contains no gelatin), and glaze made with plant-based milk. Replace the egg wash with a mixture of plant milk and a touch of maple syrup for browning.
For reduced-sugar versions without going completely sugar-free, use fruit preserves with lower sugar content and create a thinner glaze that provides flavor without excess sweetness. You can also skip the glaze entirely and simply dust finished pop tarts with powdered sugar for visual appeal with minimal added sugar.
International Flavor Inspirations
The table below shows how different global flavor combinations can transform your Homemade Heart Pop Tarts with Pie Crust into international-inspired treats:
| Flavor Profile | Filling | Glaze Variation | Topping |
|---|---|---|---|
| French | Apricot jam with vanilla | Vanilla glaze with almond extract | Sliced almonds |
| Italian | Fig jam | Honey glaze with lemon zest | Chopped pistachios |
| British | Orange marmalade | Simple powdered sugar | Candied orange peel |
| Japanese | Red bean paste | Matcha powder glaze | Black sesame seeds |
| Middle Eastern | Date paste | Rosewater glaze | Crushed pistachios |
| Scandinavian | Lingonberry jam | Cardamom-spiced glaze | Pearl sugar |
These international variations show how versatile the basic Heart Pop Tarts with Pie Crust recipe can be when you explore fillings and flavors from different culinary traditions.
Serving Suggestions for Heart Pop Tarts with Pie Crust
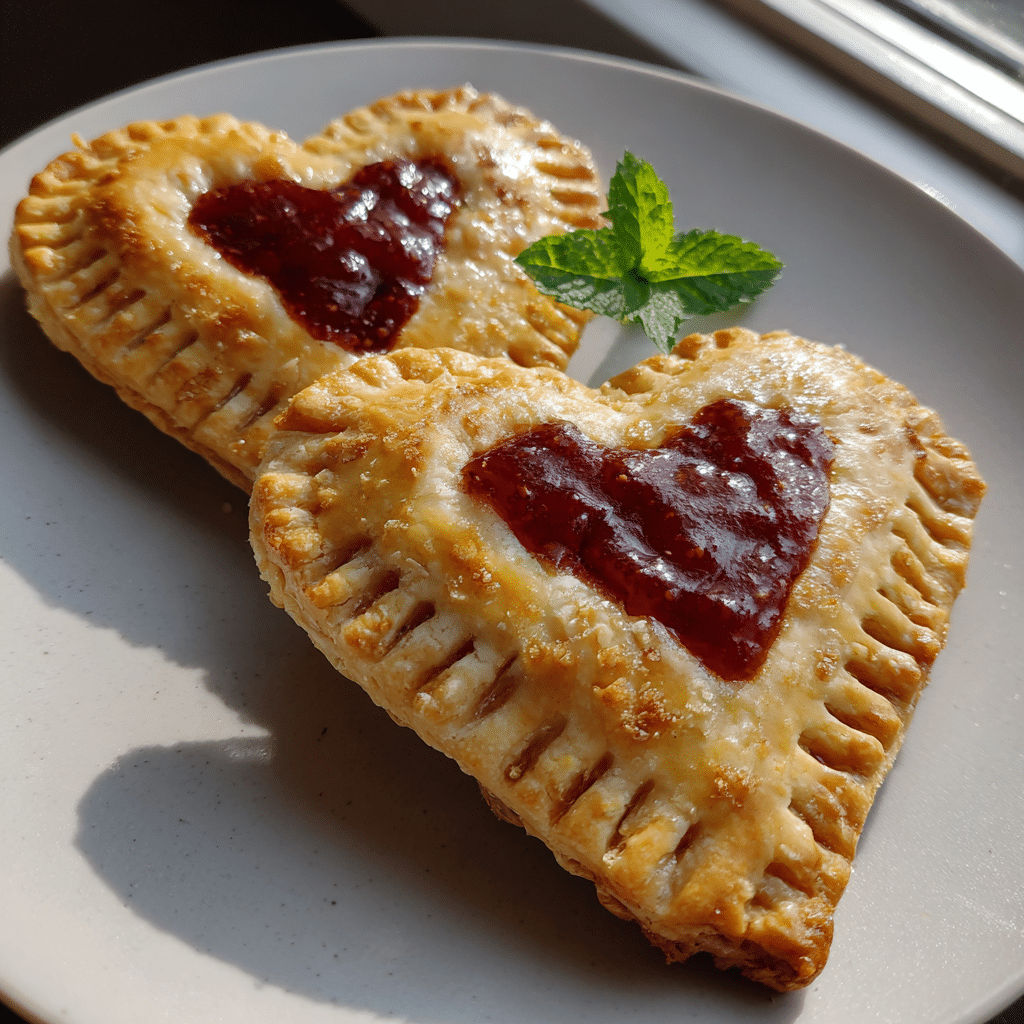
These charming pastries shine in multiple serving contexts throughout the day. For a romantic Valentine’s Day breakfast in bed, arrange Homemade Heart Pop Tarts with Pie Crust on a pretty plate with fresh strawberries and a small vase with a single rose. The visual presentation matters as much as the taste when you’re creating a special moment.
As an afternoon tea treat, serve these alongside other dainty pastries, petit fours, and finger sandwiches. The heart shape and sweet glaze fit perfectly into the elegant tea party aesthetic while offering substantially more flavor than many traditional tea cakes.
For a casual dessert, warm pop tarts pair beautifully with vanilla ice cream or whipped cream. The temperature contrast between warm pastry and cold cream creates a delightful eating experience that elevates these from simple pastries to restaurant-worthy dessert.
When gifting these Heart Pop Tarts with Pie Crust, arrange them in a decorative box lined with tissue paper or place them in clear cellophane bags tied with ribbon. They make thoughtful homemade gifts for teachers, neighbors, or anyone who deserves something special.
Beverage pairings enhance the enjoyment of these sweet treats. Hot chocolate or coffee provides warmth and richness that balances the sweet fruit filling. For adults, champagne or prosecco creates an elegant pairing for celebration occasions, while fruit-infused sparkling water offers a refreshing non-option.
For more Valentine’s Day recipe inspiration, explore our collection of heart-themed appetizers or check out our full dessert collection.
PrintHomemade Heart Pop Tarts with Pie Crust: Easy Valentine’s Treat

Adorable homemade heart-shaped Pop-Tarts made with a flaky pie crust and sweet fruit filling, baked until golden and finished with a simple glaze a fun, nostalgic treat perfect for Valentine’s Day.
- Prep Time: 20 mins
- Cook Time: 18 mins
- Total Time: 38 mins
- Yield: 8 pop tarts 1x
- Category: Breakfast
- Method: Baking
- Cuisine: American
- Diet: Vegetarian
Ingredients
- 2 refrigerated pie crusts
- 1/2 cup strawberry or raspberry jam
- 1 egg
- 1 tbsp water
- Glaze:
- 1 cup powdered sugar
- 1–2 tbsp milk
- 1/2 tsp vanilla extract
- Pink or red sprinkles
Instructions
- 1. Preheat oven to 375°F (190°C) and line a baking sheet with parchment paper.
- 2. Unroll pie crusts and use a heart-shaped cookie cutter to cut even numbers of hearts.
- 3. Place half of the hearts on the baking sheet.
- 4. Spoon a small amount of jam into the center of each heart, leaving edges clear.
- 5. Top with remaining heart cutouts and press edges gently with a fork to seal.
- 6. Whisk egg with water and brush tops lightly.
- 7. Bake for 15–18 minutes until golden brown.
- 8. Cool completely.
- 9. Whisk powdered sugar, milk, and vanilla to make glaze.
- 10. Drizzle glaze over cooled Pop-Tarts and add sprinkles.
- 11. Let glaze set before serving.
Notes
- Do not overfill or jam may leak.
- Try different jam flavors for variety.
- Store in an airtight container for up to 3 days.
Nutrition
- Serving Size: 1 pop tart
- Calories: 290
- Sugar: 16g
- Sodium: 210mg
- Fat: 15g
- Saturated Fat: 6g
- Unsaturated Fat: 7g
- Trans Fat: 0g
- Carbohydrates: 36g
- Fiber: 1g
- Protein: 3g
- Cholesterol: 45mg
Keywords: homemade pop tarts, heart shaped pop tarts, valentines breakfast, pie crust pop tarts