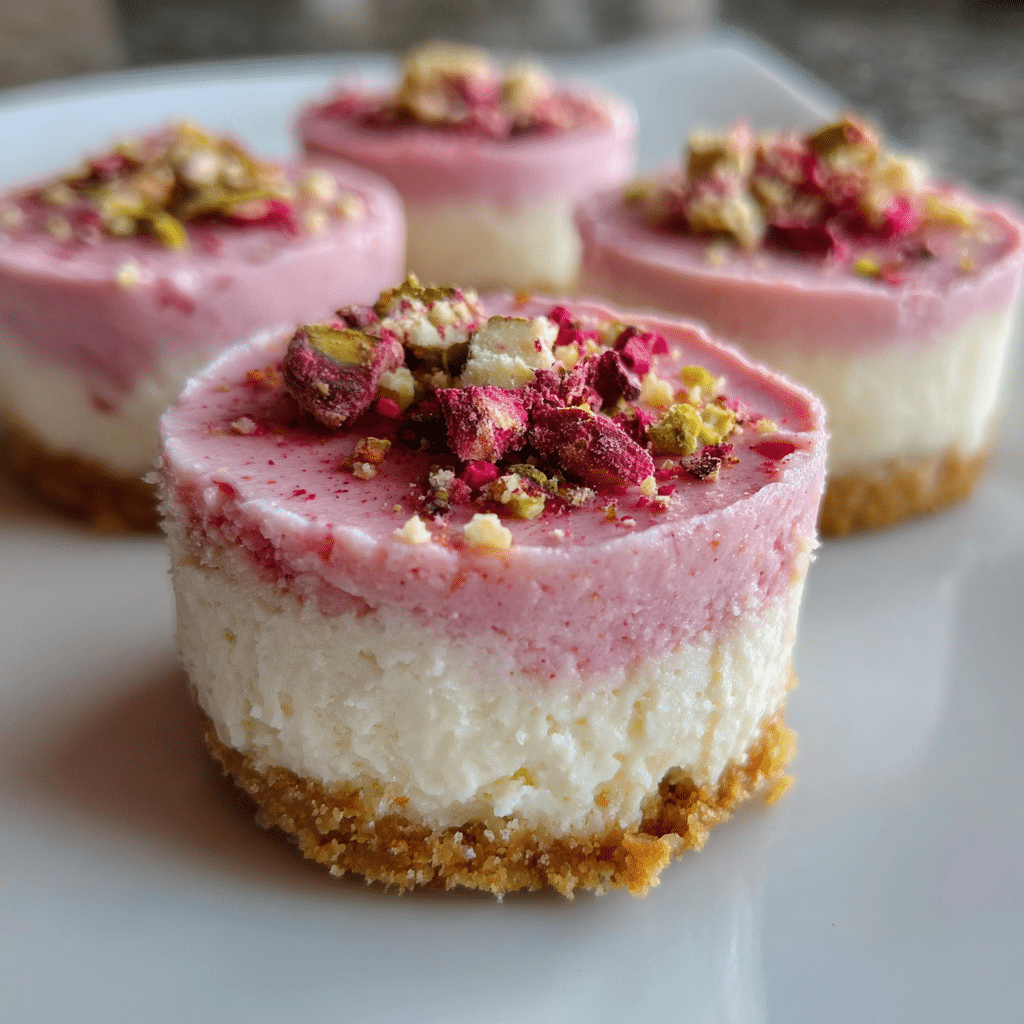
Hi, I’m Sam, and I know exactly what it’s like when you’re craving something sweet, elegant, and impressive but you’re short on time, energy, or oven space. Maybe you’re hosting a last-minute gathering, need a Valentine’s Day treat that won’t keep you in the kitchen all day, or you simply want a dessert that looks like it took hours but actually took minutes. That’s where these No-Bake Pink Velvet Cheesecake Bites come in. This easy 15-minute recipe delivers creamy, dreamy, perfectly portioned cheesecake bites with a gorgeous pink hue and rich velvet flavor no baking required.
At dishfoody.com, I believe cooking should bring joy, not stress. That’s why I created this recipe to be foolproof, beginner-friendly, and absolutely delicious. I’ve spent years perfecting no-bake desserts in my own kitchen, and these cheesecake bites have become a reader favorite for their simplicity and stunning presentation. In this guide, I’ll walk you through everything: selecting the best ingredients, mastering the no-bake technique, customizing flavors, and answering all your common questions. Let’s dive in and make something beautiful together.
Why This No-Bake Pink Velvet Cheesecake Bites Recipe Works
These No-Bake Pink Velvet Cheesecake Bites aren’t just pretty they’re practical, delicious, and endlessly versatile. Here’s why this recipe is a game-changer:
• No oven needed: Perfect for hot summer days, small kitchens, or when your oven is already occupied with dinner
• Ready in 15 minutes active time: Just mix, assemble, and chill no complicated techniques or special equipment required
• Portion-controlled perfection: Individual bites mean no messy slicing and easy serving for parties or meal prep
• Crowd-pleasing flavor: The subtle cocoa and vanilla notes of pink velvet combined with tangy cream cheese create an irresistible taste
• Customizable for any occasion: Easy to adapt for holidays, dietary needs, or flavor preferences
• Budget-friendly: Uses simple, affordable ingredients you can find at any grocery store
• Make-ahead friendly: Prepare up to 3 days in advance and store in the fridge until ready to serve
Whether you’re a beginner baker or a seasoned dessert maker, these No-Bake Pink Velvet Cheesecake Bites deliver professional results with minimal effort.
Choosing the Right Ingredients for No-Bake Pink Velvet Cheesecake Bites
The secret to perfect No-Bake Pink Velvet Cheesecake Bites lies in using quality ingredients that work together to create that signature creamy texture and delicate pink velvet flavor.
Best Base Options for This Recipe
The foundation of your cheesecake bites starts with the crust. For traditional pink velvet flavor, I recommend using vanilla wafer cookies or graham crackers. Vanilla wafers provide a subtle sweetness that complements the pink velvet without overpowering it, while graham crackers offer a slightly more robust, honey-like flavor. For a richer base, try Oreo cookies with the filling removed they add a hint of chocolate that enhances the cocoa notes in pink velvet. Biscoff cookies are another excellent choice if you want a caramelized, spiced undertone.
Buying Tips for Cream Cheese
The star of any cheesecake is the cream cheese, so quality matters here. Always choose full-fat cream cheese in block form not the spreadable tub variety, which contains added stabilizers and won’t set properly. Look for brands that list cream and milk as the first ingredients. Before using, let your cream cheese sit at room temperature for about 30 minutes. This ensures it blends smoothly without lumps and creates that signature silky texture. Cold cream cheese will leave you with a grainy filling no matter how long you mix it.
Substitutions for Dietary Needs
Need to adapt this recipe? Here are some smart swaps:
Dairy-free version: Replace cream cheese with cashew-based or coconut cream cheese alternatives. Use coconut cream (the thick part from a chilled can) in place of heavy cream.
Gluten-free option: Swap regular cookies for certified gluten-free graham crackers or vanilla wafers. Many brands now offer excellent gluten-free alternatives that taste just as good as traditional versions. You can also explore more gluten-free dessert options on my site.
Lower sugar: Reduce the powdered sugar by half and add a few drops of liquid stevia or monk fruit sweetener to taste.
Nut-free: Avoid any cookie bases containing almonds and ensure your food coloring and extracts are produced in nut-free facilities if dealing with severe allergies.
Ingredients & Prep for No-Bake Pink Velvet Cheesecake Bites
Let me break down exactly what you’ll need and how to prepare each component for success.
Base Preparation Essentials
For the crust layer:
• 1½ cups vanilla wafer cookies or graham cracker crumbs (about 30 vanilla wafers or 10 full graham crackers)
• 4 tablespoons unsalted butter, melted
• 1 tablespoon granulated sugar
• Pinch of salt
To prepare your crust: Pulse cookies in a food processor until they form fine crumbs (they should resemble wet sand when squeezed). If you don’t have a food processor, place cookies in a sealed plastic bag and crush with a rolling pin. Mix crumbs with melted butter, sugar, and salt until evenly moistened. Press about 1 tablespoon of mixture firmly into the bottom of each cavity in a mini muffin tin lined with paper liners. Use the back of a small spoon or a shot glass to pack it down firmly. Refrigerate while you prepare the filling.
Cheesecake Filling Components
For the pink velvet filling:
• 16 ounces (two 8-oz blocks) cream cheese, softened to room temperature
• ¾ cup powdered sugar, sifted
• 1 teaspoon pure vanilla extract
• 1 tablespoon unsweetened cocoa powder
• ½ cup heavy whipping cream, cold
• Pink gel food coloring (start with 3-4 drops and adjust)
• 1 teaspoon fresh lemon juice (brightens flavor and helps with setting)
The key to smooth, lump-free filling is proper preparation. Sift your powdered sugar before adding it to avoid clumps. Use gel food coloring rather than liquid it provides more vibrant color without adding excess moisture that can make your filling runny. Always start with less coloring than you think you need; you can add more, but you can’t take it away.
Pantry Staples and Topping Ideas
Essential tools:
• Mini muffin tin (24-cup)
• Mini cupcake liners
• Electric hand mixer or stand mixer
• Piping bag or plastic zip-top bag
• Offset spatula
Optional toppings:
• White chocolate shavings or chips
• Fresh raspberries or strawberry slices
• Crushed freeze-dried strawberries
• Mini chocolate chips
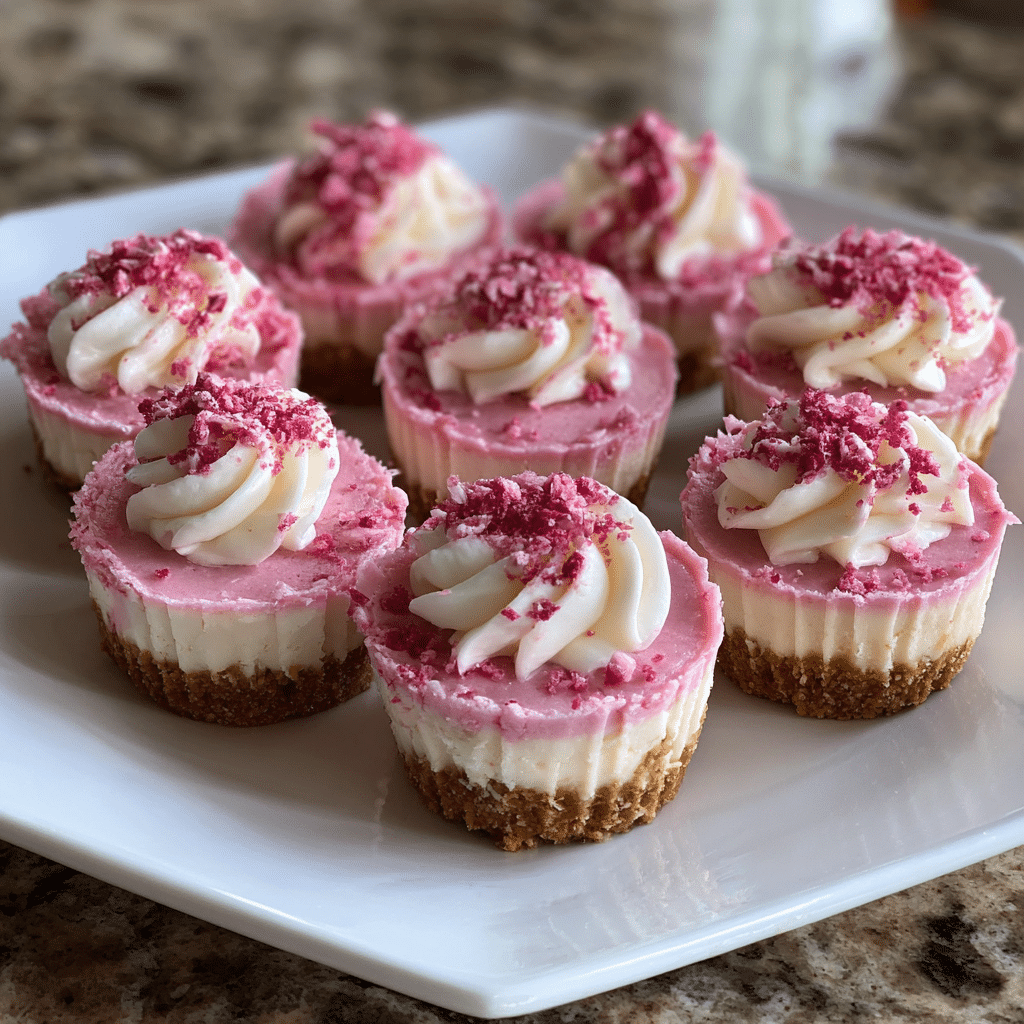
• Whipped cream rosettes
• Edible glitter or pearl dust
These No-Bake Pink Velvet Cheesecake Bites are beautiful on their own, but a simple garnish elevates them from homemade to bakery-worthy.
Step-by-Step Instructions for No-Bake Pink Velvet Cheesecake Bites
Let me walk you through the exact process I use every time to create perfect cheesecake bites.
Pre-Assembly Prep for No-Bake Pink Velvet Cheesecake Bites
Before you begin mixing, set yourself up for success. Line a 24-cup mini muffin tin with paper or foil liners this makes removing the finished bites effortless. Clear space in your refrigerator for the muffin tin to sit flat; these need at least 2 hours to set properly, so plan accordingly.
Take your cream cheese out of the refrigerator 30 minutes before you start. This is non-negotiable for smooth filling. Test readiness by pressing your finger into the block it should leave an indent easily. If it’s still cold and firm, give it more time. While waiting, prepare your crust and press it into the prepared liners as described above.
Mixing Method for No-Bake Pink Velvet Cheesecake Bites
In a large mixing bowl, beat the softened cream cheese with an electric mixer on medium speed for about 2 minutes until completely smooth and fluffy. Scrape down the sides of the bowl. Add the sifted powdered sugar and cocoa powder, then beat on low speed until just combined, about 1 minute. Add the vanilla extract and lemon juice, mixing until incorporated.
In a separate bowl, whip the cold heavy cream with clean beaters on high speed until stiff peaks form, about 2-3 minutes. This whipped cream will lighten your filling and give it that perfect mousse-like texture. Gently fold half of the whipped cream into the cream cheese mixture using a rubber spatula, then fold in the remaining half until no white streaks remain. Be gentle here you want to maintain the airiness you just created.
Now add your pink food coloring. Start with 3-4 drops of gel coloring and fold it through. The color will develop as you mix. Add more drops one at a time until you achieve your desired shade of pink. Remember, the color will look slightly more vibrant once chilled.
Assembly Check for No-Bake Pink Velvet Cheesecake Bites
Transfer your pink velvet filling to a piping bag or a large plastic zip-top bag with one corner snipped off. This makes filling the mini cups neat and professional-looking. Pipe the filling over each prepared crust, filling to just below the rim of each liner. If you don’t have a piping bag, you can carefully spoon the filling in, but piping gives you better control and cleaner results.
Gently tap the muffin tin on the counter a few times to release any air bubbles. Use a small offset spatula or the back of a spoon to smooth the tops if needed. At this point, you can add any toppings you’re using, or wait until just before serving for maximum freshness.
Setting Time for No-Bake Pink Velvet Cheesecake Bites
Cover the muffin tin loosely with plastic wrap, being careful not to let it touch the tops of your cheesecake bites. Refrigerate for at least 2 hours, but preferably 4 hours or overnight. This chilling time is essential it allows the filling to firm up to that perfect sliceable-yet-creamy texture. Don’t try to rush this step by putting them in the freezer for a shorter time; the texture won’t be right.
Once fully set, these No-Bake Pink Velvet Cheesecake Bites can be carefully removed from the tin. Peel back the paper liners when ready to serve, or leave them on for easy handling at parties. They should release cleanly and hold their shape beautifully.
Pro Tips for Perfect No-Bake Pink Velvet Cheesecake Bites
After making these countless times, I’ve learned some tricks that make all the difference between good and absolutely spectacular cheesecake bites.
Avoiding Runny or Grainy Filling in No-Bake Pink Velvet Cheesecake Bites
The number one mistake I see is using cream cheese that’s too cold. If your filling has lumps, it means your cream cheese wasn’t soft enough when you started. You can try to save it by continuing to beat on medium-high speed, but prevention is easier than cure. Another common issue is adding too much liquid. Stick to the recipe measurements, especially with the heavy cream. If your kitchen is very warm, chill your mixing bowl and beaters for 10 minutes before whipping the cream this helps it whip faster and hold better.
If your filling seems too soft after mixing, it might still firm up during the chill time. However, if it’s actually runny (pourable rather than spoonable), you can fix it by folding in an additional ¼ cup of whipped cream that’s been whipped to very stiff peaks, or by adding 1-2 teaspoons of unflavored gelatin that’s been bloomed in cold water and gently warmed until dissolved.
Tool Recommendations for No-Bake Pink Velvet Cheesecake Bites
Invest in a good quality mini muffin tin nonstick is helpful but not essential if you’re using liners. I prefer silicone or foil liners over paper for these because they release more cleanly and give you a prettier finished edge. A small cookie scoop (about 1 tablespoon size) is perfect for portioning the crust mixture evenly into each cup.
For mixing, a hand mixer works perfectly fine, but if you have a stand mixer, use it it frees up your hands and ensures thorough, even mixing. A piping bag with a large round tip makes filling the cups quick and neat, but a zip-top bag works in a pinch. And don’t skip the offset spatula it’s invaluable for smoothing tops and transferring delicate desserts.
Storage & Make-Ahead Tips for No-Bake Pink Velvet Cheesecake Bites
These cheesecake bites store beautifully, making them perfect for advance preparation. Keep them covered in the refrigerator for up to 5 days they actually taste even better on day two as the flavors meld. Store them in an airtight container with parchment paper between layers to prevent sticking.
For longer storage, these freeze exceptionally well for up to 2 months. Freeze them on a baking sheet until solid, then transfer to a freezer-safe container with parchment between layers. Thaw in the refrigerator for 3-4 hours before serving. Don’t thaw at room temperature or they’ll become too soft and lose their shape. Add any fresh fruit or whipped cream toppings after thawing for the best texture and appearance.
If you’re looking for more make-ahead dessert ideas for entertaining, I have an entire collection that fits any occasion.
Flavor Variations for No-Bake Pink Velvet Cheesecake Bites
One of my favorite things about these No-Bake Pink Velvet Cheesecake Bites is how easily they adapt to different flavor profiles and occasions.
Chocolate Lovers’ Twist
For those who want more chocolate intensity, increase the cocoa powder to 2 tablespoons and add 2 ounces of melted and cooled dark chocolate to the cream cheese mixture. Top with chocolate ganache (equal parts heavy cream and chocolate chips, heated and stirred until smooth) and a chocolate curl. This transforms your pink velvet into a chocolate-forward treat while maintaining that signature smooth, no-bake texture.
Berry-Infused Version
Fold in ⅓ cup of seedless raspberry or strawberry jam into your finished filling for bursts of fruit flavor. Or mix in 2 tablespoons of freeze-dried strawberry powder for intense berry taste without adding moisture. Top with fresh berries just before serving. The combination of tangy cream cheese and sweet-tart berries creates an irresistible balance. This version pairs beautifully with other fruit-based desserts like my banana cream pie.
Holiday Adaptations
Valentine’s Day: Use deeper pink or red coloring, top with white chocolate hearts, and serve in metallic pink liners. Pair with romantic heart-shaped appetizers for a complete Valentine’s menu.
Easter: Keep the pastel pink and top with mini chocolate eggs, shredded coconut “grass,” or spring-colored sprinkles.
Christmas: Add peppermint extract instead of vanilla, use red coloring, and top with crushed candy canes for a festive red velvet peppermint version.
Baby Showers: Make half the batch pink and half blue by dividing the filling before adding color. Top with coordinating sprinkles or edible pearls.
Comparison Table of Flavor Variations
| Variation | Key Addition | Color | Best Topping | Occasion |
|---|---|---|---|---|
| Classic Pink Velvet | 1 tbsp cocoa, pink coloring | Soft pink | White chocolate shavings | Everyday, Valentine’s Day |
| Chocolate Intense | 2 tbsp cocoa, 2 oz dark chocolate | Deep rose | Chocolate ganache | Chocolate lovers, dinner parties |
| Berry Blast | ⅓ cup raspberry jam | Pink with berry swirls | Fresh raspberries | Summer gatherings, brunches |
| Peppermint Red Velvet | Peppermint extract | Deep red | Crushed candy canes | Christmas, winter holidays |
| Lemon Pink | 2 tsp lemon zest, 1 tbsp lemon juice | Pale pink | Lemon curd drizzle | Spring, Easter, tea parties |
| Cookies & Cream | ½ cup crushed Oreos | Speckled pink | Mini Oreo pieces | Kids’ parties, casual gatherings |
Each variation follows the same simple base recipe just add your chosen flavoring along with the vanilla extract and adjust the color to suit your theme.
Serving Suggestions for No-Bake Pink Velvet Cheesecake Bites
These elegant little treats deserve to be presented beautifully and paired with complementary flavors.
For casual gatherings: Arrange the No-Bake Pink Velvet Cheesecake Bites on a simple white platter with fresh berries scattered around them. Serve alongside coffee, hot chocolate, or sparkling water with fresh fruit. They’re perfect for potlucks, game nights, or backyard barbecues because they’re individually portioned and easy to grab.
For elegant entertaining: Display them on a tiered dessert stand lined with doilies or decorative paper. Dust with edible glitter or gold leaf for extra glamour. Serve with champagne, prosecco, or a sweet dessert blend. These would be stunning at bridal showers, engagement parties, or anniversary celebrations. The individual presentation eliminates the need for dessert plates and forks, making service seamless.
For everyday enjoyment: Keep a batch in your fridge for whenever a sweet craving hits. They’re portion-controlled, so you can enjoy one (or two!) without overindulging. Pack them in lunch boxes as a special treat, or serve them as an after-dinner dessert with a cup of tea.
Beverage pairings: The slight tang from the cream cheese and subtle chocolate notes pair beautifully with:
• Freshly brewed coffee (the slight bitterness balances the sweetness)
• Chai tea or vanilla rooibos (complementary spice notes)
• Sparkling water with raspberry or strawberry essence
• Milk (classic pairing, especially popular with kids)
• Dessert blends (tawny or cream varieties complement the richness)
Complementary desserts: If you’re creating a dessert buffet, these pair wonderfully with contrasting textures and flavors. Serve alongside crunchy cookies, tart fruit tarts, or rich brownies. The creamy, no-bake texture offers a nice contrast to baked goods. Check out my full collection of desserts for more pairing inspiration.
Want even more creative recipe ideas and beautiful food inspiration? Follow me on Pinterest at DishfoodyMagic where I share daily pins featuring seasonal desserts, entertaining tips, and kitchen hacks you’ll actually use!
Frequently Asked Questions About No-Bake Pink Velvet Cheesecake Bites
Can I make these No-Bake Pink Velvet Cheesecake Bites ahead of time?
Absolutely! In fact, these are ideal make-ahead desserts. Prepare them up to 3 days in advance and store covered in the refrigerator. The texture and flavor actually improve after a day as everything sets and the flavors meld together. Just add any fresh toppings within a few hours of serving to keep them looking fresh. For longer advance preparation, freeze them for up to 2 months and thaw in the refrigerator overnight before your event.
PrintNo-Bake Pink Velvet Cheesecake Bites: Easy 15-Minute Recipe

Cute, no-bake pink velvet cheesecake bites with a smooth, creamy texture and sweet vanilla flavor perfect for parties, holidays, or an easy make-ahead dessert.
- Prep Time: 20 mins
- Cook Time: 0 mins
- Total Time: 2 hrs 20 mins
- Yield: 20 bites 1x
- Category: Dessert
- Method: No-Bake
- Cuisine: American
- Diet: Vegetarian
Ingredients
- 1 cup graham cracker crumbs
- 3 tbsp melted butter
- 8 oz cream cheese, softened
- 1/2 cup powdered sugar
- 1 tsp vanilla extract
- 2 tbsp heavy cream
- Pink food coloring
- 1/2 cup white chocolate chips, melted
- Pink sprinkles or sanding sugar for coating
Instructions
- 1. In a bowl, combine graham cracker crumbs and melted butter until evenly mixed.
- 2. Press mixture into a lined small pan or dish and chill for 10 minutes.
- 3. In a separate bowl, beat cream cheese until smooth.
- 4. Add powdered sugar, vanilla extract, and heavy cream; beat until creamy.
- 5. Mix in melted white chocolate until fully combined.
- 6. Add pink food coloring and mix until desired color is reached.
- 7. Spread cheesecake mixture evenly over the crust and refrigerate for at least 2 hours.
- 8. Once set, remove from pan and cut into bite-sized squares.
- 9. Roll or sprinkle bites with pink sprinkles before serving.
Notes
- For extra decadence, dip the bites in melted white chocolate.
- Store in the refrigerator for up to 4 days in an airtight container.
- You can freeze the bites for 20 minutes before cutting for cleaner edges.
Nutrition
- Serving Size: 1 bite
- Calories: 95
- Sugar: 7g
- Sodium: 85mg
- Fat: 6g
- Saturated Fat: 4g
- Unsaturated Fat: 2g
- Trans Fat: 0g
- Carbohydrates: 9g
- Fiber: 0g
- Protein: 1g
- Cholesterol: 22mg
Keywords: pink velvet cheesecake bites, no bake cheesecake, mini desserts, party treats