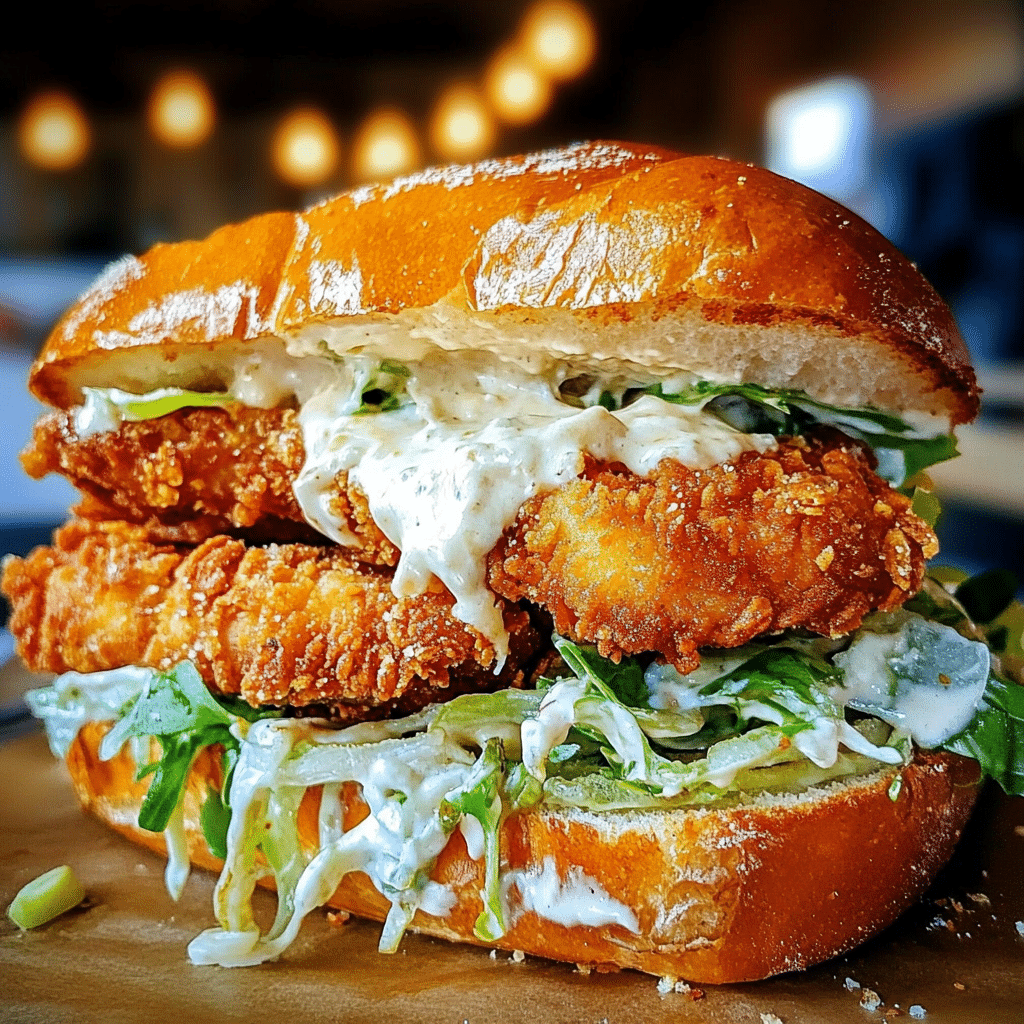
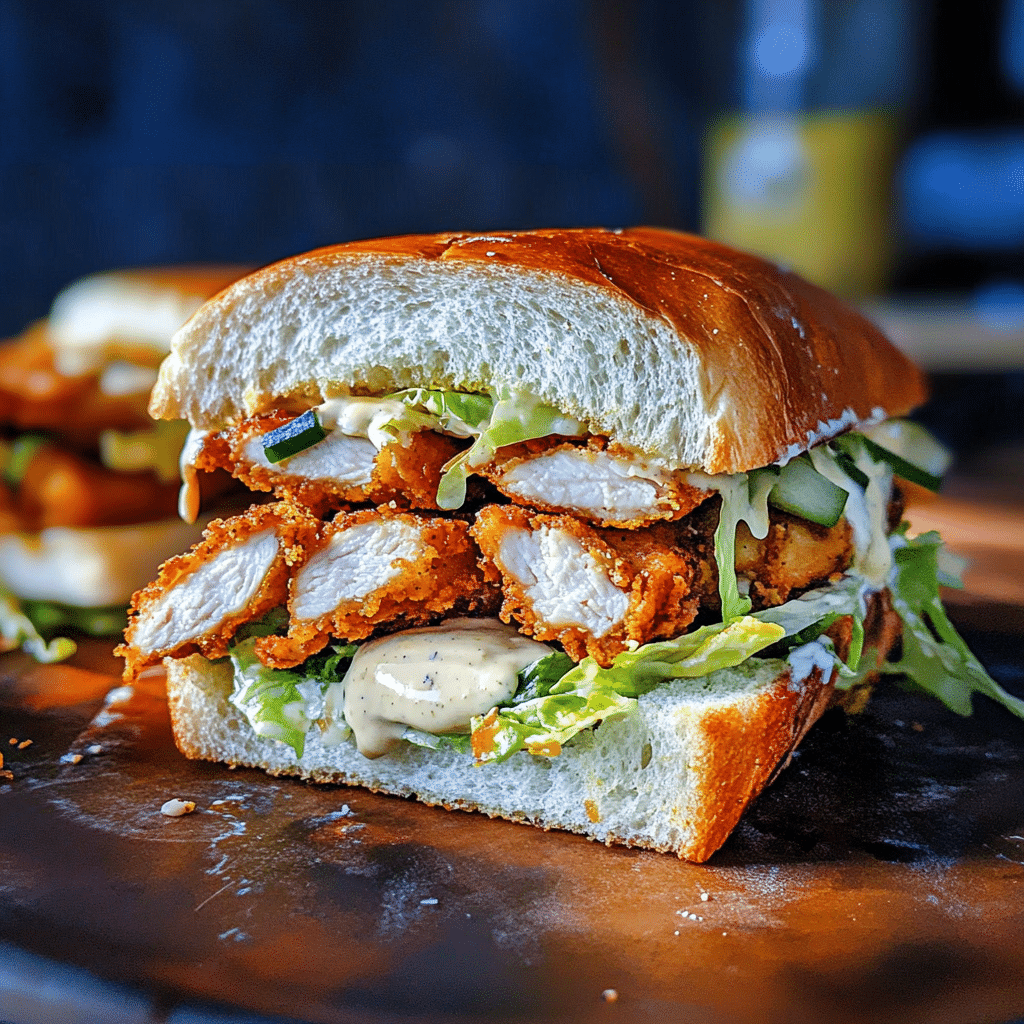
Are you tired of soggy, flavorless chicken sandwiches that fall apart after the first bite? This Crispy Chicken Caesar Sandwich will transform your lunch game forever! Picture perfectly golden, crunchy chicken breast topped with crisp romaine lettuce, tangy Caesar dressing, and freshly grated Parmesan cheese, all nestled between toasted artisan bread that holds together beautifully.
Hi, I’m Sam from dishfoody.com, and after years of perfecting comfort food classics, I’ve cracked the code to creating restaurant-quality sandwiches at home. What started as my quest to recreate my favorite deli sandwich has become one of my most requested recipes. This Crispy Chicken Caesar Sandwich has helped thousands of home cooks elevate their lunch routine with a meal that’s both satisfying and surprisingly simple to make.
In this comprehensive guide, you’ll discover my secret to achieving the perfect crispy coating, learn the foolproof technique for juicy chicken every time, and master the art of Caesar dressing that rivals any restaurant. Plus, I’ll share assembly tips that ensure your sandwich stays structurally sound from first bite to last.
Why This Crispy Chicken Caesar Sandwich Recipe Works
The magic behind this Crispy Chicken Caesar Sandwich lies in three key principles: superior texture contrast, balanced flavors, and foolproof techniques that guarantee restaurant-quality results every time.
• Uses double-breading technique – Creates an incredibly crunchy exterior that stays crispy even with dressing • Buttermilk brine method – Ensures juicy, tender chicken that never dries out during cooking • Homemade Caesar dressing – Fresh, tangy flavor that’s infinitely better than store-bought versions • Perfect bread-to-filling ratio – Prevents soggy sandwiches while maximizing flavor in every bite • Room temperature assembly – Professional technique that prevents condensation and maintains crispiness
Choosing the Right Chicken for Crispy Chicken Caesar Sandwich
The foundation of an exceptional Crispy Chicken Caesar Sandwich starts with selecting the perfect chicken cut and preparing it properly for maximum tenderness and flavor.
Best Chicken Cuts for This Crispy Chicken Caesar Sandwich
Boneless Chicken Breasts provide the ideal thickness and uniform shape for even cooking. Look for breasts that are 6-8 ounces each for perfect sandwich-sized portions.
Chicken Thighs (Boneless) offer superior juiciness and flavor, though they require slightly longer cooking time. The extra fat content creates incredibly moist results in your Crispy Chicken Caesar Sandwich.
Chicken Tenderloins work beautifully for smaller sandwiches and cook faster, making them perfect for quick weeknight meals.
Buying Tips for Crispy Chicken Caesar Sandwich
Look for chicken with a pinkish-white color and firm texture. Avoid any pieces with gray spots or strong odors, which indicate age or improper storage.
Ask your butcher to pound chicken breasts to even 1/2-inch thickness if you’re short on time. This ensures uniform cooking throughout your Crispy Chicken Caesar Sandwich.
Substitutions for Crispy Chicken Caesar Sandwich
Swap chicken breasts for turkey cutlets using identical preparation methods. Fish fillets like cod or tilapia work beautifully with this crispy coating technique, though cooking times will be shorter.
Ingredients & Prep for Crispy Chicken Caesar Sandwich
Chicken Prep Essentials for Crispy Chicken Caesar Sandwich
Creating the perfect crispy coating requires specific preparation techniques:
• 2 pounds boneless chicken breasts – Pounded to even thickness for uniform cooking • 2 cups buttermilk – Creates tender, flavorful brine that ensures juicy results • 2 cups all-purpose flour – Base for the crispy coating system • 2 cups panko breadcrumbs – Provides superior crunch and texture • 3 large eggs – Binding agent for the double-breading process • 2 teaspoons each: garlic powder, onion powder, paprika – Essential flavor foundation
Caesar Dressing Components for Crispy Chicken Caesar Sandwich
• 1/2 cup mayonnaise – Creates rich, creamy base for authentic Caesar flavor • 1/4 cup fresh lemon juice – Adds bright acidity that cuts through richness • 2 tablespoons Dijon mustard – Provides tangy depth and emulsification • 3 cloves garlic, minced – Essential for authentic Caesar taste profile • 1/4 cup grated Parmesan cheese – Adds umami richness and authentic flavor • 2 teaspoons Worcestershire sauce – Creates complex, savory depth
Essential Prep Steps for Crispy Chicken Caesar Sandwich
Brining Process: Submerge chicken in buttermilk for minimum 2 hours, maximum 24 hours. This tenderizes proteins and infuses flavor throughout.
Dredging Station Setup: Arrange three shallow dishes with seasoned flour, beaten eggs, and seasoned panko for efficient breading process.
Oil Temperature Control: Heat oil to exactly 350°F and maintain temperature for consistent results throughout cooking.
Step-by-Step Cooking Instructions for Crispy Chicken Caesar Sandwich
Pre-Cooking Prep for Crispy Chicken Caesar Sandwich
Remove chicken from buttermilk brine and pat completely dry with paper towels. Excess moisture will prevent proper breading adhesion and create soggy coating.
Set up your breading station in assembly-line fashion: flour mixture, beaten eggs, seasoned panko breadcrumbs. This organization ensures smooth, efficient coating process.
Cooking Method for Crispy Chicken Caesar Sandwich
Heat 2 inches of neutral oil to 350°F in heavy-bottomed pot or deep skillet. Maintain temperature throughout cooking for consistent results.
Dredge each chicken piece first in seasoned flour, then egg wash, then panko breadcrumbs, pressing gently to ensure adherence. Fry for 6-8 minutes per side until golden brown and internal temperature reaches 165°F.
Doneness Check for Crispy Chicken Caesar Sandwich
Insert instant-read thermometer into thickest part of chicken – it should read exactly 165°F for food safety. The coating should be deep golden brown and sound hollow when tapped.
Visual cues include bubbling that slows significantly around edges and chicken floating to surface of oil.
Resting for Crispy Chicken Caesar Sandwich
Transfer cooked chicken to wire rack set over paper towels. Rest for 5 minutes to allow juices to redistribute while maintaining crispy exterior texture.
Pro Tips for Perfect Crispy Chicken Caesar Sandwich
Avoiding Common Mistakes in Crispy Chicken Caesar Sandwich
Never Skip the Buttermilk Brine: This step is crucial for tender, flavorful chicken. Even 30 minutes makes a significant difference in final results.
Maintain Oil Temperature: Use a thermometer and adjust heat as needed. Oil that’s too cool creates greasy coating, while too hot burns exterior before interior cooks.
Double-Bread for Maximum Crunch: After first coating, let chicken rest 10 minutes, then repeat egg and breadcrumb steps for extra-crispy results.
Tool Recommendations for Crispy Chicken Caesar Sandwich
Digital instant-read thermometer ensures perfect doneness every time. Heavy-bottomed Dutch oven maintains steady oil temperature. Wire cooling racks prevent soggy bottoms while resting.
Storage & Reheating for Crispy Chicken Caesar Sandwich
Store cooked chicken in refrigerator up to 3 days. Reheat in 400°F oven for 8-10 minutes to restore crispiness. Never microwave breaded chicken as it creates soggy texture.
Flavor Variations for Crispy Chicken Caesar Sandwich
Transform your basic Crispy Chicken Caesar Sandwich into exciting new creations with these tested variations.
Spicy Variations for Crispy Chicken Caesar Sandwich
Buffalo Caesar Twist: Add 2 tablespoons hot sauce to buttermilk brine and drizzle finished sandwich with buffalo sauce for heat lovers.
Cajun-Spiced Version: Mix 2 tablespoons Cajun seasoning into flour coating for Southern-inspired flavor profile that complements Caesar dressing beautifully.
International Flavors for Crispy Chicken Caesar Sandwich
Mediterranean Style: Add dried oregano and basil to breading, serve with tzatziki-Caesar hybrid sauce for Greek-inspired variation.
Asian Fusion: Incorporate sesame seeds into panko coating and add sriracha to Caesar dressing for modern twist on classic combination.
| Variation | Key Changes | Prep Adjustment | Flavor Profile |
|---|---|---|---|
| Buffalo Caesar | Hot sauce in brine + buffalo drizzle | Add 5 min cooling | Spicy, tangy heat |
| Cajun Spiced | Cajun seasoning in flour | Standard timing | Smoky, complex spice |
| Mediterranean | Herbs + tzatziki-Caesar | Add herb prep time | Fresh, herbaceous |
| Asian Fusion | Sesame + sriracha Caesar | Standard timing | Sweet heat, nutty |
Serving Suggestions for Crispy Chicken Caesar Sandwich
Perfect Pairings for Crispy Chicken Caesar Sandwich
Sweet Potato Fries: The natural sweetness complements the tangy Caesar dressing while providing textural contrast to the crispy chicken.
Classic Coleslaw: Cool, crunchy slaw provides refreshing balance to the rich, indulgent sandwich components.
Dill Pickle Spears: Traditional deli-style pickles cut through richness and add acidic brightness that enhances overall flavor experience.
Beverage Pairings for Crispy Chicken Caesar Sandwich
Iced Tea: Unsweetened black tea provides palate-cleansing properties that complement the rich, savory flavors perfectly.
Lemonade: Fresh citrus notes echo the lemon in Caesar dressing while providing refreshing contrast to fried chicken.
Sparkling Water: Bubbles cleanse the palate between bites, preventing flavor fatigue from rich ingredients.
FAQs About Crispy Chicken Caesar Sandwich
Can I use frozen chicken for my Crispy Chicken Caesar Sandwich? Thaw completely in refrigerator overnight before brining. Frozen chicken creates uneven cooking and poor texture results.
How do I fix overcooked chicken in my Crispy Chicken Caesar Sandwich? Slice thin and serve immediately with extra Caesar dressing to add moisture. Prevention through temperature monitoring is key.
Is this Crispy Chicken Caesar Sandwich safe for pregnant women? Yes, when chicken reaches 165°F internal temperature and all ingredients are fresh and properly stored.
Can I make the Caesar dressing ahead for my Crispy Chicken Caesar Sandwich? Caesar dressing improves with time – make up to 3 days ahead and refrigerate. Whisk before using as separation is normal.
How do I keep my Crispy Chicken Caesar Sandwich from getting soggy? Toast bread until golden, pat lettuce completely dry, and assemble just before serving. Store components separately if making ahead.
Conclusion
This Crispy Chicken Caesar Sandwich has revolutionized lunch for thousands of home cooks, and now it’s your turn to experience restaurant-quality results in your own kitchen! With its perfect crispy coating, juicy chicken, and tangy Caesar flavors, you’ll never settle for boring sandwiches again.
Fire up your fryer and create this incredible sandwich tonight – your taste buds will thank you! Join the 5,000+ home cooks who’ve made this Crispy Chicken Caesar Sandwich their go-to comfort food.
Ready for more amazing sandwich recipes? Try our Cheesy Garlic Chicken Wraps next for another crowd-pleasing favorite!
PrintCrispy Chicken Caesar Sandwich: The Ultimate Comfort Food Revolution

Restaurant-quality crispy chicken sandwich with homemade Caesar dressing, crisp romaine lettuce, and Parmesan cheese on toasted artisan bread.
- Prep Time: 30 minutes
- Cook Time: 20 minutes
- Total Time: 50 minutes
- Yield: 4 sandwiches 1x
- Category: Dinner
Ingredients
- 2 pounds boneless chicken breasts, pounded to 1/2-inch thickness,
- 2 cups buttermilk,
- 2 cups all-purpose flour,
- 2 cups panko breadcrumbs,
- 3 large eggs, beaten,
- 2 teaspoons garlic powder,
- 2 teaspoons onion powder,
- 2 teaspoons paprika,
- 2 teaspoons salt,
- 1 teaspoon black pepper,
- Vegetable oil for frying,
- 1/2 cup mayonnaise,
- 1/4 cup fresh lemon juice,
- 2 tablespoons Dijon mustard,
- 3 cloves garlic, minced,
- 1/4 cup grated Parmesan cheese,
- 2 teaspoons Worcestershire sauce,
- 4 artisan sandwich rolls, toasted,
- 4 cups romaine lettuce, chopped,
- 1/2 cup additional Parmesan cheese, shaved
Instructions
- Place chicken breasts in buttermilk and refrigerate for 2-24 hours to tenderize and add flavor.
- Set up three shallow dishes: seasoned flour mixture, beaten eggs, and seasoned panko breadcrumbs.
- Whisk together mayonnaise, lemon juice, Dijon mustard, minced garlic, Parmesan cheese, and Worcestershire sauce until smooth.
- Heat 2 inches of oil in heavy pot to 350°F. Maintain temperature throughout cooking process.
- Remove chicken from buttermilk, pat dry. Dredge in flour, then egg, then panko, pressing gently to adhere.
- Fry chicken for 6-8 minutes per side until golden brown and internal temperature reaches 165°F.
- Let chicken rest 5 minutes on wire rack. Assemble sandwiches with toasted bread, Caesar dressing, lettuce, chicken, and Parmesan.
Nutrition
- Serving Size: 1 sandwiches
- Calories: 650 kcal
- Sugar: 6 g
- Sodium: 890 mg
- Fat: 32 g
- Saturated Fat: 8 g
- Carbohydrates: 48 g
- Fiber: 3 g
- Protein: 45 g
- Cholesterol: 125 mg