Why make this recipe
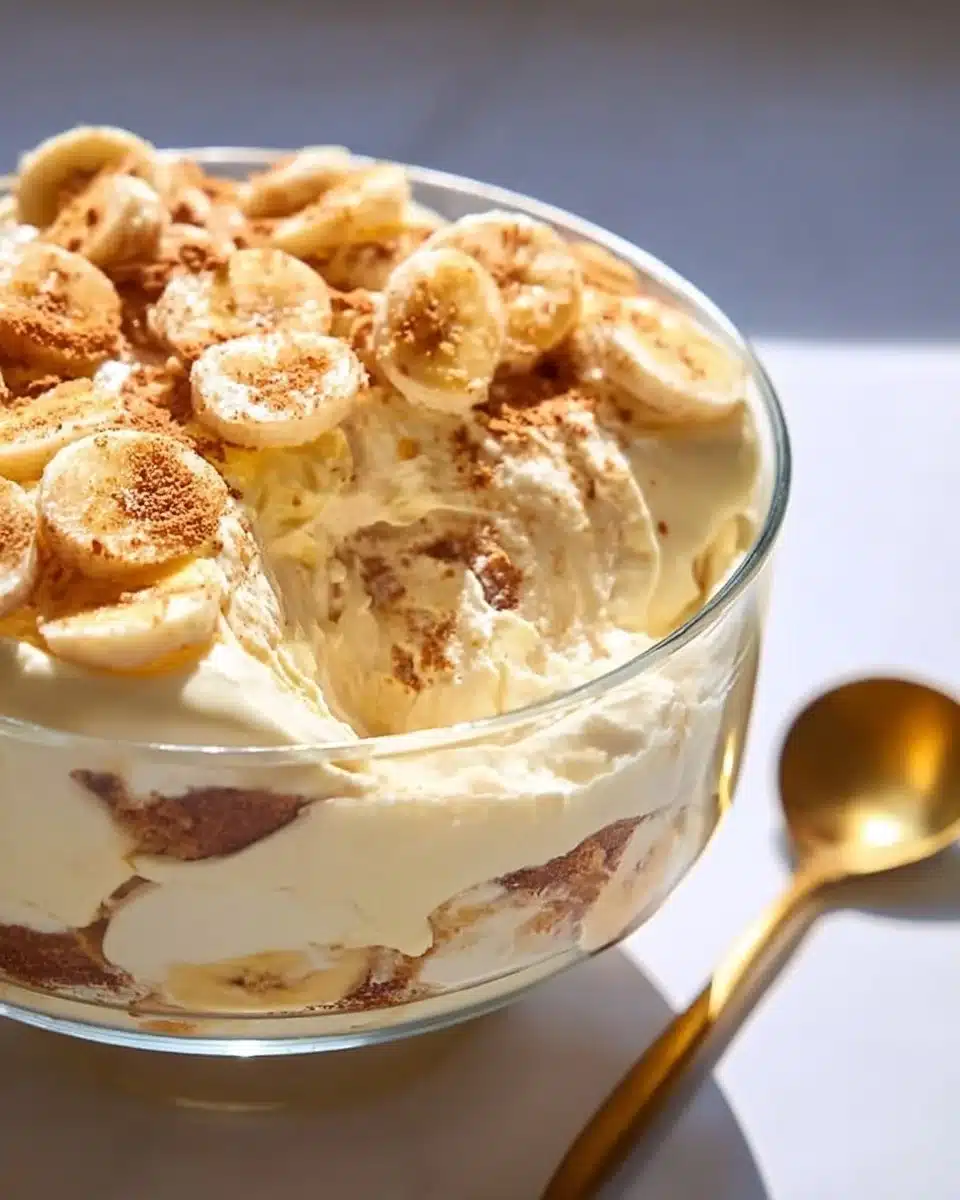
Banana pudding is a delightful dessert that holds a special place in many hearts, especially for families. It brings warmth and sweetness to any gathering and is often met with smiles and happy sighs. Making banana pudding from scratch allows you to control the ingredients, ensuring that it is fresh and full of flavor. This particular banana pudding recipe is cherished because it perfectly balances the creaminess of the pudding with the softness of the bananas and the crunch of the cookies. By preparing this dessert at home, you can create delicious memories with your loved ones.
How to make Banana Pudding
Banana pudding has a soft, creamy texture, making it a favorite for many. Here’s how you can make this classic dessert step by step.
Ingredients:
- 1 1/2 cups of milk
- 1/4 cup of granulated sugar
- 1/3 cup of cornstarch
- 1/4 teaspoon of salt
- 3 large egg yolks
- 2 tablespoons of unsalted butter
- 1 teaspoon of vanilla extract
- 4 ripe bananas
- 1 box of Nilla Wafers
- Whipped cream for topping
![image_2]
Directions:
- Prepare the Pudding Base: Begin by in a medium saucepan, whisk together the milk, sugar, cornstarch, and salt over medium heat. Stir continuously until the mixture starts to thicken, usually about 5 to 8 minutes. You want a smooth, creamy consistency.
- Add Egg Yolks: In a separate bowl, beat the egg yolks. Once the pudding mixture is thick, remove it from the heat. Gradually add a small amount of the hot pudding mixture to the egg yolks, whisking to combine. This step is vital to temper the eggs without scrambling them.
- Combine and Cook Again: Pour the egg yolk mixture back into the saucepan with the rest of the pudding. Return to low heat and keep stirring for about 2 more minutes until it thickens further. Remove from the stove, add the butter and vanilla extract, and stir until melted and smooth.
- Cool the Pudding: Let the pudding cool for a few minutes before assembling the dessert.
- Layering the Pudding: Slice the ripe bananas. In a large serving dish or individual cups, layer the pudding, sliced bananas, and Nilla Wafers. Start with a layer of pudding, then add the bananas, followed by the cookies. Repeat the layers until you run out of ingredients, finishing with a layer of pudding on top.
- Chill: Cover the dessert with plastic wrap and chill in the refrigerator for at least 4 hours, or overnight if possible. This helps the flavors meld and allows the cookies to soften.
- Serve: When ready to serve, top with whipped cream and a few banana slices for decoration.
How to serve Banana Pudding
Banana pudding is best served chilled, making it a refreshing dessert after any meal. You can serve it family-style in a large dish or in smaller individual cups for a more personalized touch. For an extra element of fun, consider adding some crushed Nilla Wafers or chocolate shavings on top of the whipped cream for garnish. A sprig of mint can also add a pop of color and freshness!
How to store Banana Pudding
Storing banana pudding is simple. Place the dessert in an airtight container or cover it tightly with plastic wrap. Make sure it is well sealed to avoid absorbing any smells from your refrigerator. Banana pudding typically stays fresh for 3 to 4 days in the fridge. However, keep in mind that the bananas will continue to brown, and the texture of the Nilla Wafers will get softer over time. To maintain the best quality, it’s best to serve it within a couple of days of making it.
Tips to make Banana Pudding
- Use Ripe Bananas: For the best flavor, choose bananas that are just ripe. They should be yellow with a few brown spots, which indicates sweetness.
- Don’t Skip the Chilling: Allow the pudding to chill properly. This not only helps the flavors blend but also improves the overall texture of the dessert.
- Whip the Cream: If you prefer a richer topping, consider whipping your heavy cream with a bit of sugar and vanilla before adding it to the top of your pudding.
- Layer Carefully: When layering the pudding, take care not to smash the cookies. This keeps the layers distinct and visually appealing.
Variation
If you want to switch up your banana pudding, there are a few fun variations you can try. You can mix in different fruits, such as strawberries or raspberries, to blend with the bananas. Alternatively, consider adding a layer of crushed chocolate cookies instead of Nilla Wafers for a chocolate banana pudding experience. Another creative twist is incorporating peanut butter into the pudding for a rich and nutty flavor.
FAQs
1. Can I use instant pudding instead of homemade?
Yes, you can substitute instant pudding for the homemade version. Just follow the instructions on the package for the instant pudding mix and then layer it with the bananas and cookies as per the recipe.
2. How ripe should the bananas be?
The ideal bananas should be slightly overripe, with a few brown spots. This enhances the sweetness and flavor in your pudding.
3. Can I freeze banana pudding?
Freezing banana pudding is not recommended because bananas tend to become mushy once thawed. However, you can freeze the pudding base and make fresh layers of bananas and cookies when you’re ready to serve.
4. What if I don’t have Nilla Wafers?
No problem! You can use any kind of vanilla cookies or even graham crackers as a substitute for Nilla Wafers. Just keep in mind that the flavor and texture may vary slightly.
5. Can I make this recipe gluten-free?
Absolutely! You can find gluten-free vanilla wafers or cookies that work as a perfect substitute for traditional ones. Just ensure that all other ingredients used are also gluten-free.
Making this banana pudding is a delightful way to share a classic dessert with your family. Enjoy the process, and happy cooking!
PrintClassic Banana Pudding
A delightful banana pudding that combines creamy pudding, ripe bananas, and crunchy cookies for a nostalgic dessert.
- Prep Time: 15 minutes
- Cook Time: 15 minutes
- Total Time: 240 minutes
- Yield: 8 servings 1x
- Category: Dessert
- Method: Chilling
- Cuisine: American
- Diet: Vegetarian
Ingredients
- 1 1/2 cups of milk
- 1/4 cup of granulated sugar
- 1/3 cup of cornstarch
- 1/4 teaspoon of salt
- 3 large egg yolks
- 2 tablespoons of unsalted butter
- 1 teaspoon of vanilla extract
- 4 ripe bananas
- 1 box of Nilla Wafers
- Whipped cream for topping
Instructions
- Prepare the pudding base: In a medium saucepan, whisk together the milk, sugar, cornstarch, and salt over medium heat. Stir continuously until thickened, about 5 to 8 minutes.
- Add egg yolks: In a separate bowl, beat the egg yolks. Gradually add some of the hot pudding mixture to temper the eggs.
- Combine and cook again: Pour the egg yolk mixture into the saucepan with the rest of the pudding and return to low heat, stirring for about 2 more minutes until thickened.
- Cool the pudding: Let it cool for a few minutes.
- Layer the pudding: In a large dish, layer pudding, sliced bananas, and Nilla Wafers, repeat until ingredients are used up.
- Chill: Cover and chill in the refrigerator for at least 4 hours, preferably overnight.
- Serve: Top with whipped cream and banana slices before serving.
Notes
For best flavor, use ripe bananas. Consider adding crushed Nilla Wafers or chocolate shavings on top when serving.
Nutrition
- Serving Size: 1 serving
- Calories: 250
- Sugar: 15g
- Sodium: 150mg
- Fat: 8g
- Saturated Fat: 4g
- Unsaturated Fat: 4g
- Trans Fat: 0g
- Carbohydrates: 40g
- Fiber: 2g
- Protein: 4g
- Cholesterol: 100mg
Keywords: banana pudding, dessert, classic recipe, creamy pudding