Why Make This Recipe
Classic Cherry Pie is an all-time favorite for many dessert lovers. Its appeal lies in the balance of sweet and tart flavors, complemented by a flaky, buttery crust that adds an irresistible texture. This pie not only satisfies your sweet tooth but also gives you the joy of baking something from scratch. With fresh cherries, you can create a treat that reminds you of summer all year long. Whether it’s for a holiday gathering, a family dinner, or simply a weekend treat, making a Classic Cherry Pie brings warmth and happiness to the table.
How to Make Classic Cherry Pie
Ingredients:
Crust:
- 2 1/2 cups (313 g) all-purpose flour
- 1/2 tablespoon granulated sugar
- 1/2 teaspoon sea salt
- 2 sticks of cold unsalted butter
- 7 tablespoons ice water
Filling:
- 6 cups sweet cherries, pitted (2 1/2 pounds)
- 2 tablespoons lemon juice
- 1/8 teaspoon salt
- 3/4 cup granulated sugar (if using sour cherries, can increase to 1 cup)
- 5 tablespoons cornstarch
- 1/2 teaspoon cinnamon
- 1 tablespoon unsalted butter
- 1 teaspoon vanilla extract
To Finish:
- 1 egg
- 1 tablespoon milk
- 1 tablespoon coarse sugar
Directions:
Filling:
Start by cutting about one-third of your pitted cherries in half. This will help to create a mix of textures.
In a pot, combine both the whole and halved cherries, lemon juice, sugar, and salt. Heat it on medium until it begins to lightly bubble, stirring carefully to avoid burning the mixture. This should take about 5 minutes.
Once bubbling, add in the cinnamon and cornstarch. Mix until these are evenly distributed. Simmer this on low heat for about 3 to 5 minutes. The mixture should thicken and coat the cherries.
At this point, the cherries should be softened. Taste your filling and adjust as necessary. If you prefer it more acidic, add a bit more lemon juice. If it needs sweetness, add some extra sugar.
If the mixture seems too thin or juicy, continue to simmer it for another couple of minutes until it thickens nicely.
Once thickened, take the pot off the heat and add in the unsalted butter and vanilla extract. Stir until the butter has melted and all ingredients are mixed well.
Transfer your cherry filling into a bowl and let it cool slightly. You can cover it with plastic wrap or place it in a Tupperware for long-term storage, where it can last up to 3 days in the fridge.
Crust:
In a mixing bowl, add flour, granulated sugar, and salt. Whisk these ingredients together until they are well combined.
Take your cold unsalted butter, cut it into small cubes, and add it to your dry ingredients. Use a pastry cutter to blend the butter into the flour until you reach a coarse crumb-like texture. If you prefer, you can do this with a food processor by pulsing the ingredients together a few times.
Once mixed, pour in your ice water. Stir with a wooden spoon until you see moist clumps forming. If you are using a food processor, pulse until small balls of dough begin to form.
Use your fingers to press the dough together into a large ball. You want it to be dry and crumbly but still hold together. If it doesn’t hold well, you may add ice-cold water, one tablespoon at a time—but be cautious not to make your dough sticky.
Split the dough into two halves, shaping each half into a disk. Cover both disks with plastic wrap and place them in the fridge for at least an hour before rolling out. If you’re planning ahead, you can leave it in the fridge overnight.
When you’re ready to roll out your crusts, take them out of the fridge. On a lightly floured surface, roll out the first disk into a rough circle that’s about 13 inches in width. This will be your bottom crust. Gently place it into a clean 9-inch pie pan.
Roll out the second disk into a circle about 12 inches wide. Cut this rolled-out circle into 10 strips of dough—5 horizontal and 5 vertical.
Construct:
Preheat your oven to 425°F (220°C).
Place the pie pan lined with your bottom crust on a clean surface. The edges may hang over; that’s perfectly fine. Pour your cooled cherry filling into the pie crust, smoothing it out evenly.
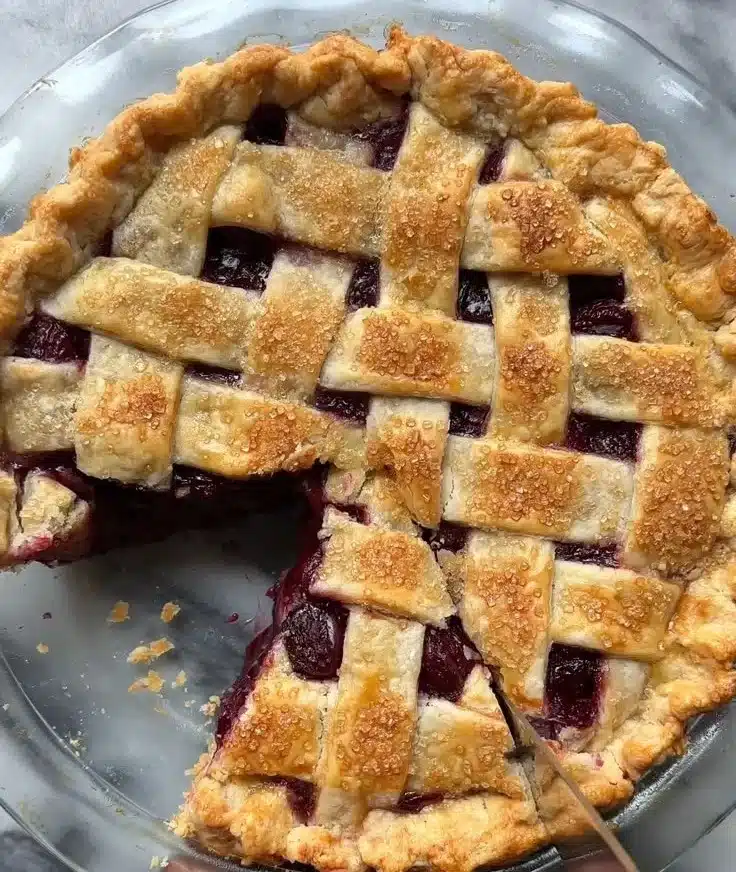
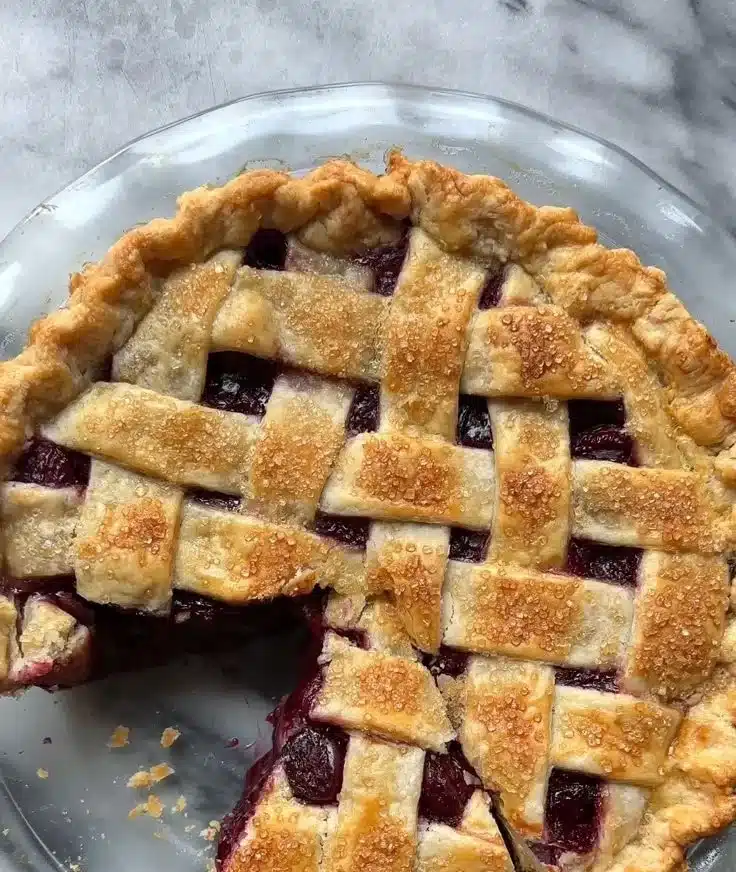
Now it’s time to create a beautiful lattice top. Start with the vertical strips of dough, laying 5 strips over the pie. Then, one at a time, add in the horizontal strips. Lift every other vertical strip to weave each horizontal one over and under, forming a basket-weave pattern.
After constructing the lattice, tuck in any excess dough hanging over the edge of the pie pan. Pinch the edges together to seal and create a decorative edge.
Bake your pie in the preheated oven for 20 minutes. After that, reduce the temperature to 375°F (190°C) and continue baking for an additional 30 to 40 minutes.
Keep an eye on the crust. If it starts to brown too much, you can shield it with aluminum foil.
You’ll know your cherry pie is done when the crust is golden brown and the filling is bubbly.
How to Serve Classic Cherry Pie
When serving your Classic Cherry Pie, allow it to cool for at least 15-20 minutes before slicing. This cooling time allows the filling to set well, making it easier to cut neat slices. You can serve it warm or at room temperature. A scoop of vanilla ice cream or a dollop of whipped cream adds a delightful touch on top, contrasting the tartness of the cherries beautifully.
How to Store Classic Cherry Pie
To store your Classic Cherry Pie, let it cool completely after baking. Once cooled, cover it loosely with plastic wrap or aluminum foil. It can be kept at room temperature for up to two days, or in the refrigerator for up to a week. If you want to keep it longer, you can freeze it. Wrap the pie tightly in plastic wrap and then in aluminum foil. Properly wrapped, it can be stored in the freezer for up to three months. When you’re ready to eat it, thaw and reheat in the oven at 350°F (175°C) for about 15-20 minutes, or until warmed through.
Tips to Make Classic Cherry Pie
- Use Fresh Cherries: While frozen cherries can work in a pinch, fresh ripe cherries provide the best flavor for this pie.
- Taste Testing: Always taste your filling before putting it in the pie crust. Adjust the sweetness and acidity to your personal preference.
- Prevent a Soggy Bottom: Pre-bake your bottom crust for 5-10 minutes before adding the filling to create a sturdier base.
- Decorative Edges: Don’t be afraid to get creative with the edges of your pie. A fork can give it a beautiful crimped design.
- Make it Ahead: Pie crust dough can be made ahead of time and stored in the fridge or freezer. This reduces your workload when you’re ready to bake the pie.
Variations
- Sour Cherry Pie: If you prefer a more tart filling, you can use sour cherries instead of sweet ones. Just remember to adjust the sugar content accordingly.
- Spicy Notes: Add a dash of nutmeg or allspice to your filling for a different twist.
- Almond Flavor: Add a teaspoon of almond extract to the filling for a nutty twist that pairs well with cherries.
FAQs
Can I use frozen cherries for this recipe?
Yes, you can use frozen cherries if fresh ones are unavailable. Just make sure to thaw them and drain any excess liquid before using them in your filling.
How do I know when the pie is done baking?
Your pie is done when the crust is a golden-brown color, and you can see the filling bubbling. If the crust is browning too quickly, cover it with tin foil to prevent burning.
Can I make the pie crust in advance?
Absolutely! You can prepare the pie crust up to two days in advance and keep it in the fridge or even freeze it for later use. Just make sure to let it chill in the fridge before rolling it out.
PrintClassic Cherry Pie

A delightful balance of sweet and tart flavors with a flaky buttery crust, perfect for any occasion.
- Prep Time: 30 minutes
- Cook Time: 60 minutes
- Total Time: 90 minutes
- Yield: 8 servings 1x
- Category: Dessert
- Method: Baking
- Cuisine: American
- Diet: Vegetarian
Ingredients
- 2 1/2 cups (313 g) all-purpose flour
- 1/2 tablespoon granulated sugar
- 1/2 teaspoon sea salt
- 2 sticks of cold unsalted butter
- 7 tablespoons ice water
- 6 cups sweet cherries, pitted (2 1/2 pounds)
- 2 tablespoons lemon juice
- 1/8 teaspoon salt
- 3/4 cup granulated sugar (or up to 1 cup for sour cherries)
- 5 tablespoons cornstarch
- 1/2 teaspoon cinnamon
- 1 tablespoon unsalted butter
- 1 teaspoon vanilla extract
- 1 egg
- 1 tablespoon milk
- 1 tablespoon coarse sugar
Instructions
- Start by cutting about one-third of your pitted cherries in half.
- Combine both the whole and halved cherries with lemon juice, sugar, and salt in a pot. Heat on medium until it begins to lightly bubble.
- Add in the cinnamon and cornstarch once bubbling, and mix until evenly distributed.
- Simmer on low heat for about 3 to 5 minutes until thickened.
- Taste the filling and adjust acidity or sweetness as necessary.
- If the mixture seems too thin, continue to simmer for a couple more minutes.
- Take the pot off the heat and stir in unsalted butter and vanilla until melted.
- Transfer your filling into a bowl and let it cool slightly.
- In a mixing bowl, add flour, sugar, and salt. Whisk together.
- Cut cold unsalted butter into small cubes and blend into dry ingredients until crumb-like.
- Add ice water and stir until moist clumps form.
- Press dough together into a ball and split into two disks. Refrigerate before rolling out.
- Roll out the first disk into a rough circle, and place it in a pie pan.
- Roll out the second disk into strips for a lattice top.
- Preheat your oven to 425°F (220°C).
- Pour cooled cherry filling into the bottom crust.
- Create a lattice top with the dough strips.
- Bake for 20 minutes, then reduce temperature to 375°F (190°C) for an additional 30 to 40 minutes.
- Serve warm or at room temperature after cooling 15-20 minutes.
Notes
For a flakier crust, be quick in handling the dough and keep ingredients cold.
Nutrition
- Serving Size: 1 slice
- Calories: 400
- Sugar: 30g
- Sodium: 200mg
- Fat: 20g
- Saturated Fat: 10g
- Unsaturated Fat: 8g
- Trans Fat: 0g
- Carbohydrates: 50g
- Fiber: 3g
- Protein: 4g
- Cholesterol: 40mg
Keywords: cherry pie, dessert, summer, baking