Hi, I’m Sam, and if you’ve ever found yourself staring at a box of cake mix wondering how to make dessert feel special without spending hours in the kitchen, you’re in the right place. The Easy Red Velvet Cookie Cake is my answer to that question a stunning, Instagram-worthy dessert that delivers big flavor with minimal effort. At dishfoody.com, I believe cooking should bring joy, not stress, and this recipe embodies that philosophy perfectly.
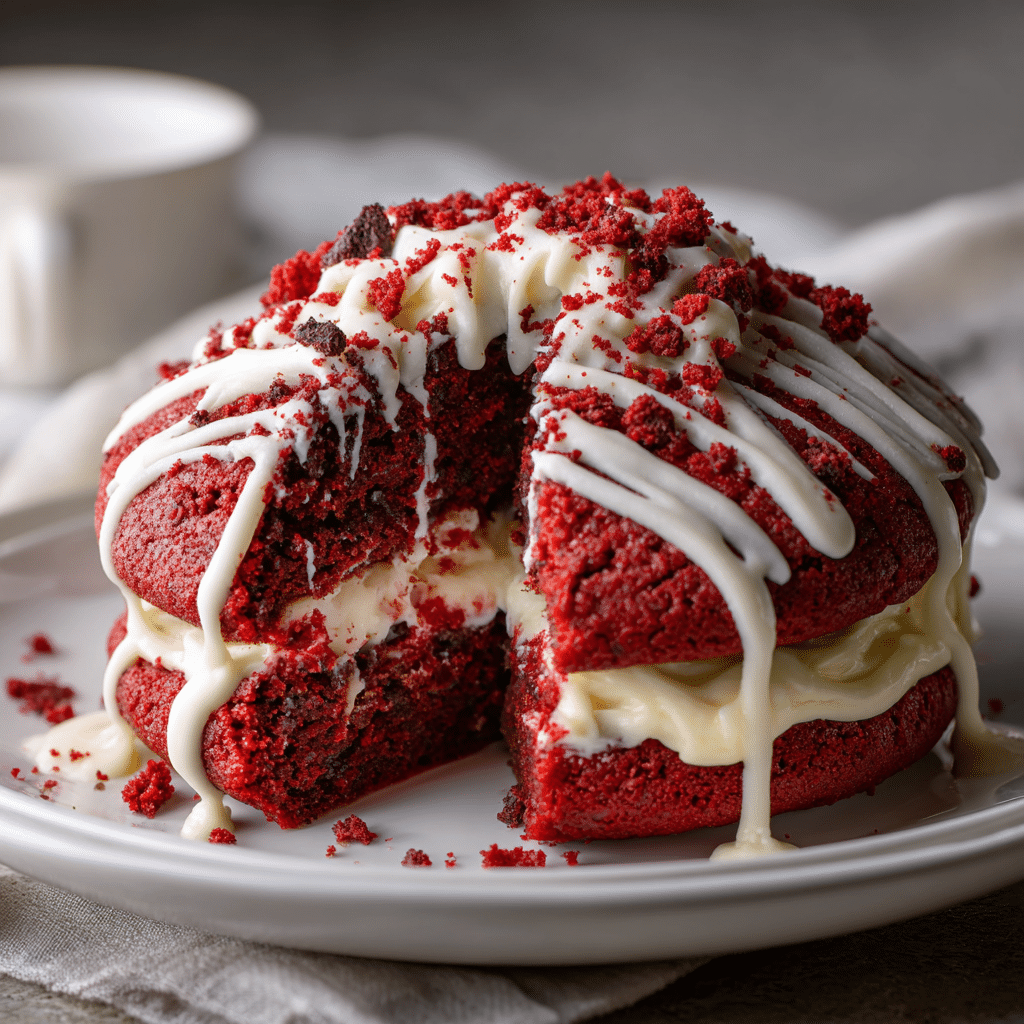
This dreamy red velvet cookie cake combines the best of both worlds: the soft, chewy texture of cookies with the rich, velvety flavor of traditional red velvet cake. It’s frosted with cream cheese icing that melts on your tongue and looks absolutely gorgeous on any table. Whether you’re celebrating a birthday, Valentine’s Day, or just Tuesday night, this dessert will make you look like a baking superstar.
Over the years of running Dishfoody, I’ve tested countless dessert variations, and this red velvet cookie cake has become one of my most-requested recipes. The beauty is in its simplicity—you don’t need professional baking skills, just a few quality ingredients and about 30 minutes of active time.
In this guide, I’ll walk you through everything: why this red velvet cookie cake works so beautifully, how to choose the right ingredients, step-by-step instructions that anyone can follow, pro tips to avoid common mistakes, creative flavor variations, and answers to your most pressing questions. Let’s dive into this delicious journey together.
Why This Easy Red Velvet Cookie Cake Recipe Works
This Easy Red Velvet Cookie Cake has become a Dishfoody favorite for three compelling reasons: flavor, convenience, and versatility. Unlike traditional layer cakes that require precise leveling and complex assembly, this cookie cake delivers the same beloved red velvet experience in a fraction of the time.
Uses pantry-friendly ingredients you probably already have: No need for specialty items or expensive extracts. Basic baking staples like flour, cocoa powder, butter, and cream cheese create magic when combined correctly.
Ready in under an hour from start to finish: From mixing your dough to pulling a beautiful red velvet cookie cake from the oven, you’re looking at minimal time investment. The cream cheese frosting comes together in just 5 minutes while your cookie cools.
Perfect for celebrations, weeknight treats, or meal prep desserts: This red velvet cookie cake adapts to any occasion. Bake it in a heart shape for Valentine’s Day, cut it into wedges for birthday parties, or slice it into squares for lunchbox treats throughout the week.
The genius of this recipe lies in its forgiving nature. Cookie cakes are naturally more tolerant of slight variations in baking time than traditional cakes, making them ideal for beginners or busy home cooks who want reliable results every single time.
Choosing the Right Ingredients for Red Velvet Cookie Cake
The quality of your red velvet cookie cake depends entirely on selecting the right ingredients. Let me walk you through the critical components that make this dessert truly shine.
Essential Ingredients for Red Velvet Cookie Cake Success
The foundation of any great red velvet cookie cake starts with all-purpose flour that provides structure without making your dessert tough. I always recommend measuring flour by spooning it into your measuring cup and leveling it off never scooping directly from the bag, which compacts the flour and throws off your ratios.
Unsweetened cocoa powder gives red velvet its subtle chocolate undertone. Dutch-processed cocoa creates a smoother flavor, but natural cocoa works beautifully too. The amount is deliberately small just enough to complement the vanilla notes without overwhelming them.
High-quality food coloring makes the difference between a vibrant red velvet cookie cake and a muddy brown one. Gel food coloring provides the most intense color with less liquid, which helps maintain the perfect cookie texture.
Red Velvet Cookie Cake Ingredient Quality Tips
When shopping for your red velvet cookie cake ingredients, freshness matters tremendously. Check the expiration dates on your baking powder and baking soda old leavening agents won’t give you the rise and texture you need.
Butter should be unsalted and at room temperature, soft enough to leave an indent when pressed but not melted or greasy. This consistency creates the ideal texture in your red velvet cookie cake dough.
For the cream cheese frosting, always choose full-fat brick-style cream cheese, never the spreadable kind in tubs. The spreadable versions contain stabilizers that prevent proper frosting consistency.
Red Velvet Cookie Cake Ingredient Substitutions
If you need to make substitutions in your red velvet cookie cake, here are my tested alternatives: swap regular granulated sugar for coconut sugar (though your color will be darker), replace half the butter with Greek yogurt for a lighter version, or use gluten-free all-purpose flour blend in a 1:1 ratio for dietary needs.
For those avoiding food coloring, you can create a naturally tinted red velvet cookie cake using beet powder, though the color will be more muted and the flavor slightly earthier. Use about 2 tablespoons of beet powder in place of the food coloring.
Ingredients & Prep for Red Velvet Cookie Cake
Getting your red velvet cookie cake ingredients properly measured and prepared sets you up for baking success. Let’s break down exactly what you need and how to prep it.
Red Velvet Cookie Cake Dough Essentials
For the cookie base:
- 2½ cups all-purpose flour
- 2 tablespoons unsweetened cocoa powder
- 1 teaspoon baking soda
- ½ teaspoon salt
- 1 cup unsalted butter, room temperature
- 1½ cups granulated sugar
- 2 large eggs, room temperature
- 1 tablespoon red gel food coloring
- 2 teaspoons vanilla extract
- 1 teaspoon white vinegar
For the cream cheese frosting:
- 8 oz cream cheese, room temperature
- ¼ cup unsalted butter, room temperature
- 2½ cups powdered sugar, sifted
- 1 teaspoon vanilla extract
- 2 tablespoons heavy cream
Red Velvet Cookie Cake Preparation Steps
Before you begin mixing your red velvet cookie cake, bring your butter, eggs, and cream cheese to room temperature. This typically takes 30-45 minutes on the counter. Cold ingredients won’t incorporate properly and will create a dense, uneven texture.
Preheat your oven to 350°F and line a 12-inch pizza pan or cake pan with parchment paper. Lightly grease the parchment to ensure your red velvet cookie cake releases easily after baking.
Sift together your dry ingredients flour, cocoa powder, baking soda, and salt—in a medium bowl. This simple step eliminates lumps and ensures even distribution of leavening agents throughout your red velvet cookie cake.
Red Velvet Cookie Cake Mixing Instructions
In your stand mixer or large bowl with a hand mixer, cream the butter and sugar together for 3-4 minutes until light and fluffy. This incorporates air that helps create a tender red velvet cookie cake texture.
Add eggs one at a time, beating well after each addition. Mix in the food coloring, vanilla extract, and vinegar until the mixture becomes a vibrant red and looks completely uniform.
Gradually add your dry ingredients in three additions, mixing on low speed just until no flour streaks remain. Overmixing develops gluten and creates a tough red velvet cookie cake, so stop as soon as everything is combined.
Step-by-Step Cooking Instructions for Red Velvet Cookie Cake
Now comes the fun part transforming your prepared ingredients into a gorgeous red velvet cookie cake that will impress everyone who sees it.
Pre-Cooking Prep for Red Velvet Cookie Cake
Transfer your red velvet cookie cake dough onto your prepared pan. Using your hands or a spatula, gently press and spread the dough from the center outward, creating an even layer that reaches about ½ inch from the pan edges. The dough will spread slightly during baking, so leave that small border.
If you’re making a decorative red velvet cookie cake, now is the time to create patterns. Use the back of a spoon to create swirls, or press the tines of a fork around the edges for a classic look.
For the most even baking, check that your red velvet cookie cake dough layer has consistent thickness throughout. Thicker areas in the center will remain undercooked while thinner edges burn.
Cooking Method for Red Velvet Cookie Cake
Place your red velvet cookie cake in the preheated 350°F oven on the center rack. Bake for 20-25 minutes, checking at the 20-minute mark. The cookie cake should look set around the edges with a slightly soft center it will continue cooking as it cools.
Rotate your pan halfway through baking to ensure even browning. Ovens have hot spots, and this simple step prevents one side of your red velvet cookie cake from overbaking.
Watch the edges carefully during the final minutes. When they turn a deeper red and begin pulling away slightly from the pan sides, your red velvet cookie cake is nearly done.
Doneness Check for Red Velvet Cookie Cake
The best way to test your red velvet cookie cake is the toothpick method. Insert a toothpick about 2 inches from the center it should come out with a few moist crumbs attached, not wet batter. If it comes out completely clean, you’ve slightly overbaked, but the cookie cake will still be delicious.
Another indicator is the touch test. Gently press the center of your red velvet cookie cake with your finger. It should spring back slowly, leaving a slight indent. If it feels liquid or jiggles significantly, give it another 2-3 minutes.
The edges of a perfectly baked red velvet cookie cake will be firm and set, while the center maintains a softer texture that firms up during cooling.
Resting Your Red Velvet Cookie Cake
Once you remove your red velvet cookie cake from the oven, resist the urge to frost it immediately. Let it cool in the pan for 10 minutes, then transfer it to a wire rack to cool completely this takes about 30-40 minutes.
Cooling is crucial for your red velvet cookie cake. The residual heat continues to cook the center, completing the texture transformation from soft dough to perfect cookie consistency. Frosting a warm cookie cake will cause your cream cheese frosting to melt and slide off.
While your red velvet cookie cake cools, prepare your frosting. The timing works perfectly by the time you’ve whipped up the cream cheese topping, your cookie base will be ready to decorate.
Pro Tips for Perfect Red Velvet Cookie Cake
After making countless red velvet cookie cakes at Dishfoody, I’ve learned the secrets that separate good from absolutely spectacular. These tips will help you avoid common pitfalls and achieve bakery-quality results.
Avoiding Common Red Velvet Cookie Cake Mistakes
The number one issue I see with homemade red velvet cookie cake is overbaking. Remember that cookie cakes continue firming as they cool, so what feels slightly underdone in the oven will be perfect at room temperature. Set your timer for the minimum time and check frequently during the final minutes.
Don’t skip the vinegar in your red velvet cookie cake recipe. This ingredient reacts with the baking soda to create tenderness and helps activate the red color in your food coloring. Without it, your cookie cake will have a different texture and duller appearance.
Room temperature ingredients matter more than you think. Cold butter won’t cream properly, and cold eggs can cause your red velvet cookie cake batter to curdle, creating an uneven texture in the final product.
Red Velvet Cookie Cake Tool Recommendations
Invest in an oven thermometer to verify your actual oven temperature. Most home ovens run 15-25 degrees off from their display, which can make or break your red velvet cookie cake. This $10 tool has saved countless batches of my desserts.
A stand mixer makes preparation easier, but a quality hand mixer works perfectly for red velvet cookie cake. The key is mixing thoroughly at each stage without overworking the dough.
Parchment paper is non-negotiable for easy removal of your red velvet cookie cake. Trying to flip it out of a greased pan often results in broken edges and frustration.
Storage & Reheating for Red Velvet Cookie Cake
Store your frosted red velvet cookie cake covered in the refrigerator for up to 5 days. The cream cheese frosting requires refrigeration, but bring slices to room temperature for 15 minutes before serving for the best texture and flavor.
For longer storage, freeze your unfrosted red velvet cookie cake wrapped tightly in plastic wrap, then aluminum foil, for up to 3 months. Thaw overnight in the refrigerator, then bring to room temperature and frost before serving.
Individual slices of frosted red velvet cookie cake freeze beautifully too. Wrap each piece separately and freeze in an airtight container. These make perfect grab-and-go treats—just thaw for 20 minutes at room temperature.
For more stunning dessert ideas that are just as impressive, check out my full collection of desserts at dishfoody.com where you’ll find everything from elegant tarts to comfort classics.
Flavor Variations for Red Velvet Cookie Cake
One of the best things about this red velvet cookie cake base is how easily it adapts to different flavor profiles and occasions. Let me share some of my favorite variations that have become Dishfoody reader favorites.
Seasonal Red Velvet Cookie Cake Twists
For a Valentine’s Day special red velvet cookie cake, fold ½ cup of mini white chocolate chips into your dough before baking. The sweet pockets of melted chocolate create little flavor surprises in every bite.
Create a festive holiday red velvet cookie cake by adding ½ teaspoon of peppermint extract to your dough and crushing candy canes over the frosted surface. The combination of red velvet and mint is absolutely magical for Christmas gatherings.
During fall, transform your red velvet cookie cake with warm spices. Add ½ teaspoon of cinnamon and ¼ teaspoon of nutmeg to your dry ingredients, then top with cream cheese frosting swirled with caramel sauce.
Dietary-Friendly Red Velvet Cookie Cake Options
For a gluten-free red velvet cookie cake, substitute the all-purpose flour with a high-quality gluten-free baking blend that contains xanthan gum. The texture will be nearly identical to the original version.
Create a reduced-sugar red velvet cookie cake by replacing half the granulated sugar with a sugar substitute like erythritol. The texture will be slightly less tender but still delicious.
For dairy-sensitive friends, make a vegan red velvet cookie cake using plant-based butter and replacing eggs with flax eggs (2 tablespoons ground flaxseed mixed with 6 tablespoons water). Use vegan cream cheese for the frosting.
Creative Red Velvet Cookie Cake Decorating Ideas
| Variation | Added Ingredients | Frosting Modification | Best For |
|---|---|---|---|
| Chocolate Lover’s | ½ cup chocolate chips mixed into dough | Add 2 tbsp cocoa powder to frosting | Chocolate enthusiasts |
| Cookies & Cream | ½ cup crushed sandwich cookies | Mix crushed cookies into frosting | Kids’ parties |
| Cheesecake Style | Add 4 oz softened cream cheese to dough | Double the frosting recipe | Special occasions |
| Nutty Delight | ½ cup chopped pecans or walnuts | Toast nuts and sprinkle on top | Texture lovers |
| Espresso Red Velvet | 1 tbsp instant espresso powder | Add 1 tsp espresso powder to frosting | Coffee fans |
| Salted Caramel | Drizzle caramel before baking | Add 2 tbsp caramel to frosting | Sophisticated palates |
Ready to explore more creative recipe ideas? Discover beautiful appetizer presentations like my Heart-Shaped Bruschetta Appetizers at dishfoody.com that pair wonderfully with dessert for a complete celebration menu.
Serving Suggestions for Red Velvet Cookie Cake
How you serve your red velvet cookie cake can elevate it from delicious to absolutely memorable. Here are my favorite ways to present this stunning dessert.
The classic approach is to cut your red velvet cookie cake into wedges like a traditional cake. Use a sharp knife dipped in hot water and wiped clean between cuts for the cleanest edges. Arrange wedges on a platter with fresh berries scattered around for a beautiful presentation.
For casual gatherings, slice your red velvet cookie cake into squares or rectangles. This method creates more servings and makes it easier for guests to grab a piece without needing plates and forks.
Create an impressive dessert table centerpiece by leaving your red velvet cookie cake whole on a cake stand. Surround it with white chocolate shavings, fresh raspberries, and mint leaves for a professional bakery look.
Pair your red velvet cookie cake with vanilla ice cream for an indulgent treat. The cold, creamy ice cream against the soft, rich cookie creates a temperature and texture contrast that’s absolutely divine.
For brunch gatherings, serve smaller portions of red velvet cookie cake alongside fresh fruit salad and coffee. The slight chocolate notes complement morning coffee beautifully.
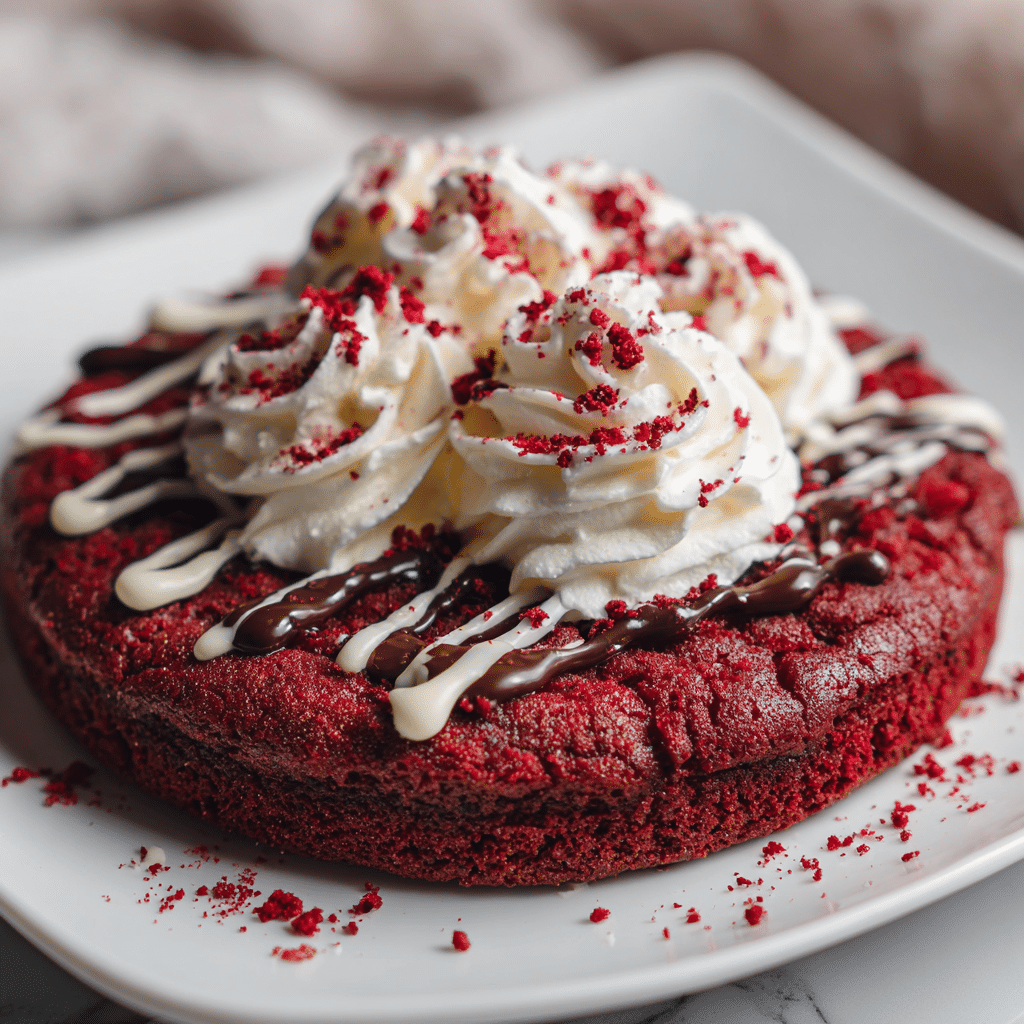
Create individual dessert plates by placing a wedge of red velvet cookie cake slightly off-center, adding a dollop of whipped cream, a few fresh berries, and a light drizzle of raspberry sauce for an elegant restaurant-style presentation.
Craving more recipe inspiration that brings people together? Follow my Pinterest boards at www.pinterest.com where I share hundreds of creative ideas, cooking hacks, and beautiful food photography that will spark your next kitchen adventure!
FAQs About Red Velvet Cookie Cake
Over the years, I’ve received countless questions about making the perfect red velvet cookie cake. Here are the answers to the most common concerns.
Can I make red velvet cookie cake ahead of time?
Absolutely! Bake your red velvet cookie cake up to 2 days in advance, store it unfrosted in an airtight container at room temperature, and frost it a few hours before serving. This actually allows the flavors to develop and deepen, making it even more delicious.
Why did my red velvet cookie cake turn out dry?
The most common cause of dry red velvet cookie cake is overbaking. Cookie cakes should look slightly underdone in the center when you remove them from the oven. They firm up as they cool. Also check that you’re measuring flour correctly too much flour creates dryness.
Can I use natural food coloring in my red velvet cookie cake?
Yes, but understand that natural red food coloring produces a more muted burgundy or brownish-red color compared to traditional gel coloring. Beet powder is the best natural option use 2-3 tablespoons for a deeper color.
How do I prevent my cream cheese frosting from being too soft on my red velvet cookie cake?
Make sure your cream cheese and butter are cool room temperature, not warm. If your frosting seems too soft, refrigerate it for 15-20 minutes before spreading on your red velvet cookie cake. Adding an extra ½ cup of powdered sugar will also help firm it up.
Can I freeze leftover red velvet cookie cake?
Yes! Wrap individual slices tightly in plastic wrap, then place them in a freezer bag. Frozen red velvet cookie cake keeps for up to 3 months. Thaw slices in the refrigerator overnight or at room temperature for 30 minutes before enjoying.
My red velvet cookie cake spread too much during baking. What happened?
This usually means your butter was too soft or melted when you mixed the dough. Butter should be soft enough to leave an indent when pressed, but still hold its shape. Also, make sure you’re not adding extra liquid ingredients beyond what the recipe calls for.
Is red velvet cookie cake safe for people with dietary restrictions?
The traditional recipe contains gluten, dairy, and eggs, but it’s easily adaptable. Use certified gluten-free flour blends, dairy-free butter and cream cheese alternatives, and flax or chia eggs for an allergy-friendly version that still tastes amazing.
How can I make my red velvet cookie cake more chocolatey?
While authentic red velvet has subtle chocolate notes, you can increase the cocoa powder to ¼ cup and add ½ cup of chocolate chips for a more pronounced chocolate flavor. Just know this moves away from traditional red velvet toward a chocolate cookie cake.
Make This Easy Red Velvet Cookie Cake Tonight
There’s something truly special about pulling a beautiful red velvet cookie cake from your oven the vibrant color, the incredible aroma, the anticipation of that first bite. This recipe brings together everything I love about cooking: it’s accessible, reliable, and creates genuine moments of joy around the table.
PrintEasy Red Velvet Cookie Cake: How to Make This Dreamy Dessert

A soft, chewy red velvet cookie cake with rich cocoa flavor and vibrant color, topped with a smooth cream cheese frosting an easy, crowd-pleasing dessert perfect for celebrations.
- Prep Time: 15 mins
- Cook Time: 25 mins
- Total Time: 40 mins
- Yield: 8 slices 1x
- Category: Dessert
- Method: Baking
- Cuisine: American
- Diet: Vegetarian
Ingredients
- 1/2 cup unsalted butter, melted
- 3/4 cup brown sugar
- 1/4 cup granulated sugar
- 1 large egg
- 1 tsp vanilla extract
- 1 tbsp red food coloring
- 1 1/2 cups all-purpose flour
- 2 tbsp cocoa powder
- 1/2 tsp baking soda
- 1/4 tsp salt
- 1 cup white chocolate chips
- 4 oz cream cheese, softened
- 2 tbsp butter, softened
- 1 cup powdered sugar
- 1/2 tsp vanilla extract
Instructions
- 1. Preheat oven to 350°F (175°C) and grease a 9-inch round pan.
- 2. In a bowl, whisk melted butter, brown sugar, and granulated sugar until smooth.
- 3. Add egg, vanilla, and red food coloring; mix well.
- 4. In another bowl, whisk flour, cocoa powder, baking soda, and salt.
- 5. Gradually mix dry ingredients into wet ingredients until just combined.
- 6. Fold in white chocolate chips.
- 7. Press dough evenly into prepared pan.
- 8. Bake for 20–25 minutes until edges are set and center is slightly soft.
- 9. Cool completely in pan.
- 10. Beat cream cheese, butter, powdered sugar, and vanilla until smooth.
- 11. Spread frosting over cooled cookie cake, slice, and serve.
Notes
- Do not overbake to keep the cookie cake soft and chewy.
- Decorate with sprinkles or piped frosting for special occasions.
- Store covered at room temperature for 2 days or refrigerated for up to 4 days.
Nutrition
- Serving Size: 1 slice
- Calories: 420
- Sugar: 32g
- Sodium: 240mg
- Fat: 22g
- Saturated Fat: 13g
- Unsaturated Fat: 8g
- Trans Fat: 0g
- Carbohydrates: 50g
- Fiber: 1g
- Protein: 5g
- Cholesterol: 75mg
Keywords: red velvet cookie cake, easy cookie cake, red velvet dessert, celebration cake