Ever find yourself craving something show-stopping for dessert, but feeling overwhelmed by complicated techniques and endless ingredient lists? You’re not alone. Many home bakers shy away from cheesecake, assuming it requires professional skills or fancy equipment. But what if I told you that creating a jaw-dropping Red Velvet Oreo Cheesecake is easier than you think?
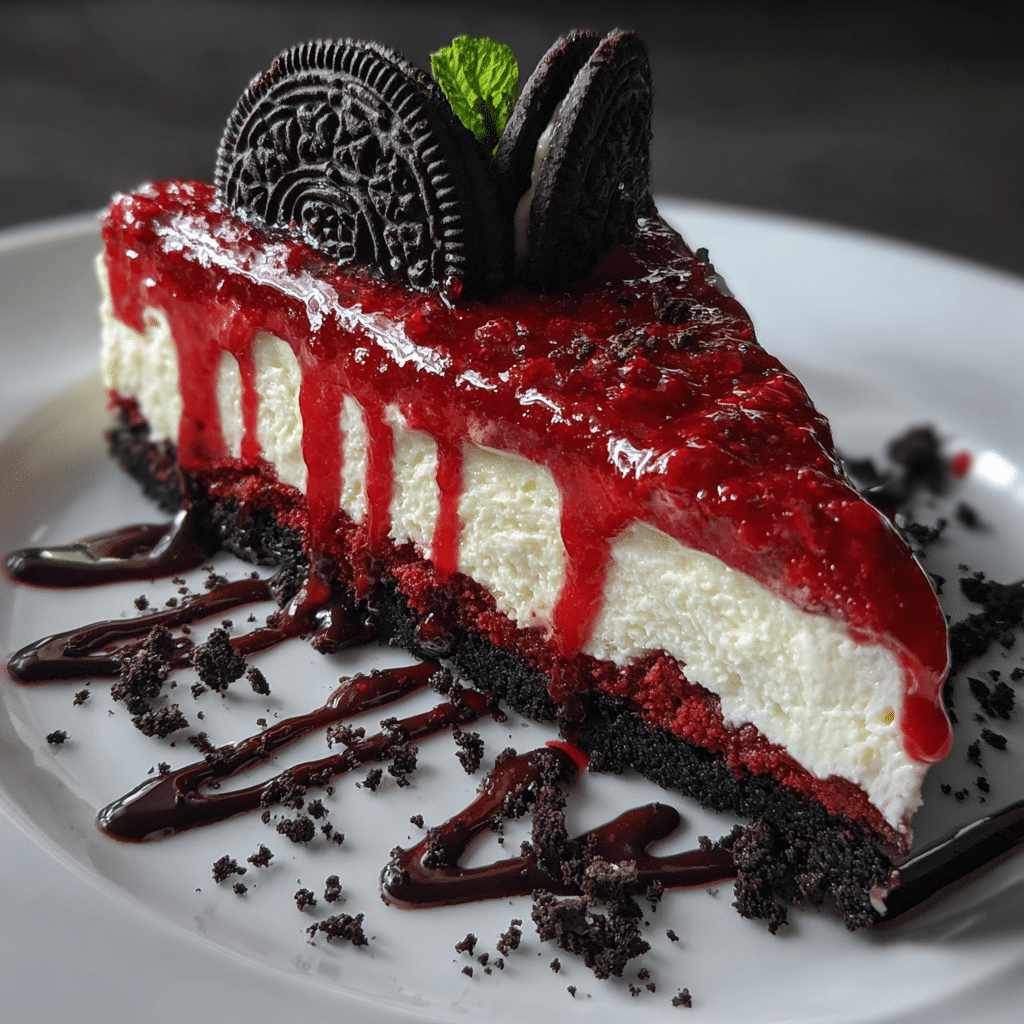
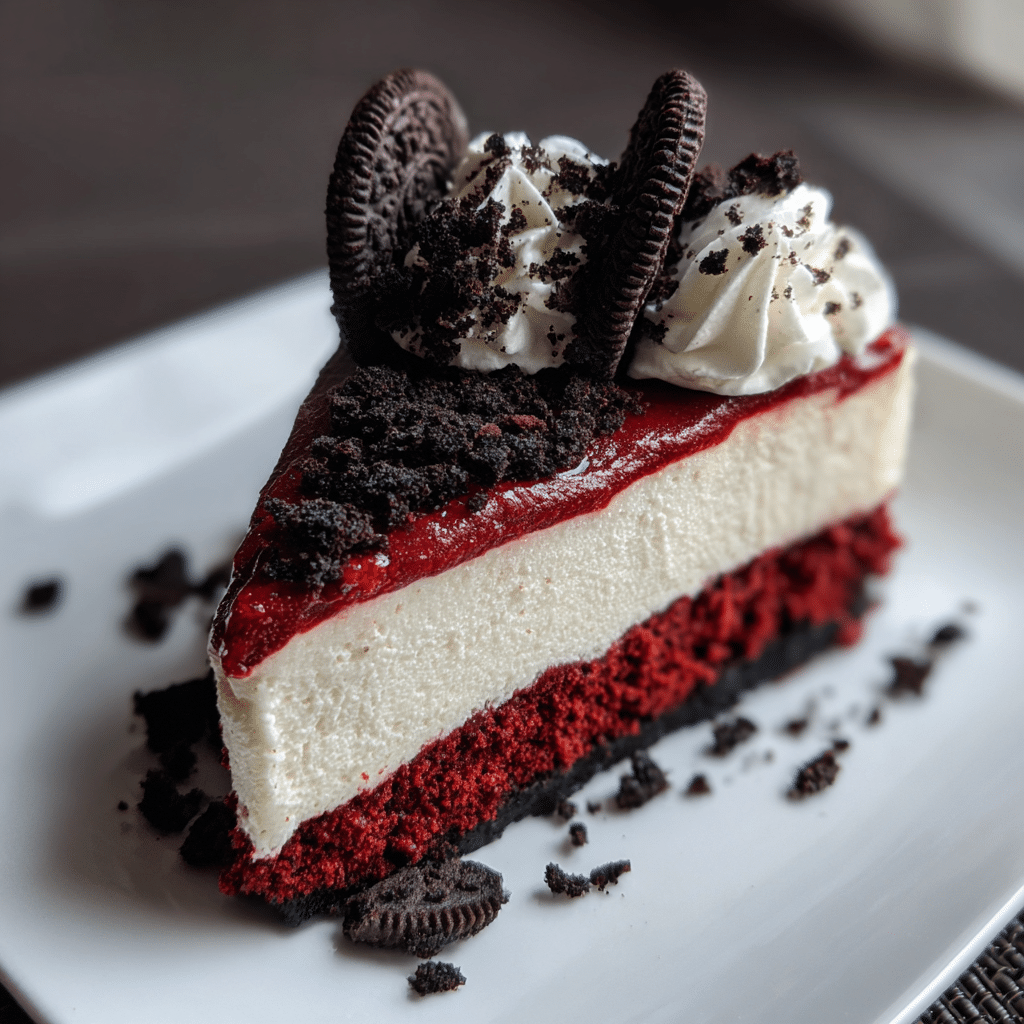
This Red Velvet Oreo Cheesecake delivers everything you want in a dessert: velvety smooth cream cheese filling, the iconic flavor of red velvet cake, and the beloved crunch of Oreo cookies, all in one stunning slice. The result is a show-stopping treat that tastes like you spent hours in a bakery, but comes together with straightforward steps any home cook can master.
Hi, I’m Sam from dishfoody.com, and I’ve been perfecting this Red Velvet Oreo Cheesecake for years. It all started when I wanted to combine my two favorite desserts for a family gathering, and after plenty of testing and tasting, this recipe was born. Since sharing it on Dishfoody, it’s become one of our most requested treats, especially during holidays and celebrations. What I love most is how it brings people together around the table, creating those special moments that make cooking so worthwhile.
In this guide, you’ll discover everything you need to know: from selecting the best ingredients and preparing your crust, to achieving that perfectly smooth filling, baking without cracks, and adding gorgeous garnishes. I’ll also share my tried-and-true tips for avoiding common cheesecake pitfalls and answer your most pressing questions.
Why This Red Velvet Oreo Cheesecake Recipe Works
This Red Velvet Oreo Cheesecake isn’t just another dessert recipe, it’s a game-changer for anyone who loves impressive treats without the stress. Here’s why this particular recipe stands out:
Uses affordable, easy-to-find ingredients: You won’t need to hunt down specialty items at gourmet stores. Everything from the cream cheese to the Oreos can be found at your regular grocery store, making this an accessible recipe for any home baker.
Combines three beloved flavors in one: Why choose between red velvet cake, cheesecake, or Oreos when you can have all three? This recipe harmoniously blends these classic flavors into one cohesive dessert that satisfies multiple cravings at once.
No fancy equipment required: Unlike some cheesecake recipes that demand springform pans with special techniques, this one works beautifully with basic kitchen tools you probably already own.
Perfect for celebrations or simple indulgence: Whether you’re planning a birthday party, holiday dinner, or just treating yourself on a Tuesday night, this Red Velvet Oreo Cheesecake fits any occasion. It’s elegant enough for special events yet comforting enough for everyday enjoyment.
Make-ahead friendly for stress-free entertaining: Cheesecake actually tastes better after sitting overnight, which means you can prepare this beauty a day or two before your event and simply garnish before serving.
Choosing the Right Ingredients for Red Velvet Oreo Cheesecake
The quality and type of ingredients you choose directly impact the texture and flavor of your Red Velvet Oreo Cheesecake. Let’s break down what you need and why it matters.
Best Ingredients for This Red Velvet Oreo Cheesecake Recipe
Cream cheese: Always use full-fat cream cheese, not the whipped or reduced-fat varieties. Full-fat cream cheese provides the rich, dense texture that defines a proper cheesecake. Brands like Philadelphia work best because they have consistent texture and moisture content. Make sure your cream cheese is at room temperature before mixing, this prevents lumps and creates a silkier filling.
Oreo cookies: Regular Oreos are perfect for this recipe. You’ll use them in both the crust and mixed into the filling for bursts of chocolatey crunch. There’s no need to remove the cream filling, it adds to the overall flavor and helps bind the crust together.
Red velvet elements: You’ll need cocoa powder for that signature red velvet flavor, which is more subtle and complex than regular chocolate. Quality red food coloring is essential for achieving that dramatic crimson hue. Gel food coloring works better than liquid because it won’t thin out your batter.
Sour cream: This ingredient adds tanginess and creates an ultra-creamy texture. It balances the sweetness and prevents the cheesecake from being cloying.
Buying Tips for Red Velvet Oreo Cheesecake
Check expiration dates on cream cheese: Fresh cream cheese blends more smoothly and has better flavor. Cream cheese that’s approaching its expiration date can be grainy or have off flavors.
Choose quality cocoa powder: Dutch-process cocoa gives you the most authentic red velvet flavor with its mellow, rounded taste. Natural cocoa powder works too, but the flavor will be slightly more acidic.
Look for gel food coloring: If you want that deep, rich red color without adding excess liquid to your batter, gel or paste food coloring is your best choice. You’ll find it in the baking aisle or at craft stores.
Buy extra Oreos: Trust me on this, you’ll want some for snacking while you bake, plus extras for garnishing the top of your finished cheesecake.
Substitutions for Red Velvet Oreo Cheesecake
Greek yogurt instead of sour cream: If you don’t have sour cream, full-fat Greek yogurt provides similar tang and creaminess. Use the same amount.
Different cookie crusts: While Oreos are traditional for this recipe, you can experiment with chocolate graham crackers or even vanilla wafers for a different twist on the crust.
Natural food coloring: If you prefer to avoid artificial dyes, beet powder can provide a reddish hue, though it won’t be as vibrant. You can also use pomegranate or berry purees, but these will slightly alter the flavor.
Ingredients & Prep for Red Velvet Oreo Cheesecake
Proper preparation is half the battle when making this Red Velvet Oreo Cheesecake. Taking time to prep correctly ensures a smooth baking process and beautiful results.
Prep Essentials for Red Velvet Oreo Cheesecake
Bring ingredients to room temperature: This is crucial for cheesecake success. Cold cream cheese creates lumps, and eggs that are too cold won’t incorporate smoothly. Set your cream cheese, eggs, and sour cream out about 1-2 hours before you begin. If you’re short on time, you can place sealed cream cheese packages in warm water for 10 minutes.
Prepare your pan properly: Line the bottom of your springform pan with parchment paper, then wrap the entire outside with heavy-duty aluminum foil. This prevents water from seeping in during the water bath and makes removing the cheesecake much easier.
Crush Oreos to the right consistency: For the crust, you want fine crumbs with just a few small chunks. A food processor makes quick work of this, but you can also place Oreos in a sealed plastic bag and crush them with a rolling pin. For mix-ins, chop Oreos into larger, quarter-sized pieces so you get satisfying chunks throughout.
Red Velvet Oreo Cheesecake Ingredients List
For the Oreo Crust:
- 24 Oreo cookies, finely crushed (about 2 cups crumbs)
- 4 tablespoons unsalted butter, melted
- 2 tablespoons granulated sugar
For the Red Velvet Cheesecake Filling:
- 32 ounces cream cheese, softened (four 8-ounce packages)
- 1 cup granulated sugar
- 1 cup sour cream
- 4 large eggs, room temperature
- 2 tablespoons all-purpose flour
- 2 tablespoons unsweetened cocoa powder
- 1 tablespoon vanilla extract
- 1-2 tablespoons red gel food coloring (adjust to desired color intensity)
- 10 Oreo cookies, roughly chopped
For Garnish:
- Whipped cream
- Extra Oreo cookies, halved or crushed
- Red velvet cake crumbs (optional)
- Cream cheese frosting drizzle (optional)
Pantry Staples for Red Velvet Oreo Cheesecake
Butter: Unsalted butter gives you better control over the overall flavor. It binds the cookie crumbs together to create a firm, sliceable crust.
Sugar: Granulated white sugar is standard, but you can use superfine sugar for an even smoother texture that dissolves more quickly.
Flour: Just a couple tablespoons of all-purpose flour helps stabilize the filling and prevents cracking. It absorbs excess moisture without making the cheesecake taste floury.
Vanilla extract: Pure vanilla extract adds depth and rounds out all the other flavors. Imitation vanilla works in a pinch, but pure extract tastes noticeably better.
Cocoa powder: This provides the chocolate undertone that makes red velvet distinctive. Don’t skip it or substitute chocolate syrup, you need the dry cocoa for proper texture.
Step-by-Step Cooking Instructions for Red Velvet Oreo Cheesecake
Now that everything is prepped, let’s walk through the process of creating your Red Velvet Oreo Cheesecake from start to finish.
Pre-Cooking Prep for Red Velvet Oreo Cheesecake
Step 1: Preheat your oven to 325°F (163°C). Position the rack in the lower third of your oven. This ensures even heat distribution and prevents the top from browning too quickly.
Step 2: Prepare a 9-inch springform pan by wrapping the outside completely with heavy-duty aluminum foil, covering the bottom and extending up the sides. This waterproofs your pan for the water bath. Line the bottom inside with parchment paper for easy removal later.
Step 3: Make the crust by combining crushed Oreos, melted butter, and sugar in a bowl. Mix until the texture resembles wet sand and holds together when pressed. Press this mixture firmly into the bottom of your prepared pan, creating an even layer. Use the bottom of a measuring cup or glass to pack it down tightly.
Step 4: Bake the crust for 10 minutes, then remove and let cool while you prepare the filling. This pre-baking step creates a firmer base that won’t get soggy.
Step 5: Begin boiling water for your water bath. You’ll need enough to come about halfway up the sides of your springform pan when placed in a larger roasting pan.
Cooking Method for Red Velvet Oreo Cheesecake
Step 6: Beat the softened cream cheese on medium speed for 2-3 minutes until completely smooth and fluffy with no lumps. Scrape down the sides of the bowl frequently. This step is critical for a lump-free filling.
Step 7: Add the sugar and beat for another 2 minutes until well incorporated and slightly lighter in color. The mixture should look creamy and smooth.
Step 8: Mix in the sour cream and vanilla extract on low speed until just combined. Overmixing at this stage can incorporate too much air, which leads to cracks.
Step 9: In a small bowl, whisk together the cocoa powder and flour to break up any lumps. Add this to the cream cheese mixture and blend on low speed until uniform.
Step 10: Add the red food coloring and mix until you achieve your desired shade of red. Start with one tablespoon and add more if needed. Remember that the color will lighten slightly as it bakes.
Step 11: Add eggs one at a time, mixing on the lowest speed just until each egg disappears into the batter. Stop mixing as soon as the egg is incorporated. Overbeating the eggs creates too much air and causes cracking and deflating.
Step 12: Gently fold in the chopped Oreo pieces by hand using a rubber spatula. Distribute them evenly throughout the batter without overmixing.
Step 13: Pour the filling over the cooled crust, smoothing the top with a spatula. Tap the pan gently on the counter a few times to release any air bubbles.
Step 14: Place the wrapped springform pan into a larger roasting pan. Carefully pour the hot water into the roasting pan until it reaches about halfway up the sides of the springform pan. This water bath creates gentle, even heat that prevents cracking and ensures creamy texture.
Step 15: Carefully transfer the whole setup to your preheated oven. Bake for 65-75 minutes. The cheesecake is done when the edges are set but the center still has a slight wobble, about a 2-inch diameter area in the very center.
Doneness Check for Red Velvet Oreo Cheesecake
Unlike other baked goods, you don’t want to insert a toothpick into cheesecake. Instead, use these visual and physical cues:
The jiggle test: Gently shake the pan. The outer 2-3 inches should be completely set and firm, while the center should have a slight jiggle like jello. It should not be liquid or wavy.
Temperature check: If you have an instant-read thermometer, the internal temperature at the center should read 150-155°F. The cheesecake will continue cooking as it cools, reaching the safe temperature of 160°F.
Visual cues: The edges will look slightly puffed and may be just starting to develop tiny cracks. The surface should look set rather than liquid, with a slight matte finish instead of glossy.
Trust the timing: For a 9-inch cheesecake at 325°F, 70 minutes is usually perfect. Don’t be tempted to bake longer because the center looks soft, it will firm up completely as it cools.
Resting for Red Velvet Oreo Cheesecake
Step 16: Turn off the oven and crack the door open about 1 inch. Leave the cheesecake inside for 1 hour. This gradual temperature change prevents shocking the delicate structure, which causes cracks and sinking.
Step 17: After the hour in the cooling oven, remove the cheesecake from the water bath and place it on a wire rack. Carefully remove the aluminum foil. Let it cool at room temperature for another hour.
Step 18: Once completely cooled to room temperature, cover the top loosely with plastic wrap or aluminum foil. Don’t let it touch the surface or it will stick and ruin your beautiful top.
Step 19: Refrigerate for at least 6 hours, but preferably overnight. This resting time is essential for the flavors to develop and for the texture to set properly. Cheesecake always tastes better the next day.
Step 20: When ready to serve, run a thin knife around the edges before releasing the springform pan sides. This prevents the edges from tearing or sticking.
Pro Tips for Perfect Red Velvet Oreo Cheesecake
After making this Red Velvet Oreo Cheesecake dozens of times, I’ve learned some tricks that make the difference between good and absolutely spectacular.
Avoiding Common Red Velvet Oreo Cheesecake Mistakes
Prevent cracking: Cracks happen due to sudden temperature changes or overbaking. Use a water bath, don’t overmix (especially after adding eggs), and cool gradually. If you do get cracks, don’t worry, they’ll be covered with toppings and taste just as delicious.
Fix lumpy batter: The key is room temperature ingredients. If you forgot to soften your cream cheese, cut it into small cubes and beat it for several minutes until smooth before adding anything else. You can also press the mixture through a fine-mesh sieve to remove stubborn lumps.
Avoid soggy crust: Pre-baking the crust is essential. Also, make sure your crust mixture is well combined with enough melted butter to hold together firmly when pressed.
Don’t open the oven door: During baking, resist the urge to peek. Opening the door causes temperature fluctuations that lead to cracks and uneven baking.
Release from pan carefully: Always run a knife around the edges before releasing the springform collar. Warm the knife under hot water and dry it between each pass for the cleanest release.
Tool Recommendations for Red Velvet Oreo Cheesecake
9-inch springform pan: This is non-negotiable for easy removal and serving. Make sure the seal is tight so no water seeps in during the water bath.
Stand mixer or hand mixer: While you can make cheesecake by hand, a mixer ensures the smoothest, lump-free texture with much less effort. A stand mixer is ideal because it frees your hands for scraping and monitoring.
Food processor: Perfect for crushing Oreos into uniform crumbs quickly. If you don’t have one, a plastic bag and rolling pin work well too.
Instant-read thermometer: Takes the guesswork out of doneness. Aim for 150-155°F at the center.
Roasting pan: Needs to be larger than your springform pan with high enough sides to hold the water bath. A 9×13-inch pan usually works perfectly.
Offset spatula: Makes smoothing the top and spreading garnishes much easier than a regular spatula.
Storage & Reheating Red Velvet Oreo Cheesecake
Refrigerator storage: Cover your Red Velvet Oreo Cheesecake tightly with plastic wrap or store in an airtight container. It will stay fresh for up to 5 days in the refrigerator. The flavor actually improves over the first 2-3 days as everything melds together.
Freezing: Cheesecake freezes beautifully for up to 3 months. Wrap individual slices tightly in plastic wrap, then in aluminum foil, or freeze the whole cheesecake before adding toppings. Thaw overnight in the refrigerator before serving.
Serving temperature: Cheesecake tastes best when it’s cold but not ice-cold. Remove from the refrigerator about 20-30 minutes before serving for the creamiest texture and most pronounced flavors.
Never reheat: Cheesecake should always be served chilled or at cool room temperature. Heating it will ruin the texture and cause it to become runny.
Looking for more stunning dessert inspiration? Check out our complete collection of show-stopping sweets at dishfoody.com for your next celebration.
Want even more creative recipe ideas to wow your guests? Follow us on Pinterest at www.pinterest.com where I share hundreds of mouthwatering photos, helpful tutorials, and seasonal inspiration that’ll have you eager to get back in the kitchen!
Flavor Variations for Red Velvet Oreo Cheesecake
One of the best things about this Red Velvet Oreo Cheesecake is how adaptable it is to different tastes and dietary needs. Here are some of my favorite variations that keep the spirit of the original while adding exciting new dimensions.
Creative Twists on Red Velvet Oreo Cheesecake
Cookies and cream overload: Double down on the Oreo flavor by adding crushed Oreos to the crust, folding them into the filling, and creating a generous Oreo topping. Use about 15 extra cookies total for maximum cookie impact.
White chocolate red velvet: Melt 4 ounces of white chocolate and fold it into the filling along with the Oreos. This adds richness and a subtle sweetness that complements the tang of the cream cheese beautifully.
Chocolate drizzle: After the cheesecake has fully set, drizzle melted dark or semi-sweet chocolate over the top in decorative patterns. Let it set in the refrigerator before serving for a professional bakery look.
Cream cheese frosting swirl: Make a simple cream cheese frosting and dollop it on top of the filling before baking. Use a knife to swirl it through the top layer for a marbled effect that’s as beautiful as it is delicious.
Miniature versions: Instead of one large cheesecake, make individual servings in a muffin tin lined with cupcake papers. Reduce baking time to about 20-25 minutes. These are perfect for parties and portion control.
Dietary Adaptations for Red Velvet Oreo Cheesecake
Gluten-free option: Use gluten-free Oreo-style cookies for the crust and substitute the all-purpose flour in the filling with gluten-free flour blend or cornstarch. The texture will be virtually identical.
Reduced sugar version: Cut the sugar in the filling by one-third to one-half and use a sugar substitute like erythritol or stevia. You can also use sugar-free Oreo alternatives for the crust, though the texture may be slightly different
PrintRed Velvet Oreo Cheesecake Recipe: How to Make This Decadent Dessert
A decadent red velvet Oreo cheesecake with a crunchy Oreo crust, creamy red velvet cheesecake filling, and chunks of Oreo cookies throughout rich, dramatic, and perfect for Valentine’s Day or special celebrations.
- Prep Time: 25 mins
- Cook Time: 1 hr
- Total Time: 5 hrs 25 mins
- Yield: 12 servings 1x
- Category: Dessert
- Method: Baking
- Cuisine: American
- Diet: Vegetarian
Ingredients
- Crust:
- 24 Oreo cookies, crushed
- 5 tbsp unsalted butter, melted
- Cheesecake Filling:
- 24 oz cream cheese, softened
- 1 cup granulated sugar
- 3 large eggs
- 1/2 cup sour cream
- 1 tsp vanilla extract
- 2 tbsp cocoa powder
- 1 tbsp red food coloring
- 12 Oreo cookies, chopped
- Optional Topping:
- Whipped cream
- Crushed Oreos
Instructions
- 1. Preheat oven to 325°F (165°C) and grease a 9-inch springform pan.
- 2. Mix crushed Oreos with melted butter and press firmly into bottom of pan.
- 3. Bake crust for 10 minutes and let cool.
- 4. In a large bowl, beat cream cheese and sugar until smooth.
- 5. Add eggs one at a time, mixing well after each.
- 6. Mix in sour cream, vanilla, cocoa powder, and red food coloring.
- 7. Fold in chopped Oreos.
- 8. Pour filling over cooled crust and smooth top.
- 9. Bake for 55–60 minutes until center is just set.
- 10. Turn off oven, crack door, and let cheesecake cool for 1 hour.
- 11. Refrigerate at least 4 hours or overnight.
- 12. Top with whipped cream and crushed Oreos before serving.
Notes
- Do not overmix to avoid cracks.
- Use a water bath for extra creamy texture.
- Cheesecake slices best when fully chilled.
Nutrition
- Serving Size: 1 slice
- Calories: 520
- Sugar: 38g
- Sodium: 420mg
- Fat: 34g
- Saturated Fat: 18g
- Unsaturated Fat: 13g
- Trans Fat: 0g
- Carbohydrates: 48g
- Fiber: 2g
- Protein: 9g
- Cholesterol: 145mg
Keywords: red velvet oreo cheesecake, oreo cheesecake, red velvet dessert, valentines cheesecake