Hook me with chocolate-covered strawberry cupcakes! If you’ve ever tried making these beauties only to end up with dry cake, runny frosting, or strawberries that weep all over your perfect swirls, you’re not alone. These cupcakes can be tricky, but I’m here to change that for you.
Hi, I’m Sam from dishfoody.com, and I share flavorful, feel-good recipes made to make life in the kitchen easier and more joyful. I remember the first time I attempted chocolate-covered strawberry cupcakes for my daughter’s birthday party. The cake was dense, the strawberries turned the frosting pink and watery, and I nearly gave up on the whole idea. But after years of testing and tweaking, I’ve cracked the code to creating bakery-worthy chocolate covered strawberry cupcakes that look stunning and taste even better.
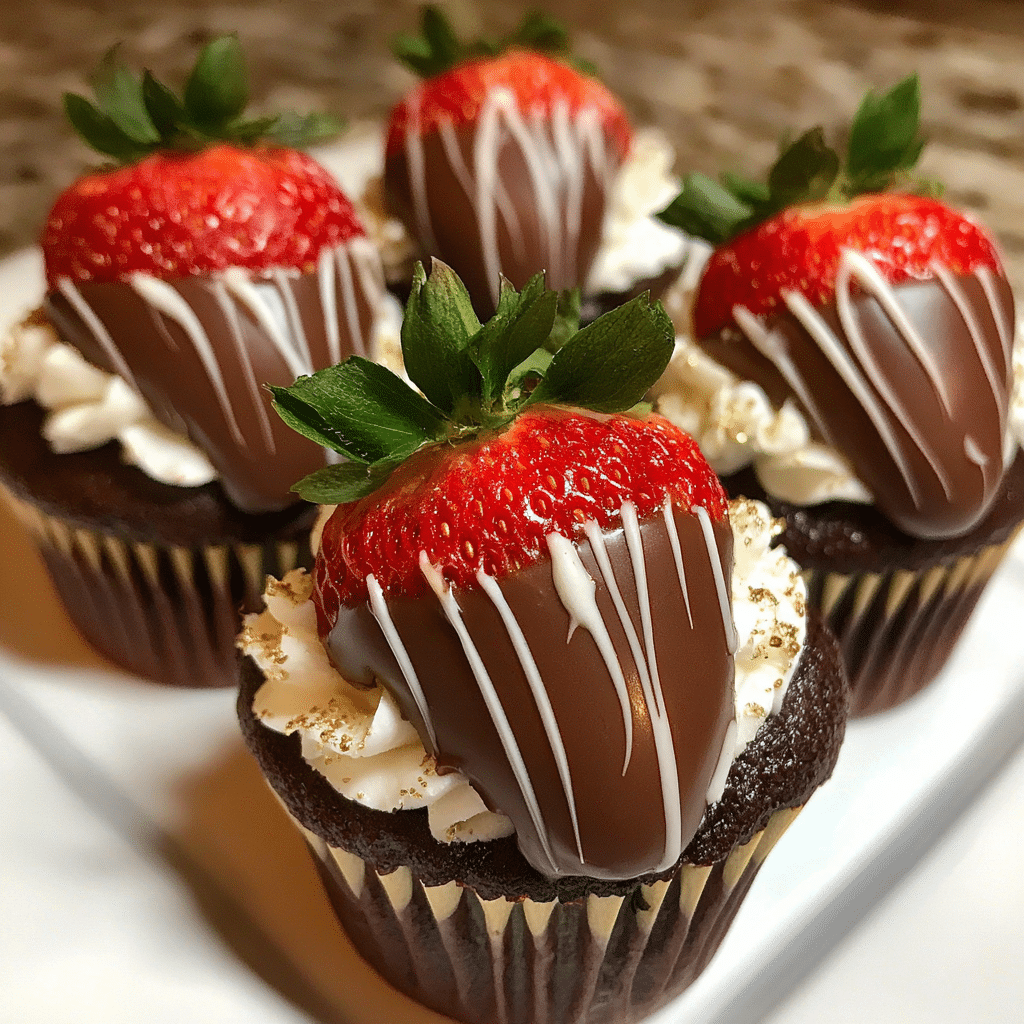
This recipe delivers moist chocolate cupcakes, stable strawberry-infused frosting, and those gorgeous chocolate-dipped berries on top that won’t slide off or make everything soggy. Whether you’re planning a Valentine’s Day treat, a bridal shower dessert, or just want to impress your family on a regular Tuesday, these cupcakes will become your go-to showstopper.
In this guide, I’ll walk you through selecting the best ingredients, preparing your strawberries properly so they don’t ruin your frosting, mastering the chocolate coating technique, and assembling everything like a pro. Plus, I’ll share the mistakes I made so you don’t have to, along with storage tips and creative variations. Let’s create some magic together!
Why This Chocolate Covered Strawberry Cupcakes Recipe Works
These chocolate covered strawberry cupcakes aren’t just another pretty dessert—they’re designed with both beginners and experienced bakers in mind, combining impressive presentation with surprisingly simple techniques.
Uses everyday ingredients you probably already have: No specialty items or hard-to-find components required. Basic pantry staples like cocoa powder, flour, and butter form the foundation, while fresh strawberries are available year-round at most grocery stores.
Foolproof strawberry preparation method prevents soggy frosting: The secret is in how you handle the berries. By properly drying and treating them before incorporating into your frosting, you’ll avoid the waterlogged disaster that ruins so many strawberry desserts.
Chocolate shell technique that actually stays put: My method for dipping strawberries creates a stable coating that won’t crack, slide off, or sweat in normal room temperatures. Perfect for transport or advance preparation.
Perfect for romantic occasions, celebrations, or weekend baking projects: These cupcakes work beautifully for Valentine’s Day, anniversaries, bridal showers, Mother’s Day, or anytime you want to create something special. They’re fancy enough to impress but approachable enough for home bakers.
Make-ahead friendly components save time on event day: You can bake the cupcakes, prepare the frosting, and dip the strawberries on different days, then assemble everything when you’re ready to serve.
Choosing the Right Ingredients for Chocolate Covered Strawberry Cupcakes
The quality of your ingredients directly impacts the final result with these chocolate covered strawberry cupcakes. Let me guide you through what to look for and why it matters.
Best Chocolate for This Recipe
Not all chocolate is created equal, especially when you’re working with both cake and coating components. For the cupcake batter, use high-quality Dutch-process cocoa powder, which gives a deeper, less acidic chocolate flavor and creates that beautiful dark color. Brands like Hershey’s Special Dark or Ghirardelli work wonderfully.
For coating your strawberries, I recommend using chocolate melting wafers or compound chocolate rather than pure chocolate bars. While chocolate purists might object, melting wafers contain stabilizers that make them far more forgiving for beginners. They set quickly, create a nice snap, and won’t bloom (develop that white coating) as easily. If you prefer real chocolate, use high-quality dark or semi-sweet chocolate with at least 60% cacao content, and temper it properly for best results.
Selecting Perfect Strawberries
Your strawberries are the star of these chocolate covered strawberry cupcakes, so choose wisely. Look for medium-sized berries that are uniformly red with bright green, fresh-looking caps. Avoid berries with white shoulders (the area near the stem) as they’re underripe and will be tart. The berries should be firm to the touch, not mushy, and completely dry with no signs of mold.
Size matters here select strawberries that are proportional to your cupcakes. Too large and they’ll topple over; too small and they’ll look lost. Medium berries about 1.5 to 2 inches tall work perfectly for standard cupcakes.
Buying Tips for Fresh Ingredients
Visit your grocery store midweek when produce is freshest and selection is best. If possible, shop at farmers’ markets during strawberry season (typically spring through early summer) for the most flavorful berries. For off-season baking, greenhouse strawberries from California or Florida are your best bet.
Buy your strawberries no more than one day before you plan to dip them. The fresher they are, the longer they’ll last after being chocolate-covered. Never buy pre-washed strawberries in containers with visible moisture, as this increases the risk of mold and makes chocolate coating difficult.
For butter, always choose unsalted so you can control the salt level in your recipe. Real vanilla extract (not imitation) makes a noticeable difference in both cake and frosting. When selecting cocoa powder, check the date cocoa can lose its potency over time.
Ingredient Substitutions
While I’ve perfected this recipe with specific ingredients, I understand you might need alternatives. For the chocolate cupcakes, you can substitute vegetable oil with melted coconut oil or even unsweetened applesauce for a lighter version, though the texture will be slightly different.
If you’re dairy-free, use plant-based butter alternatives in the frosting (I’ve had success with Earth Balance) and choose dairy-free chocolate for coating. The cupcake itself can easily be made with non-dairy milk like almond or oat milk.
For the frosting, cream cheese can be reduced or eliminated if you prefer a purely buttercream version, though the tanginess beautifully complements the sweet strawberries. If strawberries aren’t available, you can use this same technique with raspberries or even freeze-dried strawberry powder for flavor.
Ingredients & Prep for Chocolate Covered Strawberry Cupcakes
Proper preparation is half the battle when making chocolate covered strawberry cupcakes. Let’s break down everything you need and how to prep it correctly.
Cupcake Base Essentials
Dry Ingredients:
1¾ cups all-purpose flour
2 cups granulated sugar
¾ cup Dutch-process cocoa powder
2 teaspoons baking soda
1 teaspoon baking powder
1 teaspoon salt
Wet Ingredients:
2 large eggs at room temperature
1 cup buttermilk at room temperature
1 cup hot coffee or hot water
½ cup vegetable oil
2 teaspoons pure vanilla extract
The key to moist cupcakes is bringing your eggs and buttermilk to room temperature before mixing. This ensures even incorporation and proper emulsification. If you forgot to take them out ahead, place eggs in warm water for 5 minutes and microwave buttermilk for 15-20 seconds.
Strawberry Frosting Components
Base Frosting:
1 cup (2 sticks) unsalted butter, softened to room temperature
4 ounces cream cheese, softened to room temperature
4-5 cups powdered sugar, sifted
2 teaspoons vanilla extract
2-3 tablespoons heavy cream or milk
Pinch of salt
Strawberry Element:
1 cup fresh strawberries, hulled and finely diced
2 tablespoons granulated sugar
The crucial step everyone skips: macerating and reducing your strawberries. Toss your diced strawberries with sugar and let them sit for 30 minutes. The sugar draws out the moisture. Then cook this mixture in a small saucepan over medium heat until it reduces to about ¼ cup of thick, jammy concentrate. Cool completely before adding to frosting. This concentrated approach gives you intense strawberry flavor without the moisture that makes frosting runny.
Chocolate Coating Essentials
For Dipping:
12 ounces chocolate melting wafers (or tempered chocolate)
1 tablespoon coconut oil (optional, for smoother consistency)
12-15 medium fresh strawberries, with stems attached
Prep Work:
Wash strawberries gently under cool running water and pat completely dry with paper towels. This is non-negotiable even a tiny bit of moisture will cause your chocolate to seize and become grainy. After patting dry, let strawberries sit on paper towels at room temperature for at least 30 minutes to ensure they’re completely dry.
Line a baking sheet with parchment paper or a silicone mat. Have this ready before you start melting chocolate so you can work quickly once dipping begins.
Pantry Staples for Success
Beyond the main ingredients, keep these items on hand: extra powdered sugar for adjusting frosting consistency, additional cocoa powder for dusting, and pink or red food coloring if you want to tint your frosting (optional but pretty). Having a variety of sprinkles, edible glitter, or white chocolate for drizzling gives you options for decoration.
Coffee enhances chocolate flavor in baked goods without making them taste like coffee. If you don’t have brewed coffee, use instant coffee dissolved in hot water or simply use hot water—the cupcakes will still be delicious, just slightly less chocolatey in depth.
Room temperature ingredients mix together more smoothly and create better texture, so patience during prep pays off in the final product. If you’re short on time, cut cold butter into small pieces and let it sit for 15-20 minutes while you prep other components.
Step-by-Step Cooking Instructions for Chocolate Covered Strawberry Cupcakes
Let me walk you through each phase of creating these stunning chocolate covered strawberry cupcakes. Take your time with each step, and you’ll achieve bakery-quality results.
Pre-Cooking Prep for Chocolate Covered Strawberry Cupcakes
Start by preheating your oven to 350°F (175°C). This gives it plenty of time to reach the correct temperature, which is essential for even baking. Line two standard 12-cup muffin tins with paper liners—this recipe makes about 20-22 cupcakes, so be prepared.
Gather all your ingredients and measure them out before you begin mixing. This French technique called “mise en place” prevents mistakes and ensures smooth workflow. Sift your cocoa powder to remove lumps, and sift your powdered sugar for the frosting while you’re at it.
Bring your eggs and buttermilk to room temperature if you haven’t already. This step truly matters cold ingredients don’t emulsify properly and can result in dense cupcakes. Brew your coffee and let it cool slightly so it’s hot but not boiling when added to the batter.
Soften your butter and cream cheese for the frosting by leaving them on the counter for about an hour. They should be soft enough to press your finger into easily but not melted or greasy. This texture is perfect for creating fluffy frosting.
Cooking Method for Chocolate Covered Strawberry Cupcakes
Making the Cupcake Batter:
In a large mixing bowl, whisk together all your dry ingredients: flour, sugar, cocoa powder, baking soda, baking powder, and salt. Whisk for a good 30 seconds to ensure everything is evenly distributed and the cocoa has no lumps.
In a separate medium bowl, whisk together your eggs, buttermilk, oil, and vanilla until well combined. Pour this wet mixture into your dry ingredients and use a hand mixer on low speed or whisk by hand until just combined. The batter will look thick and slightly lumpy this is normal.
Now comes the magic step: slowly pour in your hot coffee while mixing on low speed. The batter will transform into a thin, pourable consistency. Don’t panic this is exactly what you want! This thin batter creates incredibly moist cupcakes. Mix only until the coffee is fully incorporated, about 15-20 seconds.
Baking Process:
Fill your cupcake liners about two-thirds full. I use a large cookie scoop or a measuring cup with a pour spout for even distribution. Don’t overfill or your cupcakes will overflow and create mushroom tops.
Bake for 18-22 minutes, rotating the pans halfway through for even baking. The cupcakes are done when a toothpick inserted in the center comes out with just a few moist crumbs attached—not wet batter, but not completely clean either. The tops should spring back when lightly touched.
Remove from the oven and let cupcakes cool in the pan for 5 minutes, then transfer to a wire rack to cool completely. This step is crucial if you frost warm cupcakes, your frosting will melt into a puddle. I usually bake cupcakes the night before and let them cool completely overnight.
Creating the Strawberry Frosting for Chocolate Covered Strawberry Cupcakes
While your cupcakes cool, prepare your strawberry concentrate if you haven’t already. Remember: dice 1 cup fresh strawberries, toss with 2 tablespoons sugar, let sit 30 minutes, then cook down until you have about ¼ cup of thick concentrate. Press it through a fine-mesh strainer to remove seeds if you want ultra-smooth frosting. Cool completely before proceeding.
In a large bowl with an electric mixer, beat your softened butter on medium-high speed for 3 minutes until light and fluffy. Add the cream cheese and beat another 2 minutes until completely smooth with no lumps.
Reduce speed to low and gradually add your sifted powdered sugar, one cup at a time. After each addition, increase speed to medium and beat for 20 seconds, then reduce to low before adding more sugar. This prevents a powdered sugar cloud in your kitchen.
Once all sugar is incorporated, add your vanilla, salt, and 2 tablespoons of heavy cream. Beat on medium-high for 3-4 minutes until the frosting is light, fluffy, and increased in volume.
Finally, add your cooled strawberry concentrate, one tablespoon at a time, beating between additions. Stop when you’ve reached your desired strawberry flavor. The frosting should be thick enough to hold stiff peaks. If it’s too thin, add more powdered sugar ¼ cup at a time. Too thick? Add cream one teaspoon at a time.
If you want a more vibrant pink color, add a tiny amount of pink or red food coloring. Start with just a drop—you can always add more, but you can’t take it away.
Dipping Strawberries in Chocolate for Chocolate Covered Strawberry Cupcakes
Ensure your strawberries are completely dry this cannot be overstated. Any moisture will ruin your chocolate coating.
Place your chocolate melting wafers in a microwave-safe bowl. Microwave in 30-second intervals, stirring between each one, until chocolate is about 90% melted. Then stir vigorously the residual heat will melt the remaining pieces. This prevents overheating, which can make chocolate thick and unworkable.
If using coconut oil for a thinner consistency, stir it in after chocolate is fully melted. The chocolate should be fluid enough to drip smoothly off a spoon.
Hold each strawberry by the stem and dip into the chocolate, swirling gently to coat about three-quarters of the berry. Let excess chocolate drip off, then place on your parchment-lined baking sheet. Work quickly but calmly.
If you want to drizzle with contrasting chocolate, melt white chocolate separately and use a fork to drizzle it back and forth over your dipped berries.
Refrigerate dipped strawberries for 10-15 minutes until chocolate is set but not cold. Cold strawberries will “sweat” when brought to room temperature, creating condensation that looks unappealing.
Doneness Check for Chocolate Covered Strawberry Cupcakes
Your cupcakes are properly baked when a toothpick inserted into the center comes out with a few moist crumbs. The internal temperature should read about 205-210°F if you’re using an instant-read thermometer. The tops should be set and spring back when lightly pressed.
For the frosting, you’ll know it’s ready when it holds stiff peaks and has a light, airy texture. If you turn the beater upside down, the frosting should stand up in a peak without drooping.
Chocolate-covered strawberries are ready when the coating is set but not cold to the touch. Press gently—the chocolate should be firm and not leave a fingerprint.
Resting and Assembly for Chocolate Covered Strawberry Cupcakes
Allow your cupcakes to cool completely on a wire rack before frosting—this takes about an hour. If you’re in a hurry, you can place them in the refrigerator for 20 minutes, but room temperature cooling is gentler and prevents condensation.
Once cooled, you’re ready to assemble. Fill a piping bag fitted with your favorite tip (I love a large open star tip for these) with your strawberry frosting. Pipe generous swirls on each cupcake, starting from the outside and working your way up to create height.
Immediately top each frosted cupcake with a chocolate-covered strawberry, pressing gently into the frosting so it stays secure. The frosting acts as glue to hold your strawberry in place.
If you’re not serving immediately, leave the strawberries off until closer to serving time. Frosted cupcakes can be stored, and strawberries added just before presenting. For the best appearance and to capture those perfect photos for sharing on social media (I’d love to see your creations on Pinterest where I share tons of baking inspiration and behind-the-scenes tips!), assemble within 2-3 hours of serving.
Pro Tips for Perfect Chocolate Covered Strawberry Cupcakes
After making countless batches of chocolate covered strawberry cupcakes, I’ve learned tricks that make the difference between good and absolutely spectacular results.
Avoiding Common Mistakes with Chocolate Covered Strawberry Cupcakes
The Moisture Problem: The number one issue people face is watery frosting from fresh strawberries. Always, always reduce your strawberry mixture until it’s thick and jammy. I can’t stress this enough—skipping this step ruins everything. If your frosting seems thin after adding strawberries, refrigerate it for 20 minutes, then rewhip it. You can also add more powdered sugar, but this makes it sweeter.
Chocolate Seizing Issues: When your chocolate becomes grainy, thick, and unworkable, it has seized. This happens when even tiny amounts of water contact the chocolate, or when chocolate overheats. Prevent this by ensuring strawberries are bone-dry and melting chocolate at low temperatures in short intervals. If disaster strikes and your chocolate seizes, try stirring in coconut oil or vegetable shortening one teaspoon at a time until it smooths out.
Overmixing Cupcake Batter: Once you add your wet ingredients to dry, mix only until combined. Overmixing develops gluten, resulting in tough, dense cupcakes. The batter should look slightly lumpy before you add the coffee. After adding coffee, mix for just 15-20 seconds until incorporated.
Temperature Troubles: Room temperature ingredients are essential for proper emulsification. Cold eggs won’t incorporate smoothly. Cold butter creates lumpy frosting. Cold cream cheese leaves chunks no matter how long you mix. Plan ahead and leave dairy products out for an hour before starting.
Tool Recommendations for Chocolate Covered Strawberry Cupcakes
Invest in a good quality offset spatula for spreading frosting smoothly if you’re not piping. For piped frosting, a large open star tip (like Wilton 1M or 2D) creates beautiful professional-looking swirls with minimal effort.
Use cupcake liners that won’t fade or bleed color when baked—Reynolds StayBrite liners are my favorite. They’re a bit more expensive but maintain their appearance beautifully.
A spring-loaded cookie scoop ensures all your cupcakes are exactly the same size, which means they’ll bake evenly and finish at the same time. I use a 3-tablespoon scoop for standard cupcakes.
For melting chocolate, I prefer a double boiler over the microwave for more control, but both work fine. If using the microwave, use a glass bowl rather than plastic, as it heats more evenly.
A stand mixer makes frosting preparation much easier, but a hand mixer absolutely works—just give your arm a workout for those 3-4 minutes of beating.
Storage and Reheating for Chocolate Covered Strawberry Cupcakes
Unfrosted chocolate cupcakes can be stored in an airtight container
PrintChocolate Covered Strawberry Cupcakes: How to Make Perfect Ones
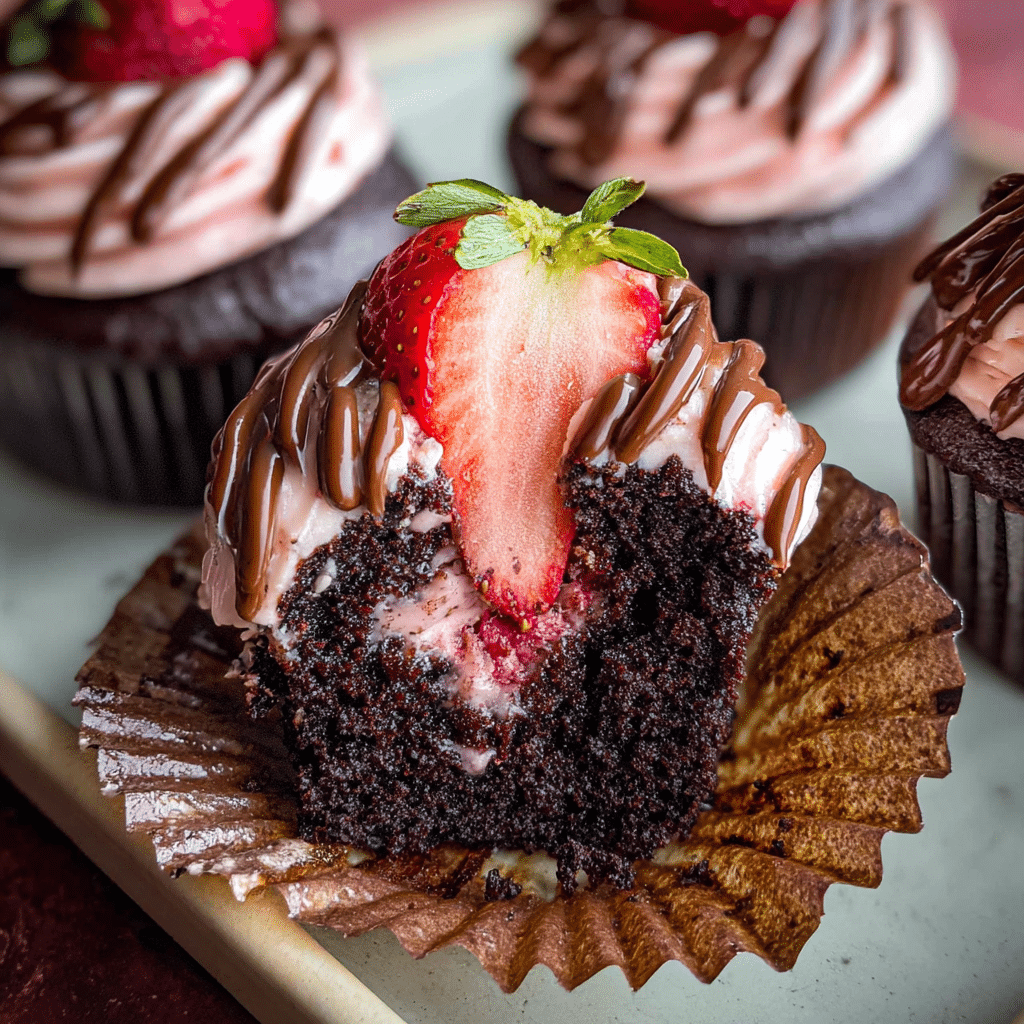
Chocolate Covered Strawberry Cupcakes layer moist chocolate cupcakes with fluffy strawberry buttercream and glossy ganache, crowned with real chocolate-dipped strawberries. Bakery-style swirls and drip create ultimate Valentine’s Day moment. Classic chocolate-covered strawberry flavors in handheld cupcake perfection.[web:31][web:33]
- Prep Time: 45 mins
- Cook Time: 20 mins
- Total Time: 2 hours (+ cooling)
- Yield: 12–16 cupcakes
- Category: Dessert
- Method: Oven
- Cuisine: American
- Diet: Vegetarian
Ingredients
Chocolate Cupcakes: 1 cup all-purpose flour (spooned & leveled) ½ cup unsweetened cocoa powder 1 tsp baking soda ½ tsp baking powder ½ tsp salt ¾ cup granulated sugar ½ cup brown sugar ½ cup vegetable oil 1 large egg (room temp) 1 tsp vanilla extract 1 cup buttermilk (room temp) ½ cup hot coffee or hot water (for extra rich chocolate crumb)[web:31][web:33] Strawberry Buttercream: 1 cup unsalted butter (room temp) 3 cups powdered sugar 1 oz freeze-dried strawberries (powdered) 2–3 tbsp heavy cream 1 tsp vanilla extract Pinch salt[web:31][web:33] Chocolate Ganache: 4 oz semisweet chocolate (chopped) ½ cup heavy cream[web:31][web:104] Chocolate Covered Strawberries: 12–16 fresh strawberries 4 oz semisweet or dark chocolate (melted) 2 oz white chocolate + pink gel color (optional drizzle)[web:32][web:33]
Instructions
1. Prep: Line 12–16 muffin cups with liners. Preheat oven to 350°F (177°C).Cupcakes: Whisk flour, cocoa, baking soda, baking powder, salt, and both sugars in a bowl. In another bowl whisk oil, egg, vanilla, and buttermilk until smooth. Combine wet with dry, then whisk in hot coffee/water until batter is thin and smooth. Fill liners slightly over ½ full. Bake 16–20 mins until a toothpick comes out clean. Cool completely on rack.[web:31][web:33] Ganache: Heat cream just to a gentle simmer, pour over chopped chocolate, rest 2–3 mins, then stir smooth. Chill 20–30 mins until spreadable.[web:31][web:104] Buttercream: Pulse freeze-dried strawberries into powder. Beat butter fluffy, add strawberry powder, then powdered sugar in batches with cream, vanilla, and salt until light and pipeable.[web:31][web:33][web:104] Chocolate Strawberries: Melt chocolate, dip dry strawberries, set on parchment to harden. Drizzle pink-tinted white chocolate if desired, chill until set.[web:32][web:33] Assembly: Swirl strawberry buttercream on cooled cupcakes, spoon or pipe ganache drip over top, then crown each with a chocolate-covered strawberry. Serve same day for best berry texture.[web:31][web:32][web:33]
Notes
Thin batter + hot coffee = super moist, deep chocolate flavor.[web:31][web:33] Freeze-dried strawberries give intense berry flavor without watering down frosting.[web:31][web:33][web:106] Make sure cupcakes and ganache are fully cool before topping, so strawberries don’t slide. Dry strawberries completely after rinsing or chocolate won’t stick smoothly.[web:33] Best served day-of; refrigerate leftovers in an airtight container up to 2 days (bring to room temp before serving).[web:31][web:33] Perfect for Valentine’s Day, anniversaries, and bridal showers dessert tables.[web:32][web:109]
Nutrition
- Serving Size: 1 cupcake
- Calories: 420
- Sugar: 38g
- Sodium: 280mg
- Fat: 24g
- Saturated Fat: 12g
- Unsaturated Fat: 10g
- Trans Fat: 0g
- Carbohydrates: 52g
- Fiber: 3g
- Protein: 5g
- Cholesterol: 65mg
Keywords: chocolate covered strawberry cupcakes, valentines cupcakes, strawberry buttercream, chocolate ganache cupcakes