Red velvet cookies often turn out flat, dry, or lacking that signature tangy flavor we all crave during the holidays. You follow recipes to the letter, but somehow they don’t deliver that perfect balance of cocoa richness and cream cheese frosting bliss. The frustration is real when you’re baking for a special gathering and your cookies come out disappointing.
But what if you could create bakery-quality red velvet cookies that are soft, chewy, and bursting with that iconic flavor every single time? These 10 tested recipes guarantee perfect results whether you’re craving classic cream cheese frosting-topped cookies, cake-like textures, or creative twists on the traditional favorite.
Hi, I’m Sam from dishfoody.com, and I’ve spent countless hours perfecting red velvet cookies in my kitchen. After testing dozens of variations and learning from both successes and failures, I’ve curated the absolute best recipes that consistently deliver amazing results. I remember the first time I made red velvet cookies for a holiday party they disappeared within minutes, and guests kept asking for the recipe. That’s when I knew I had discovered something special worth sharing.
In this comprehensive guide, you’ll discover foolproof recipes with step-by-step instructions, learn the secrets to choosing quality ingredients, explore flavor variations from classic to creative, and get answers to common baking questions. Plus, I’ll share pro tips that transform good cookies into extraordinary ones.
Why This Red Velvet Cookies Recipe Works
Red velvet cookies combine everything we love about the classic cake in a portable, shareable form. These recipes succeed where others fail because they focus on three essential elements: flavor authenticity, foolproof techniques, and stunning presentation.
Uses affordable ingredients you already have – Most red velvet cookie recipes call for pantry staples like cocoa powder, vanilla extract, and buttermilk or sour cream. You won’t need specialty items or expensive equipment.
Mix and bake in under 30 minutes – From gathering ingredients to pulling cookies from the oven, these recipes respect your time. The active prep work takes just 10-15 minutes, making them perfect for busy holiday schedules.
Perfect for any occasion from casual gatherings to elegant celebrations – Red velvet cookies work beautifully at Christmas parties, Valentine’s Day celebrations, wedding showers, or simple family dinners. Their festive appearance and crowd-pleasing flavor make them universally loved.
Versatile base for creative variations – Once you master the foundation recipe, you can experiment with different frostings, add-ins like chocolate chips or nuts, or transform them into sandwich cookies. The possibilities are endless.
Consistently soft and chewy texture – These recipes have been tested to ensure your cookies stay soft for days when properly stored, unlike many red velvet cookies that become dry and crumbly within hours.
Choosing the Right Ingredients for Red Velvet Cookies
The quality and type of ingredients you select directly impact your red velvet cookies’ flavor, texture, and appearance. Let’s break down what you need to know.
Essential Ingredient Selection for Red Velvet Cookies
Cocoa powder matters more than you think – Dutch-process cocoa creates a milder, smoother chocolate flavor that works beautifully in red velvet cookies. Natural cocoa powder provides a more acidic, intense chocolate taste. Either works, but Dutch-process is traditional and creates that signature subtle cocoa background note rather than overwhelming chocolate flavor.
Food coloring choices affect both color and health – Liquid red food coloring is most common and readily available, requiring about 1-2 tablespoons for vibrant color. Gel food coloring is more concentrated, needing just 1-2 teaspoons while producing more intense color. Natural alternatives like beet powder create a more muted, earthy red but appeal to those avoiding artificial dyes.
Acid components create the signature tang – Buttermilk is the traditional choice, adding moisture and tangy flavor. White vinegar or apple cider vinegar combined with regular milk creates a similar effect. Sour cream produces denser, richer cookies with excellent tang.
Buying Tips for Red Velvet Cookie Ingredients
Check cocoa powder freshness – Smell your cocoa before using it. Fresh cocoa has a rich, pleasant chocolate aroma. Stale cocoa smells flat or dusty and will produce disappointing results.
Invest in quality vanilla extract – Pure vanilla extract costs more but delivers significantly better flavor than imitation vanilla. For red velvet cookies where flavors are delicate and balanced, this matters.
Use room temperature dairy products – Cold butter, eggs, and buttermilk don’t incorporate properly into your dough, creating texture issues. Plan ahead and let these ingredients sit out for 30-60 minutes before baking.
Substitutions for Red Velvet Cookies
Buttermilk replacement – Mix 1 tablespoon white vinegar or lemon juice with enough milk to measure 1 cup. Let it sit for 5 minutes before using.
Cream cheese frosting alternatives – Vanilla buttercream works beautifully for those who prefer sweeter frosting. White chocolate ganache creates an elegant finish. Simple powdered sugar glaze keeps things light.
Flour options – All-purpose flour is standard, but cake flour creates more delicate, tender cookies. Gluten-free all-purpose flour blends work well if you need gluten-free red velvet cookies, though texture will be slightly different.
Ingredients & Prep for Red Velvet Cookies
Proper preparation sets the foundation for baking success. These red velvet cookie recipes require attention to detail during the prep phase.
Cookie Dough Essentials for Red Velvet Cookies
Measure flour correctly – Spoon flour into your measuring cup and level it off with a knife. Scooping directly from the bag compacts flour, adding too much and creating dry, tough cookies.
Cream butter and sugar thoroughly – This process incorporates air into your dough, creating lighter texture. Beat for 3-4 minutes until the mixture is pale and fluffy. Don’t rush this step.
Add food coloring at the right time – Mix food coloring into your wet ingredients before adding flour. This ensures even distribution throughout your red velvet cookie dough without overmixing.
Chill dough when needed – Some red velvet cookie recipes benefit from 30 minutes of refrigeration before baking. This prevents excessive spreading and helps cookies maintain their shape.
Cream Cheese Frosting Components for Red Velvet Cookies
Softened cream cheese (8 ounces) – Must be at room temperature for smooth frosting. Cold cream cheese creates lumpy frosting no matter how long you beat it.
Unsalted butter (4 tablespoons) – Also at room temperature. Butter adds richness and helps frosting hold its shape.
Powdered sugar (2-3 cups) – Adjust based on desired sweetness and consistency. Start with 2 cups and add more as needed.
Pure vanilla extract (1 teaspoon) – Enhances the cream cheese flavor without overwhelming it.
Pinch of salt – Balances sweetness and enhances all other flavors in your frosting.
Pantry Staples for Red Velvet Cookies
Quality butter – Unsalted butter lets you control salt levels. European-style butter with higher fat content creates richer cookies.
Granulated and brown sugar – Granulated sugar creates crisp edges, while brown sugar adds moisture and chewiness. Most recipes use both.
Baking essentials – Baking soda and baking powder provide lift. Salt enhances flavors. These seem minor but dramatically affect results.
Step-by-Step Cooking Instructions for Red Velvet Cookies
Following these detailed instructions ensures your red velvet cookies turn out perfect every time.
Pre-Baking Prep for Red Velvet Cookies
Preheat your oven to 350°F (175°C) – Always preheat for at least 15 minutes before baking. Placing cookies in an oven that hasn’t reached temperature affects rising and spreading.
Line baking sheets with parchment paper – This prevents sticking and promotes even browning. Silicone baking mats work equally well. Avoid greasing pans directly, which can cause excessive spreading.
Bring ingredients to room temperature – Cold eggs don’t emulsify properly with butter. Cold butter won’t cream correctly with sugar. Plan ahead for best results.
Measure all ingredients before starting – This French technique called “mise en place” prevents mistakes and helps you work efficiently. You won’t accidentally forget the vanilla or add baking powder twice.
Mixing Method for Red Velvet Cookies
Step 1: Cream butter and sugars – Beat softened butter with granulated and brown sugar for 3-4 minutes until light and fluffy. This incorporates air that helps cookies rise.
Step 2: Add eggs and vanilla – Beat in eggs one at a time, mixing well after each addition. Add vanilla extract and mix until combined.
Step 3: Incorporate food coloring and cocoa – Mix in your red food coloring until evenly distributed. Add cocoa powder and mix just until no streaks remain.
Step 4: Add buttermilk and vinegar – Pour in buttermilk and vinegar, mixing on low speed just until incorporated. This activates the leavening and creates that signature tang.
Step 5: Combine dry ingredients – In a separate bowl, whisk together flour, baking soda, baking powder, and salt. This ensures even distribution of leavening agents.
Step 6: Mix wet and dry ingredients – Add dry ingredients to wet ingredients in two or three additions, mixing on low speed just until no flour streaks remain. Overmixing creates tough cookies.
Baking Method for Red Velvet Cookies
Portion dough consistently – Use a cookie scoop for uniform size. Most recipes call for 1-2 tablespoon portions. Consistent sizing ensures even baking.
Space cookies properly – Leave 2 inches between cookies on your baking sheet. Red velvet cookies spread during baking and need room.
Bake at 350°F for 10-12 minutes – Cookies are done when edges are set but centers still look slightly underdone. They continue cooking on the hot pan after removal.
Rotate pans halfway through – If baking multiple sheets, rotate them top to bottom and front to back at the 6-minute mark for even browning.
Doneness Check for Red Velvet Cookies
Visual cues – Edges should be set and just beginning to brown. Centers will look soft and puffy. Don’t wait for centers to look completely done or you’ll have dry cookies.
Touch test – Gently press the edge of a cookie. It should feel firm. The center will feel soft but not liquid.
Timing matters – Remove cookies when they still look slightly underdone. They continue baking on the hot pan for 2-3 minutes after leaving the oven.
Color changes – Red velvet cookies darken slightly as they cool. What looks perfectly red in the oven may look too dark once cooled if you overbake.
Cooling Process for Red Velvet Cookies
Leave cookies on the baking sheet for 5 minutes – This allows them to set without breaking. Moving them too soon causes them to fall apart.
Transfer to cooling racks – After 5 minutes, use a thin spatula to move cookies to wire racks. This prevents soggy bottoms and allows air circulation.
Cool completely before frosting – Warm cookies will melt cream cheese frosting. Wait at least 30 minutes until cookies reach room temperature.
Don’t stack warm cookies – They’ll stick together and create a mess. Give them space on cooling racks.
Pro Tips for Perfect Red Velvet Cookies
These expert techniques elevate your red velvet cookies from good to extraordinary.
Avoiding Common Red Velvet Cookie Mistakes
Don’t overmix your dough – Once you add flour, mix just until incorporated. Overmixing develops gluten, creating tough, cake-like cookies instead of tender ones.
Measure food coloring carefully – Too little creates pink cookies instead of red. Too much can create slightly bitter flavor and stain teeth. Start with recipe amounts and adjust in future batches.
Use fresh leavening agents – Baking soda and baking powder lose potency over time. If yours are more than 6 months old, replace them for best rising.
Don’t skip the vinegar – It seems like a small amount, but vinegar reacts with baking soda to help cookies rise and creates the signature red velvet tang.
Tool Recommendations for Red Velvet Cookies
Stand mixer or hand mixer – Creaming butter and sugar by hand is exhausting and produces inferior results. A mixer is essential for proper incorporation.
Cookie scoops – These inexpensive tools create perfectly uniform cookies that bake evenly. A 1-tablespoon scoop works for most red velvet cookie recipes.
Silicone spatulas – Flexible spatulas scrape every bit of dough from your bowl and fold ingredients gently without overmixing.
Cooling racks – Wire racks allow air circulation around cookies, preventing soggy bottoms and promoting even cooling.
Offset spatula for frosting – This makes spreading cream cheese frosting smooth and professional-looking.
Storage & Reheating Red Velvet Cookies
Room temperature storage – Unfrosted red velvet cookies stay fresh in an airtight container for up to 5 days. Place parchment paper between layers to prevent sticking.
Refrigerator storage for frosted cookies – Cream cheese frosting requires refrigeration. Store frosted red velvet cookies in airtight containers for up to 1 week. Let them sit at room temperature for 15 minutes before serving for best flavor.
Freezing cookie dough – Scoop dough into balls, freeze on a baking sheet until solid, then transfer to freezer bags. Frozen dough keeps for 3 months. Bake directly from frozen, adding 2-3 minutes to baking time.
Freezing baked cookies – Unfrosted cookies freeze beautifully for up to 3 months. Wrap well to prevent freezer burn. Thaw at room temperature and frost fresh before serving.
Looking for more inspiration and creative baking ideas? Follow me on Pinterest at www.pinterest.com where I share gorgeous photos, seasonal variations, and behind-the-scenes tips that will take your holiday baking to the next level!
Flavor Variations for Red Velvet Cookies
Once you master the basic red velvet cookie recipe, these creative variations keep things exciting.
Chocolate Lovers’ Red Velvet Cookies
Double chocolate version – Add 1 cup of dark chocolate chips or chunks to your basic dough. The bittersweet chocolate complements the subtle cocoa flavor beautifully.
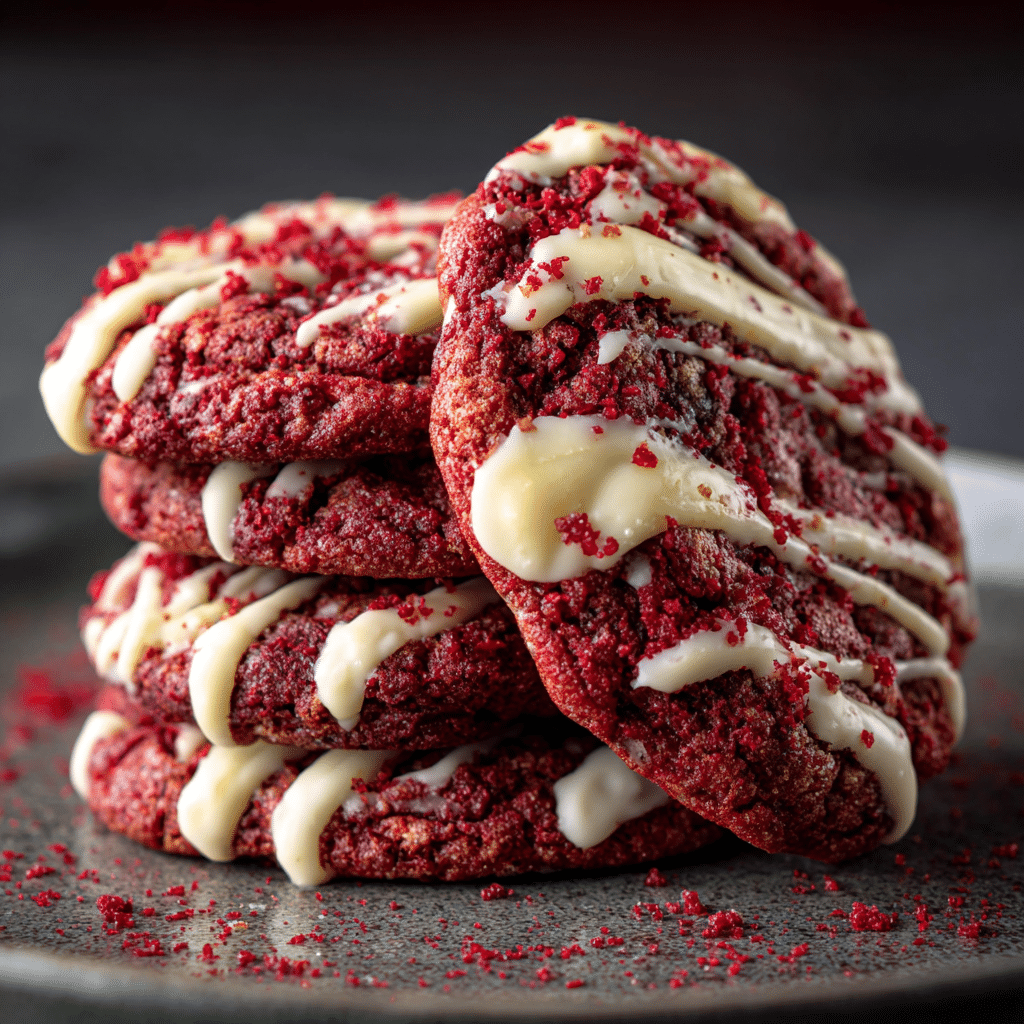
White chocolate drizzle – After frosting, melt white chocolate and drizzle it over cooled cookies for an elegant finish that adds sweet contrast.
Chocolate cream cheese frosting – Add 1/4 cup cocoa powder to your standard cream cheese frosting recipe for chocolate lovers who want even more cocoa flavor.
Festive Holiday Red Velvet Cookies
Peppermint twist – Add 1/2 teaspoon peppermint extract to your dough and top frosted cookies with crushed candy canes. Perfect for Christmas celebrations.
Gingerbread spiced – Add 1 teaspoon ground ginger, 1/2 teaspoon cinnamon, and 1/4 teaspoon nutmeg to your dough for a holiday spice profile.
Eggnog flavor – Replace buttermilk with eggnog and add 1/4 teaspoon nutmeg for a festive winter variation.
Creative Red Velvet Cookie Combinations
Oreo-stuffed – Place an Oreo cookie between two red velvet cookie dough portions and bake together for an impressive treat.
Cheesecake filling – Pipe cream cheese frosting between two cookies to create red velvet sandwich cookies that mimic the classic cake.
Salted caramel topping – Drizzle salted caramel sauce over cream cheese frosting for a sweet-salty combination that’s absolutely addictive.
| Variation | Key Ingredients | Flavor Profile | Best For |
|---|---|---|---|
| Classic Red Velvet | Cocoa, buttermilk, vanilla | Traditional tangy chocolate | Purists and first-timers |
| Double Chocolate | Dark chocolate chips, extra cocoa | Rich, intensely chocolate | Chocolate enthusiasts |
| Peppermint | Peppermint extract, crushed candy canes | Cool, minty, festive | Holiday parties |
| Cheesecake Sandwich | Double cream cheese frosting | Rich, decadent, creamy | Special occasions |
| Salted Caramel | Caramel sauce, sea salt | Sweet with savory contrast | Adventurous bakers |
| White Chocolate | White chocolate chips, vanilla | Sweeter, less tangy | Kids and sweet lovers |
Serving Suggestions for Red Velvet Cookies
Presentation and pairing elevate these cookies from everyday treats to memorable dessert experiences.
Create a dessert board – Arrange red velvet cookies alongside fresh berries, chocolate truffles, and nuts for a stunning holiday spread. The vibrant red color makes these cookies a natural focal point.
Serve with coffee or tea – The tang of red velvet cookies pairs beautifully with bold coffee or Earl Grey tea. The slight bitterness balances the sweetness.
Ice cream sandwiches – Use two unfrosted red velvet cookies with vanilla or cream cheese ice cream between them. Roll edges in sprinkles or mini chocolate chips for extra flair.
Milk pairing – Classic whole milk remains the perfect beverage partner for red velvet cookies. The creaminess complements the tang while cleansing your palate between bites.
Gift presentation – Stack red velvet cookies in clear cellophane bags tied with ribbon, or arrange in decorative tins lined with parchment paper. They make thoughtful homemade gifts during the holidays.
Check out more delightful dessert ideas at dishfoody.com where you’ll find complementary recipes perfect for rounding out your holiday cookie platter.
Themed cookie platters – Combine red velvet cookies with sugar cookies, gingerbread, and chocolate crinkles for a varied holiday cookie selection that appeals to all tastes.
Brunch addition – Red velvet cookies aren’t just for dessert. Set them out during holiday brunches alongside dishfoody.com for a sweet-savory balance.
FAQs About Red Velvet Cookies
Can I make red velvet cookies without food coloring?
Yes, absolutely. Your cookies will be brown rather than red, but they’ll still taste like red velvet cookies with that signature tangy flavor and subtle cocoa taste. The red color is primarily for visual appeal and tradition, not flavor. Some bakers use beet powder for natural coloring, which creates a more muted burgundy shade.
Why did my red velvet cookies turn out flat?
Several factors cause flat cookies. First, using melted butter instead of softened butter eliminates the air pockets that help cookies rise. Second, old or expired baking soda won’t provide proper lift. Third, dough that’s too warm spreads excessively try chilling your dough for 30 minutes before baking. Finally, overmixing develops gluten, which can affect texture and spreading.
How do I make my red velvet cookies more red?
Use gel food coloring instead of liquid for more vibrant color with less product. You can also increase the amount slightly, but be cautious too much creates artificial taste. Make sure you’re using enough cocoa powder as specified, since cocoa darkens the dough and requires more coloring to achieve bright red. Additionally, baking temperature and time affect final color—overbaking darkens cookies significantly.
Can I freeze red velvet cookies?
Yes, red velvet cookies freeze exceptionally well. For unfrosted cookies, layer them between parchment paper in airtight containers and freeze for up to 3 months. Frosted cookies can also be frozen, but freeze them uncovered on a baking sheet first until frosting hardens, then transfer to containers. This prevents frosting from smearing. You can also freeze cookie dough balls for convenient fresh-baked cookies anytime.
What’s the difference between red velvet cookies and chocolate cookies?
Red velvet cookies contain much less cocoa powder than chocolate cookies typically just 1-2 tablespoons compared to 1/2 cup or more in chocolate cookies. This creates a subtle cocoa flavor rather than intense chocolate taste. Red velvet cookies also include buttermilk and vinegar for tanginess, which chocolate cookies don’t have. The texture is typically softer and more cake-like, and they’re traditionally topped with cream cheese frosting rather than eaten plain.
How do I fix red velvet cookies that are too dry?
If your baked cookies turned out dry, you can’t fully
PrintRed Velvet Cookies: 10 Best Recipes for Perfect Holiday Treats

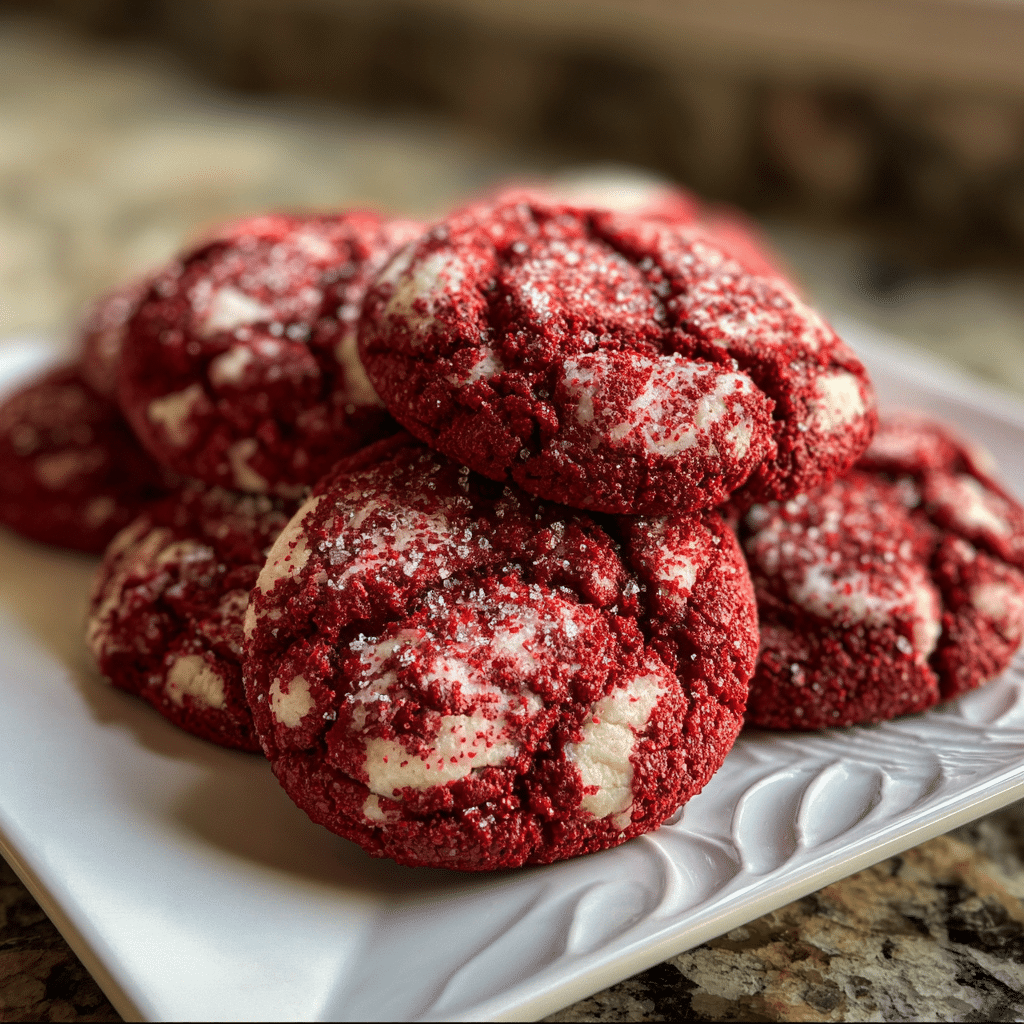
Soft and chewy red velvet cookies with a rich cocoa flavor and vibrant red color bakery-style cookies that are perfect for holidays, Valentine’s Day, or anytime a classic red velvet treat is desired.
- Prep Time: 15 mins
- Cook Time: 12 mins
- Total Time: 27 mins
- Yield: 18 cookies 1x
- Category: Dessert
- Method: Baking
- Cuisine: American
- Diet: Vegetarian
Ingredients
- 1/2 cup unsalted butter, softened
- 3/4 cup granulated sugar
- 1/4 cup brown sugar
- 1 large egg
- 1 tsp vanilla extract
- 1 tbsp red food coloring
- 1 1/4 cups all-purpose flour
- 2 tbsp cocoa powder
- 1/2 tsp baking soda
- 1/4 tsp salt
- 1 cup white chocolate chips
Instructions
- 1. Preheat oven to 350°F (175°C) and line baking sheets with parchment paper.
- 2. In a large bowl, cream butter, granulated sugar, and brown sugar until light and fluffy.
- 3. Beat in egg, vanilla extract, and red food coloring.
- 4. In a separate bowl, whisk flour, cocoa powder, baking soda, and salt.
- 5. Gradually mix dry ingredients into wet ingredients until combined.
- 6. Fold in white chocolate chips.
- 7. Scoop dough onto baking sheets, spacing evenly.
- 8. Bake for 10–12 minutes until edges are set and centers are soft.
- 9. Allow cookies to cool on baking sheet for 5 minutes before transferring to a wire rack.
Notes
- Do not overbake to keep cookies soft.
- Chill dough for thicker cookies.
- Store in an airtight container for up to 4 days.
Nutrition
- Serving Size: 1 cookie
- Calories: 190
- Sugar: 14g
- Sodium: 105mg
- Fat: 9g
- Saturated Fat: 5g
- Unsaturated Fat: 3g
- Trans Fat: 0g
- Carbohydrates: 24g
- Fiber: 1g
- Protein: 2g
- Cholesterol: 30mg
Keywords: red velvet cookies, soft red velvet cookies, valentines cookies